Docker Configuration Example
The information in this page is updated in accordance with 00.07.11.2 firmware version.
Introduction
Docker has revolutionized the way developers build, deploy, and manage applications by enabling them to create lightweight, portable containers. In this configuration example, we’ll explore the fundamentals of setting up Docker on our RUTC series router. A router plays a critical role in directing traffic between containers and networks, ensuring seamless communication and optimized performance. Whether you’re a beginner or an experienced developer, this guide will provide practical insights into using Docker with our RUTC series router to streamline your workflows and enhance scalability.
Configuration overview and prerequisites
Before we begin, let's look at the configuration we are attempting to achieve and the prerequisites that make it possible.
Prerequisites:
- One RUTC series router, which can handle Docker;
- An end device (PC, Laptop) for configuration;
- USB if we would like to increase the storage of RUTC series router;
If you're having trouble finding this page or some of the parameters described here on your device's WebUI, you should turn on "Advanced WebUI" mode. You can do that by clicking the "Advanced" button, located at the top of the WebUI.

Router configuration
Setting up the router for docker
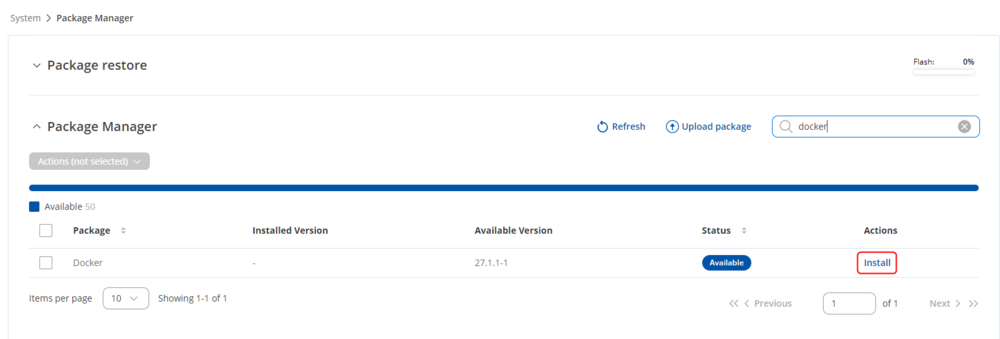
Firstly, we will need to download the Docker package from the Package Manager. Login to the WebUI of your router, navigate to System → Package Manager:
- Locate the Docker package by writing the name of the package in Search bar;
- Click on the Install button, to install the package;
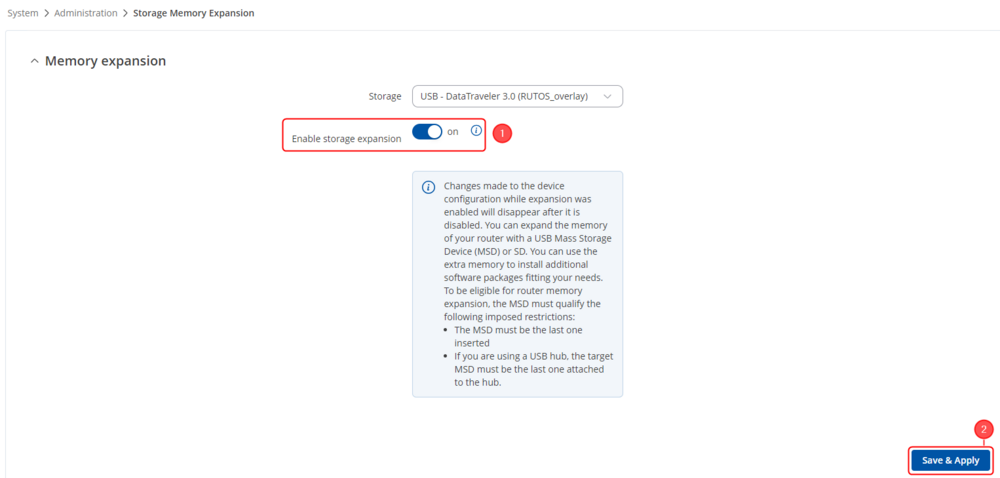
After that, if you would need to expand the storage of the router with a USB stick, you can do so by navigating to System → Administration → Storage Memory Expansion:
- Enable storage expansion by clicking on the sliding button;
- Click on Save & Apply button, where you will be prompted to another window;
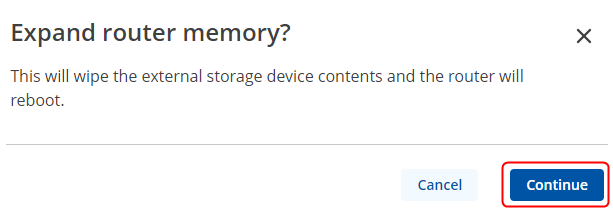
There you will be asked if you are sure that you want to expand router memory. Keep in mind that any content left on the USB mount will be removed and will be formatted to be compatible with the router:
- Click on the Continue button if the USB mount is clear without any important files for you.
Enabling Docker on the router
Further configuration will be done on the CLI of the router, if you are not sure how to connect to the router via CLI, you can refer to this guide: Connecting to the command line of the router. After connecting to the CLI of the router, we will need to enable docker service and start it. For that you can execute these commands:
uci set dockerd.globals.enabled=1
uci commit dockerd
/etc/init.d/dockerd start
/etc/init.d/dockerd status
The status should retrieve running as shown in the picture below;

After that you are ready to set up your docker containers by your needs and building images. In this example furthermore we will showcase on how to build a simple HTTP site docker image that would be reachable via our RUTC series router.
Building Docker Image on the router
Building Apache server image on the router
We will need to create a directory in which we will store the image and create the Dockerfile to install Apache image:
mkdir /etc/example
cd /etc/example
vi Dockerfile

In this case Dockerfile looks like this:
FROM httpd:2.4
COPY ./public-html/ /usr/local/apache2/htdocs/

After that we will need to create another directory where we will store our website files:
- mkdir public-html
- Then we will need to upload our site files, we can do so using WinSCP Uploading files to RutOS router;
- Then we will check if the files are uploaded by executing ls public-html command;

Once our files are uploaded, we can build our Apache image. We can do so by executing this command, keep in mind it could take a while to build the image, as it has to download files and set up the image:
docker build -t my-apache2 .

After building the image, we will need to start the docker container to launch our image:
docker run -d --name my-running-app -p 9999:80 my-apache2

This will start our Docker container with the built image and we will be able to access our website via port 9999 in this case and will be redirected to the port 80.
To access your website, you will need to write your Routers LAN IP address and the port, via which it will be accessible, in our case it will be 9999, so it will be 192.168.1.1:9999

Making the website reachable via internet
If you would want to make the website reachable via the internet, we will need a public IP address for the router and then you would need to open up the port. On routers WebUI navigate to Network → Firewall → Port Forwards and add new instance:
- Name of your Port Forward;
- Port Number via which it will be possible to reach the Website;
- IP address of the router in this case;
- Port Number where we can reach the website;
- Click on the Add button, where you will be prompted to instance configuration window;

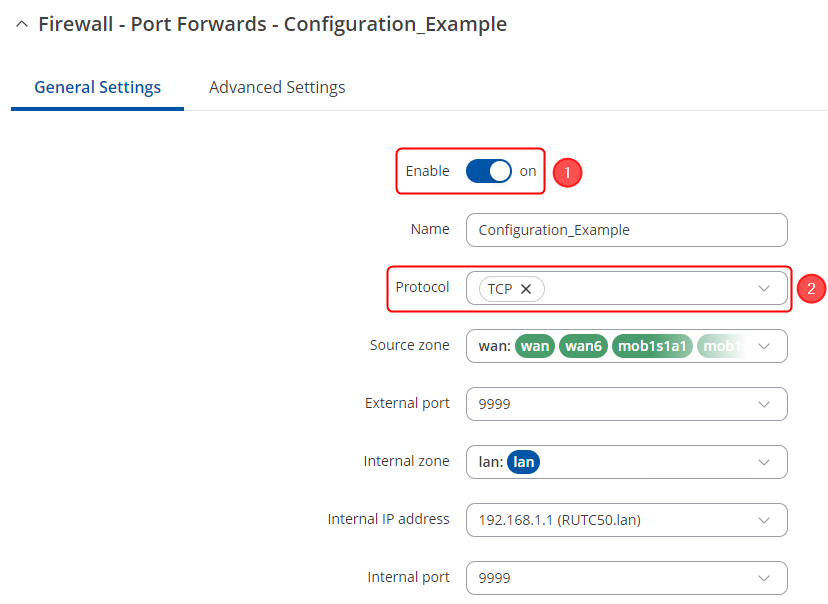
In the configuration window, do the following changes:
- Enable the port forward;
- Choose TCP protocol;
After these changes, we can reach our website via the public IP address of our device:

Testing the configuration
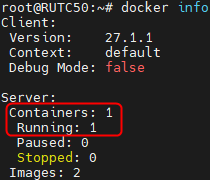
After launching the docker image, you can always check if it is launched by executing docker info command in CLI and check if the container is running:
See also
Private and Public IP Addresses
