VLAN: Tag-Based RUTOS
Note: click here for the old style WebUI user manual page.
Summary
A virtual LAN (VLAN) is any broadcast domain that is partitioned and isolated in a computer network at the data link layer (OSI layer 2). LAN is the abbreviation for local area network and in this context virtual refers to a physical object recreated and altered by additional logic. VLANs work by applying tags to network packets and handling these tags in networking systems - creating the appearance and functionality of network traffic that is physically on a single network but acts as if it is split between separate networks. In this way, VLANs can keep network applications separate despite being connected to the same physical network, and without requiring multiple sets of cabling and networking devices to be deployed.
VLANs allow network administrators to group hosts together even if the hosts are not on the same network switch. This can greatly simplify network design and deployment, because VLAN membership can be configured through software. Without VLANs, grouping hosts according to their resource needs necessitates the labor of relocating nodes or rewiring data links. It also has benefits in allowing networks and devices that must be kept separate to share the same physical cabling without interacting, for reasons of simplicity, security, traffic management, or economy. For example, a VLAN could be used to separate traffic within a business due to users, and due to network administrators, or between types of traffic, so that users or low priority traffic cannot directly affect the rest of the network's functioning. Many Internet hosting services use VLANs to separate their customers' private zones from each other, allowing each customer's servers to be grouped together in a single network segment while being located anywhere in their datacenter. Some precautions are needed to prevent traffic "escaping" from a given VLAN, an exploit known as VLAN hopping.
This chapter is an overview of the VLAN function of RUT devices.
Configuration in Router's web interface
Creating new LAN's
Go to Network → Interfaces Add two new LAN interfaces by typing "New LAN Names" and clicking "Add"
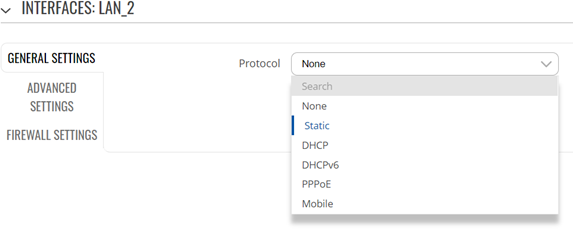
The configuration window will appear, in the "Protocol" drop-down box select Static.
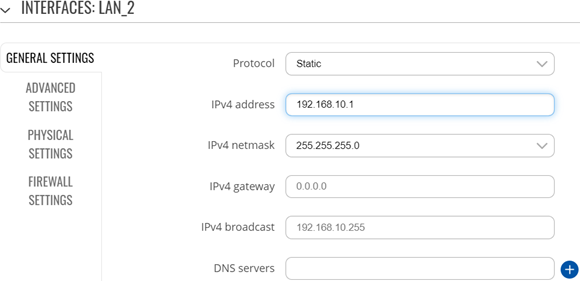
Add the new IP address for the LAN interface
Note: The LANS must be on a different subnet from each other. For example: LAN 192.168.1.1, LAN_2, 192.168.10.1, LAN_3 192.168.15.1
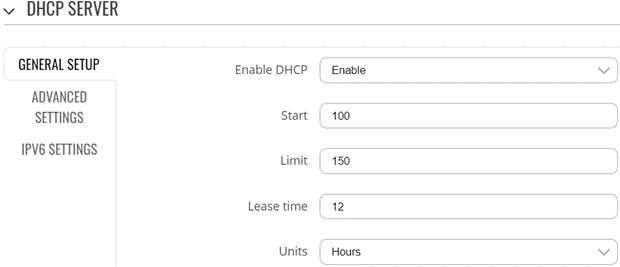
Click on Setup DHCP Server
The parameters will be set to default parameters for the DHCP server for the LAN. You can change these to suit your requirements. Click Save & Apply.
Creating new VLANS
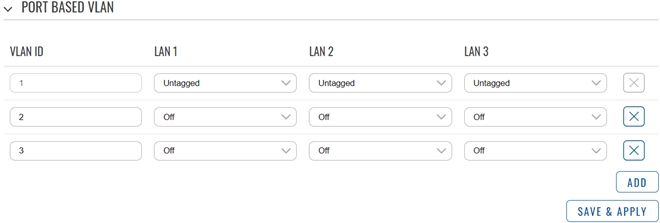
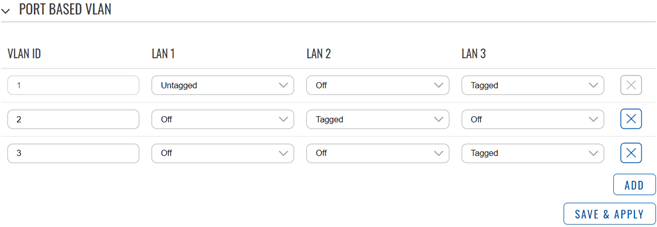
Go to Network → VLAN → Port-Based VLANs and click "Add" to create two new VLANs.
Go to VLAN 1 and turn off “Untagged” for LAN 2 and LAN 3.
Under VLAN 2 and choose the drop-down box under LAN 2 and select “Tagged”. Then do the same for VLAN 3 under LAN 3 drop-down box choose “Tagged”. Click Save & Apply
Note: You can Tag more than one VLAN for the Same Port with “Tagged”, meaning multiple Tagged VLANs can be used on the same Port. In this example I have turned on “Tagged” for VLAN 1 and VLAN 3 on LAN 3 for testing later.
Assigning LAN networks
Go to Network → Interfaces
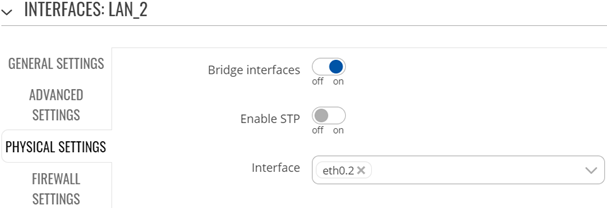
Click “edit” on the new LAN interfaces.
In the configuration window, choose the "Physical Settings" tab and add the Ethernet port you choose to assign to the LAN. In this case I assigned VLAN 2 to LAN_2 on Ethernet port 2. Click Save & Apply
The new LAN interface should now show active.
Testing VLAN Configuration
Navigate to System → CLI
Sign into the CLI and run route-n command and should see something like the following
To further test if the changes were successful, download the Realtek Ethernet Diagnostic Utility.
Realtek Ethernet Diagnostic Tool
Change your wired connection from your PC to Ethernet Port 3 on the Router.
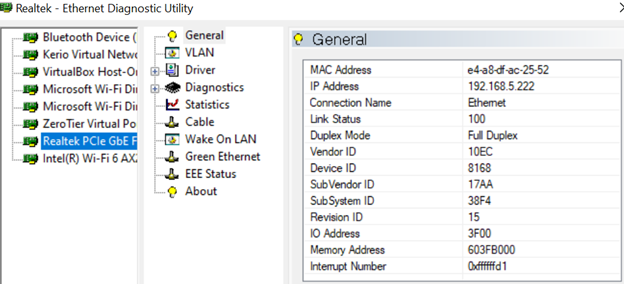
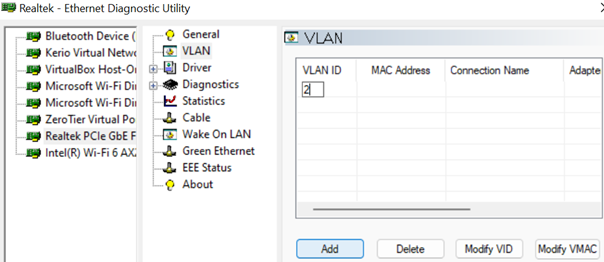
Open the Realtek Ethernet Diagnostic Utility application on your pc. Click on "Realtek PCIe Gbe Family Controller"
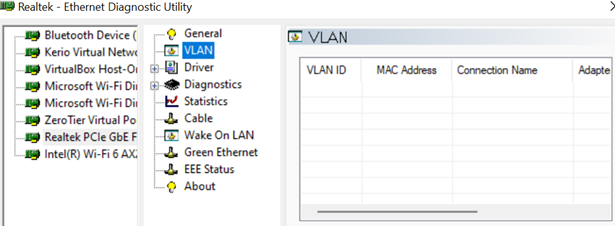
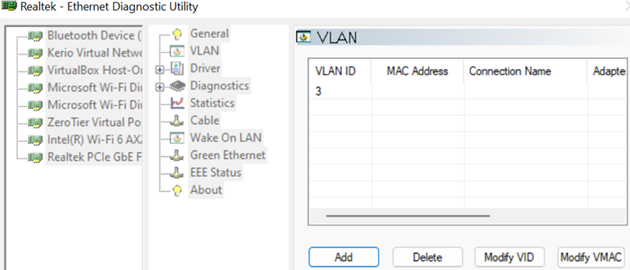
Select "VLAN"
Type "VLAN ID 2" to the box on the right and click "Add" at the bottom. If done correctly this will cause you to lose network service since VLAN 2 is not added to LAN Port 3
Delete VLAN ID 2 from the Utility and add VLAN ID 3. Your network should be back online after a few moments.
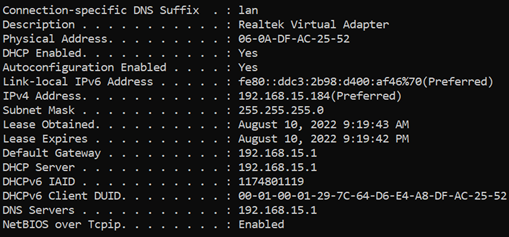
Open Command Prompt on your pc and enter the command “ipconfig /all”. You will see that you now have an IP address from the LAN_3 network.
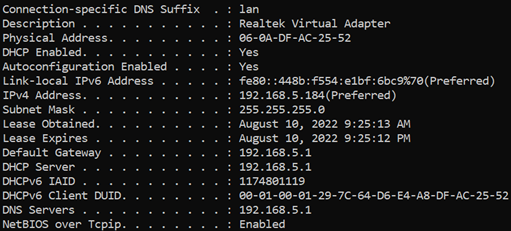
Delete VLAN ID 3 and add VLAN ID 1 and enter the “ipconfig /all" command in Command Prompt again and you should receive an IP address from the LAN network.

