LAN as WAN RutOS
The information in this page is updated in accordance with 00.07.13 firmware version.
Introduction
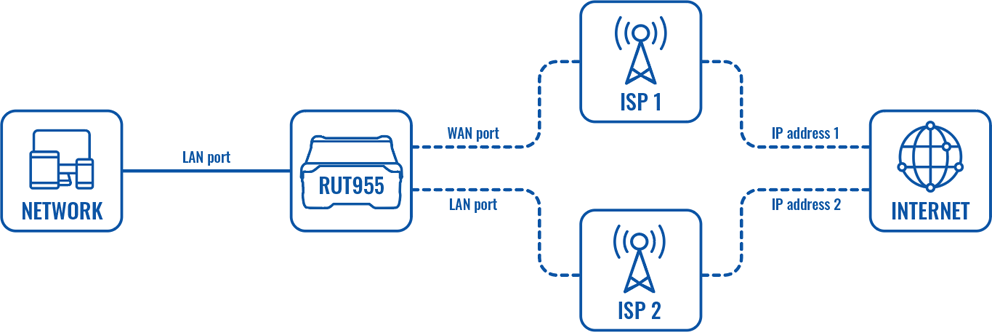
This article contains instructions on how to set up LAN port as WAN on RUTxxx if you have a need for multiple wired WAN connections.
Configuration overview and prerequisites
Before we begin, let's overview the configuration that we are attempting to achieve and the prerequisites that make it possible.
Prerequisites:
- One RUTxxx series router.
- At least two wired Internet connections.
- An end device for test the configuration.
Configuration scheme:
Setting up second WAN interface
To change LAN port purpose to WAN you will have to perform changes in 3 different locations of RUTxxx WebUI
Creating additional VLAN
Go to Network > VLAN section in device WebUI and perform following actions:
- Create new VLAN ID by clicking ADD button.
- On VLAN ID: 1 (LAN interface), select Off from drop-down list, on port that you want to use as secondary WAN.
- On newly created VLAN ID (3 in this example), from drop-down list, select Untagged, on same port.
- After performing these actions press Save & Apply in VLAN settings.

Add new WAN interface
Go to Network > WAN WebUI section.
- Click on Add button.
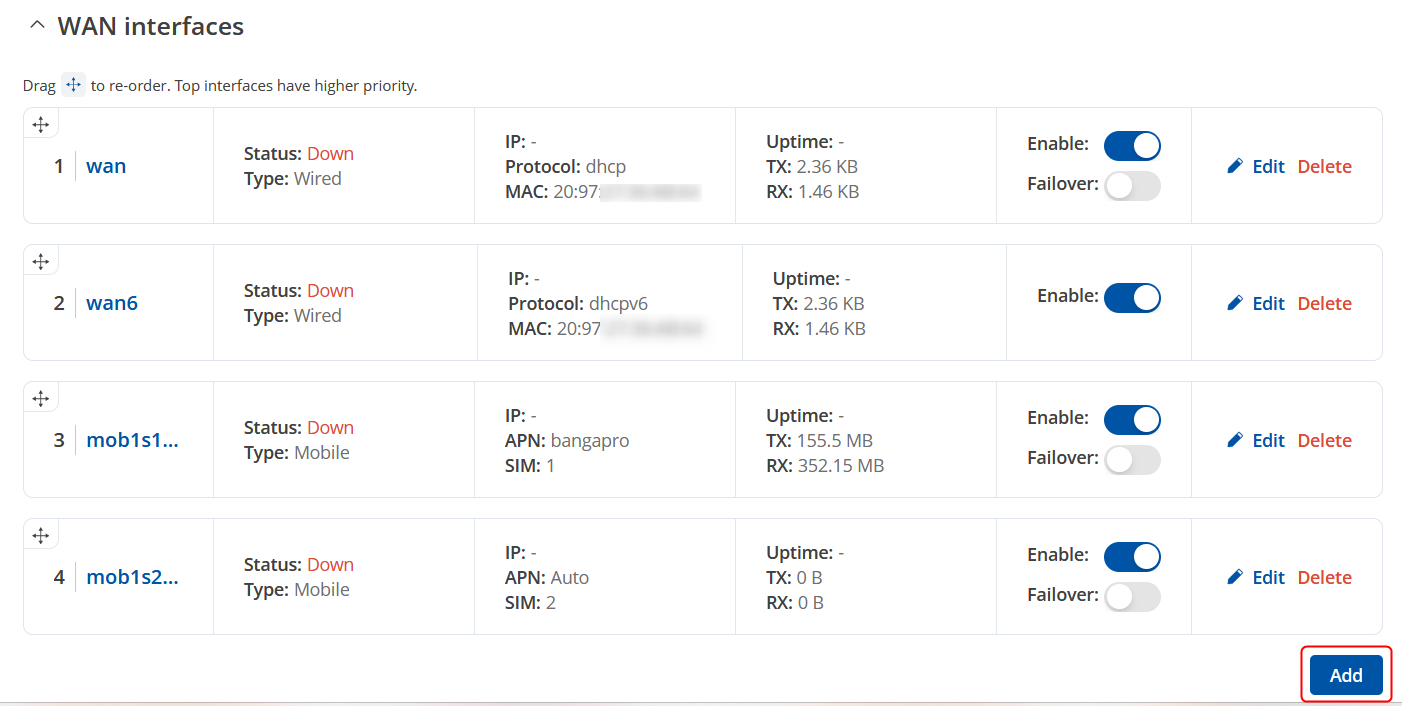
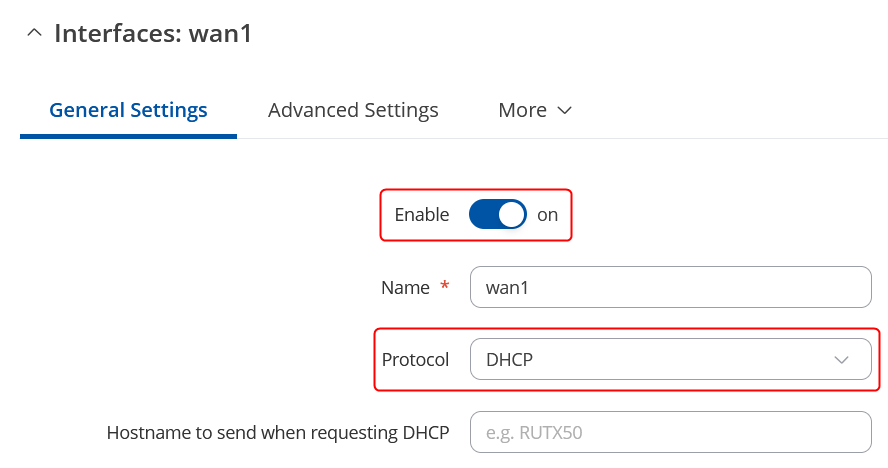
After doing that you will be redirected to new window to set up new interface, when there:
- Choose DHCP Protocol from drop-down list.
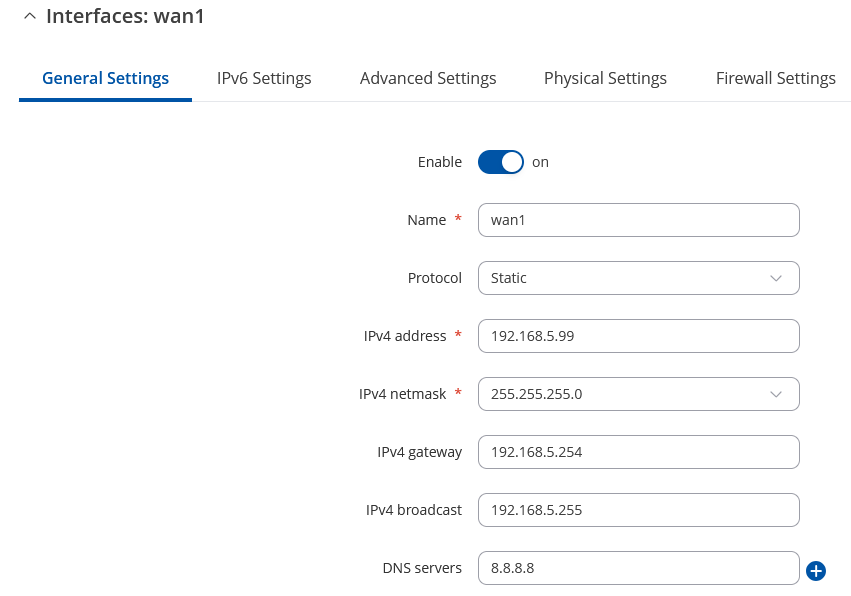
If there is need to use a static IP instead of DHCP option select Static option and specify:
- IPv4 address
- IPv4 netmask
- IPv4 gateway
- IPv4 broadcast
- DNS servers
After switching protocol More setting options will appear.
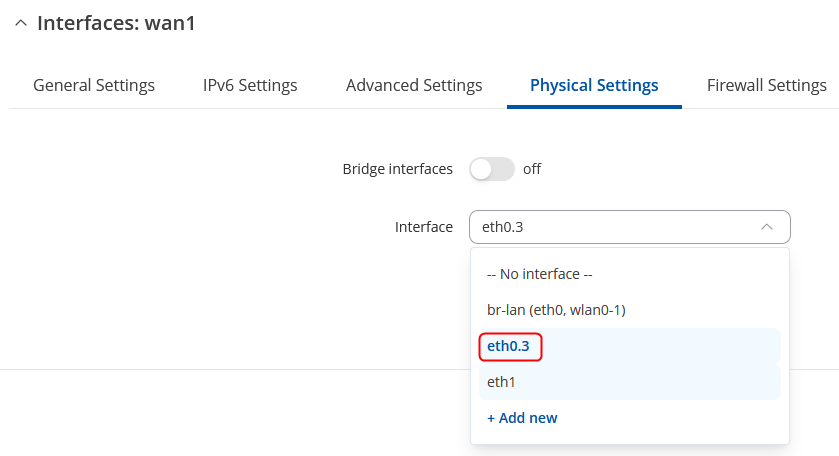
- Go to Physical Settings.
- From drop-down list choose previously created VLAN interface (in this example it is eth0.3)
- Press Apply & Save.
Check new WAN interface
Insert WAN cable in selected port, go to Network > WAN WebUI section and if you followed steps correctly yours newly created WAN interface should be running and have an IP.

Testing the configuration
Your device should now have two wired WAN connections.
- Set the Wired (WAN) interface as the main WAN connection.
- Set the new interface as WAN failover and save the changes.
- Go to [www.whatsmyip.com] and check your public IP address.
- Then unplug the main WAN cable and check again. If the interface failed over correctly, the website should show a different IP address than before.
- Plug the main WAN cable back in and wait a bit. Refresh the website; the IP should have change back to the one shown in the first place.

