802.11k/v wireless roaming configuration guide
Introduction
This guide provides an overview and configuration steps for implementing 802.11k/v functionality to enhance wireless roaming in your network.
802.11v BSS Transition Management
802.11v enables BSS Transition Management, facilitating smoother transitions for clients between access points (APs). It suggests clients leave an AP if signal quality degrades, preventing them from becoming "sticky" clients.
802.11k Radio Resource Measurement
802.11k enables Radio Resource Measurement, allowing APs to inform clients about the best AP to connect to based on factors like signal strength and client load. This feature helps distribute clients evenly across APs.
Prerequisites
- Main gateway with WAN access (Any RUTOS router. RUTXR1 is used in this example).
- Access Points (Any WiFi-capable RUTOS device. RUTX11 (Router 1) and RUT955 (Router 2) are used in this example).
- All devices on R_00.07.06 or newer firmware. Legacy firmware is not supported.
Before you start configuring the router turn on "Advanced WebUI" mode. You can do that by clicking the "Basic" button under "Mode", which is located at the top-right corner of the WebUI.

Configuration
Gateway router
- Login to the router's WebUI, navigate to the Network → LAN → Edit LAN page. Enter main gateway's IP address and save. We will leave it default (192.168.1.1) for this example.

Access Points
- Connect your AP to the gateway router using LAN to LAN connection.
- Login to the router's WebUI, navigate to the Network → LAN → Edit LAN page. Configure as follows:
- Enter IP address on the same subnet as main gateway. We will use 192.168.1.2 for Router 1 and 192.168.1.3 for Router 2 in this example.
- Disable DHCPv4 server.


Note: The configuration below applies to all APs and must match:
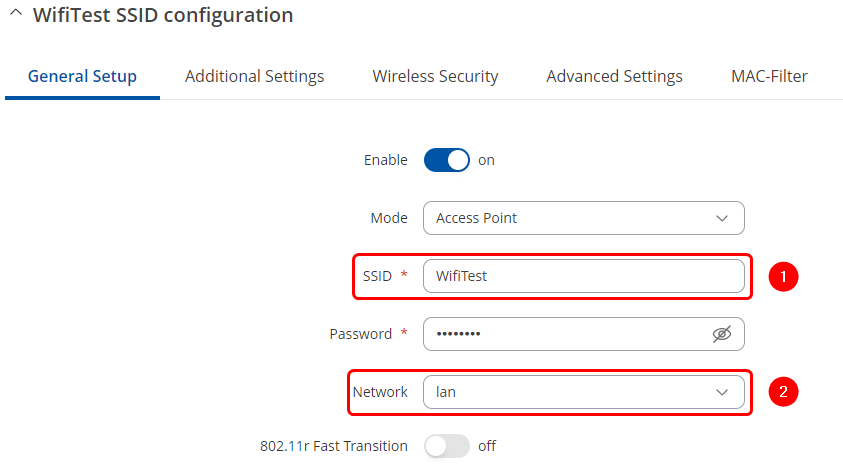
- Navigate to the Network → Wireless → SSIDs → Edit SSID page. Configure an existing AP follows or create a new one:
- Change AP SSID. We will use "WifiTest" for this example.
- Select Network - lan.

- Navigate to the Additional Settings section. Configure as follows:
- Enable 802.11v BSS Transition Management.
- Enable 802.11k Radio Resource Measurement.

Results
After configuration, the AP should be visible on WiFi devices. Testing the setup involves connecting to the WiFi network and observing seamless roaming behavior between APs. Clients should switch APs smoothly based on signal strength and load, enhancing overall wireless roaming performance.
Additionally, clients should retain internet connectivity even when switching between APs. Disabling an AP to test automatic switching can further validate the effectiveness of the configuration.
By implementing 802.11k/v features, wireless roaming performance can be improved, ensuring better connectivity and user experience within the network.
Troubleshooting
- Make sure you have no other devices with a DHCP server on the same subnet as main gateway router.
- Make sure each Access Point is configured identically.
- We cannot guarantee full wireless coverage for each individual setup, therefore if you are losing the connection, make sure that the physical locations of each AP are set up accordingly.