Connect Serial Devices as Virtual COM Ports using TRB145 and HW VSP3
Introduction
This article provides a configuration example to enable communication from a serial device connected to the TRB145 to a virtual COM port on a Windows machine using the software HW VSP3, to enable its usage by applications (such as Putty) as a native device of the computer.
Configuration Overview and Prerequisites
The RUT956 has an RS485 interface, which can be used to communicate with serial devices. Combining this, plus the [[1]] functionality of the device, can enable serial devices to be communicated through LAN or WAN as native COM ports in Windows machines.
This configuration focuses on enabling the Serial-Over-IP functionality of the RUT956 and connecting it through LAN to the HW VSP3 software, which is a freeware provided by HW Group that allows Windows machines to connect to Serial-Over-IP devices as if they were directly connected to the computer.
For example, we will enable a TRB246 in Serial Console mode to be our Serial end device.
Prerequisites
- A TRB145 device (this configuration also works with a TRB142, TRB256, RUT956, RUT906, RUT142, RUT976).
- An RS485 serial device, which in this example is a TRB246.
- A computer running Windows with the HW VSP3 Software.
- The software Putty installed in this Windows machine.
Configuration
TRB246 configuration
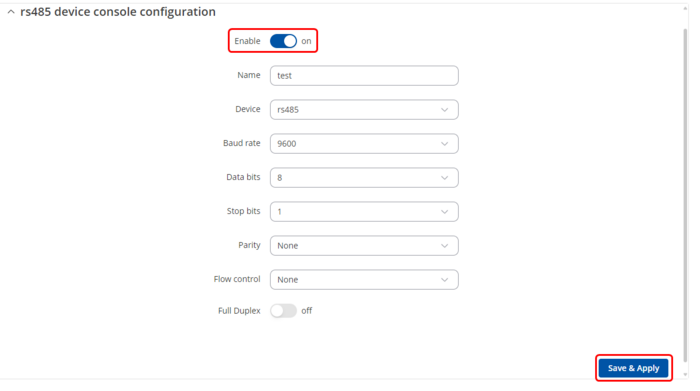
First, we will set up the RS485 functionality of the TRB246 to have it act as a Serial console.
For this, connect to the TRB246 WebUI and head over to Serial Utilities > Console. Enter the desired name for the instance and select RS485 as the device name; after that, press the ADD button. In the newly opened tab, enable the instance and press save & apply.
This will enable console access through the RS485 port of the TRB246.
TRB145 configuration
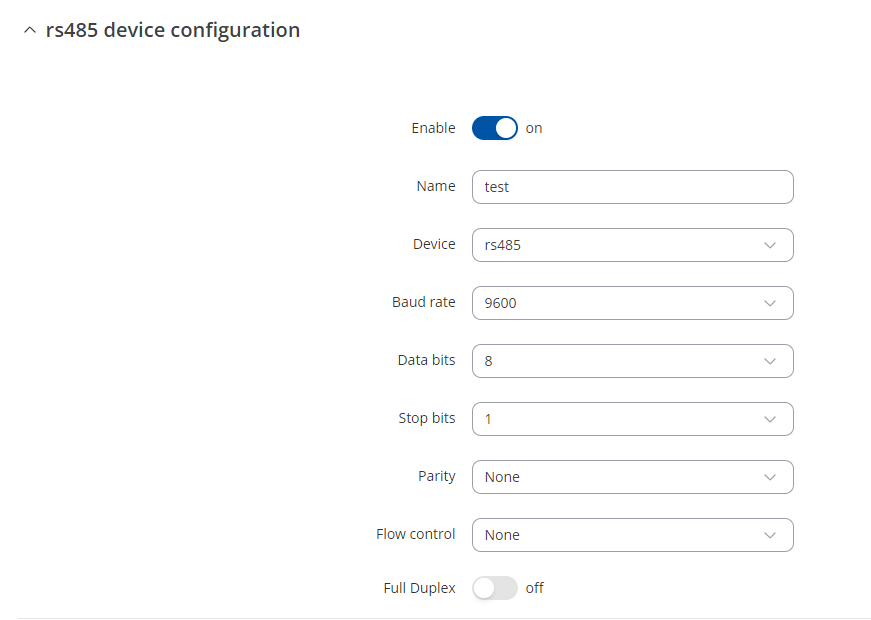
Connect to the router's WebUI and then head over to the Serial Utilities > Over IP menu. Write the desired name for the new instance and select RS485 for the device name, and press the ADD button.
In the newly opened tab, set the following configurations:
 |
|
|---|---|
|
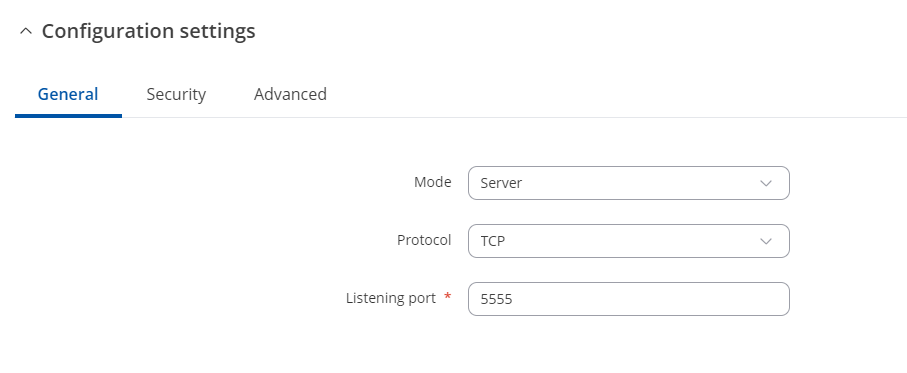
Under the configuration settings:
 |
|
|---|---|
|
Then, hit Save & Apply to save the changes.
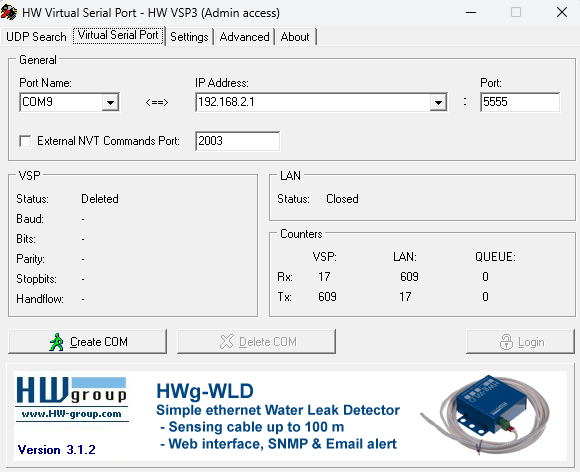
After that, we move onto the computer to use the HW VSP3 software, which can be downloaded from this link. Proceed with a normal installation, and once installed, open the software.
In order to generate a serial connection to the Serial device, once you have opened the software, head over to the Virtual Serial Port tab and set up a name for the Port Name, which in this example is COM9. Then, also select the TRB145 IP address, and the Port we set up in the TRB145.
Finally, press on the Create COM port to enable the virtual port on the device, which will interface with the Serial Over IP device.
Testing virtual port
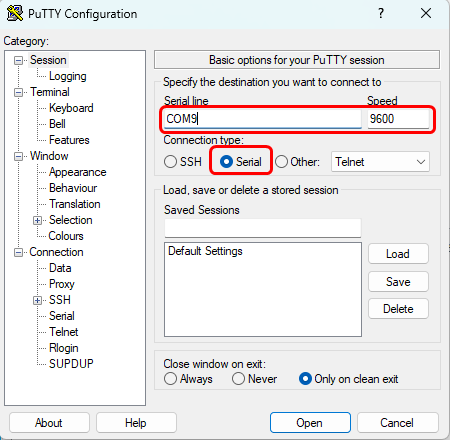
This virtual port can be tested in software like Putty. To do this, please first select the Serial option for the Connection Type, and then select the correct Port Name in the Serial Line field, which is COM9 in this case, and the correct Speed, which in this case is 9600.
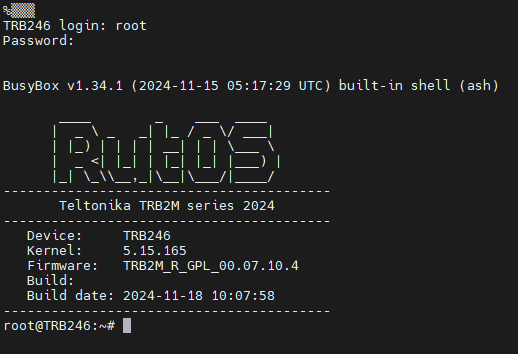
Click on the Open button to start a console on the Serial device. TRB246 is connected, it will prompt to log into the device just as if this were an SSH connection; however, all of the traffic will go through Serial-Over-IP.
This configuration can be replicated using a public IP on the SIM card of the TRB145 or using this configuration coupled with a VPN (by also enabling the appropriate firewall rules) to enable the usage of serial devices through the Internet as native COM ports. This setup can also be replicated to work with the RS232 interface by instead making the same configurations over the RS232 configuration page.

