OTD500 Ports
The information in this page is updated in accordance with firmware version OTD500_R_00.07.20.
Summary
The Ports page provides information related to the status of the device's physical ports, as well as the ability to edit port settings.
Port Settings
This section displays information about the status of the device's ports with the ability to configure port settings.
All Ports
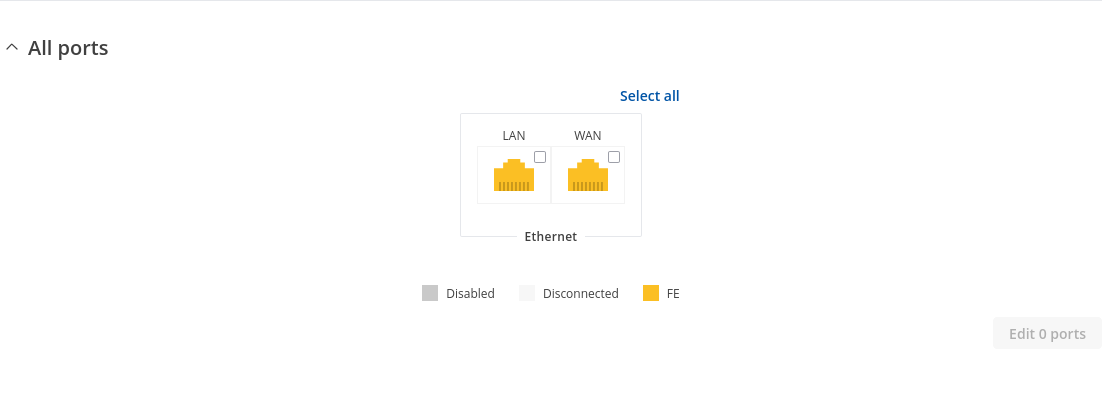
The figure below is an example of the All Ports window, color indicates port speed and status:
To change port settings select port and press `edit (number of ports) ports` button:
You will be redirected to `Port settings`. From here you can enable/disable ports or change settings.
| Field | Value | Description |
|---|---|---|
| Enable | off | on; default: on | Toggle port on or off. |
| Auto negotiation | off | on; default: on | Auto negotiation allows the device to communicate with devices on the other end of the link to determine the optimal duplex mode and speed for the port. |
| Link Speed | 10Mbps (E) | 100Mbps (FE); default: 10Mbps (E) | A measure of how fast ports are able to transmit and receive data. |
| Duplex | Full | Half; default: Full | Bidirectional communication system that allows both end nodes to send and receive communication data or signals. Full - sends and receives simultaneously. Half - sends or receives one path at a time. |
| Advertisement | 10M-Half | 10M-Full | 100M-Half | 100M-Full; default: All | Advertises preferred duplex mode and speed for negotiation with other devices. |
Port Status
This section displays port status information. There is also an option to select ports:
802.1X Server
The 802.1X authentication server is typically an EAP-compliant RADIUS server which can authenticate either users (through passwords or certificates) or the client computer.
Note: 802.1X Server is additional software on some devices that can be installed from the System → Package Manager page.
Port status
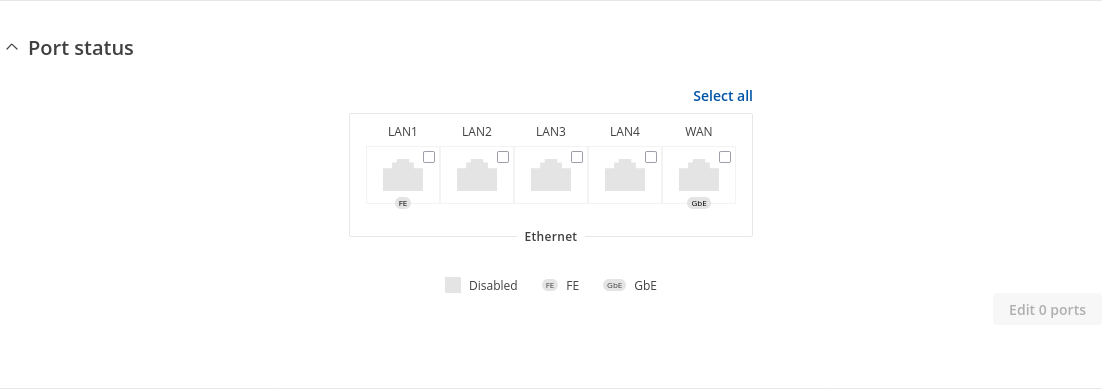
The figure below is an example of the Port status section (the number of ports depends on the device model):
To change port settings select port and press `edit (number of ports) ports` button:
You will be redirected to `802.1X settings`. From here you can change 802.1X settings.

| Field | Value | Description |
|---|---|---|
| Enable | off | on; default: off | Toggle 802.1x on or off. |
| Radius server | radius server id; default: example | Authentication type. |
| Reject VLAN | Disabled | VLAN1 | VLAN2; default: Disabled | Select reject VLAN 802.1x for server service. |
| Accept VLAN | Radius assigned | VLAN1 | VLAN2; default: VLAN1 | Select accept VLAN 802.1x for server service. |
802.1X status
This section displays port 802.1X status information. There is also an option to select ports and enable authentication:
RADIUS
The RADIUS page is used to create and manage radius servers:
| Field Name | Description |
|---|---|
| Name | Name of RADIUS server. |
| IP address | RADIUS server IP. |
| Authentication port | RADIUS server athentication port. |
| Actions | -(interactive buttons) |
Radius Configuration
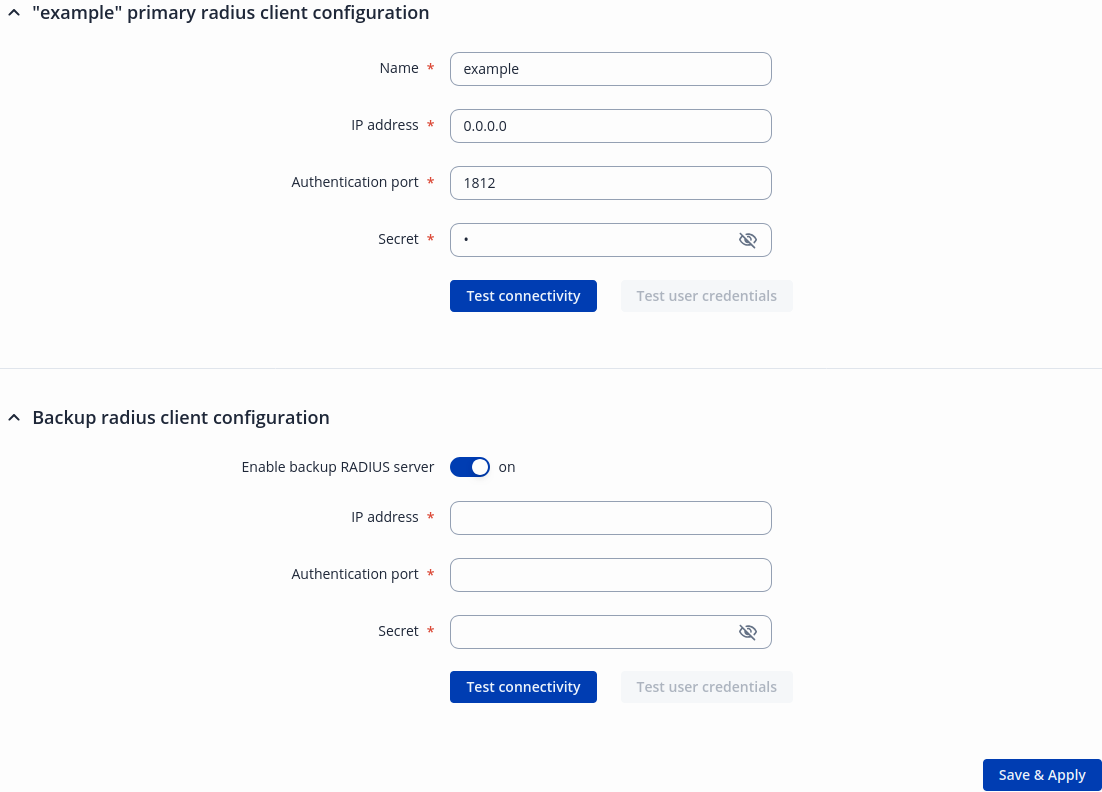
The RADIUS configuration window should look similar to this:
| Field | Value | Description |
|---|---|---|
| Name | string; default: example | Name of radius configuration. |
| IP address | ip; default: 0.0.0.0 | RADIUS server IP. |
| Authentication port | integer [1.. 65535]; default: 1812 | RADIUS server athentication port. |
| Secret | string; default: - | RADIUS server secret. |
| Test connectivity | -(interactive) button | Test connectivity to RADIUS server. |
| Test user credentials | -(interactive) button | Test credentials to RADIUS server. |
| Enable backup RADIUS server | off | on; default: off | Enable backup RADIUS server. |
| IP address | ip; default: none | Backup RADIUS server IP. |
| Authentication port | integer [1.. 65535]; default: none | Backup RADIUS server authentication port. |
| Secret | string; default: - | Backup RADIUS server secret. |
| Test connectivity | -(interactive) button | Test connectivity to backup RADIUS server. |
| Test user credentials | -(interactive) button | Test credentials to backup RADIUS server. |


