OpenVPN config file example
Summary
This configuration example will show how to use the third-party .ovpn configuration file on RutOS, upload it to the device and successfully connect to VPN.
We are going to use the VPNBOOK service for this. (No registration required)
Step 1: Download the OpenVPN Configuration File
Open your internet browser and type www.vpnbook.com in the browser's URL bar.
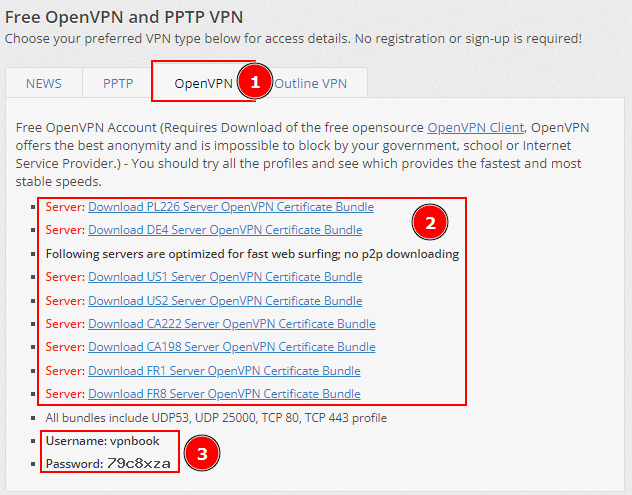
- Press OpenVPN
- Select the server and download .ovpn file package.
- Write down the username and password as it will be needed to connect using this provider.
Step 2: Certificates
You can use any of the four configuration files, in this example we'll be using TCP 443 profile.
Extract this file to your computer.
Step 3: Uploading file onto the device
Navigate to Services -> VPN -> OpenVPN and create new client instance.
- Type name
- Choose Client
- Add new client
Now on the new client configuration:
- Enable
- Enable OpenVPN config from file.
- Press browse.
- In the new window select the file you have downloaded earlier.
- Press Open
- And save
This would be enough for many OpenVPN configurations to connect successfully, however, this exact one from VPNBOOK requires additional authentication via username and password, and therefore additional configuration must be done to establish the connection.
Step 4: TLS, users and passwords
As mentioned before, some VPN configurations have user management, requiring you to provide username and password.
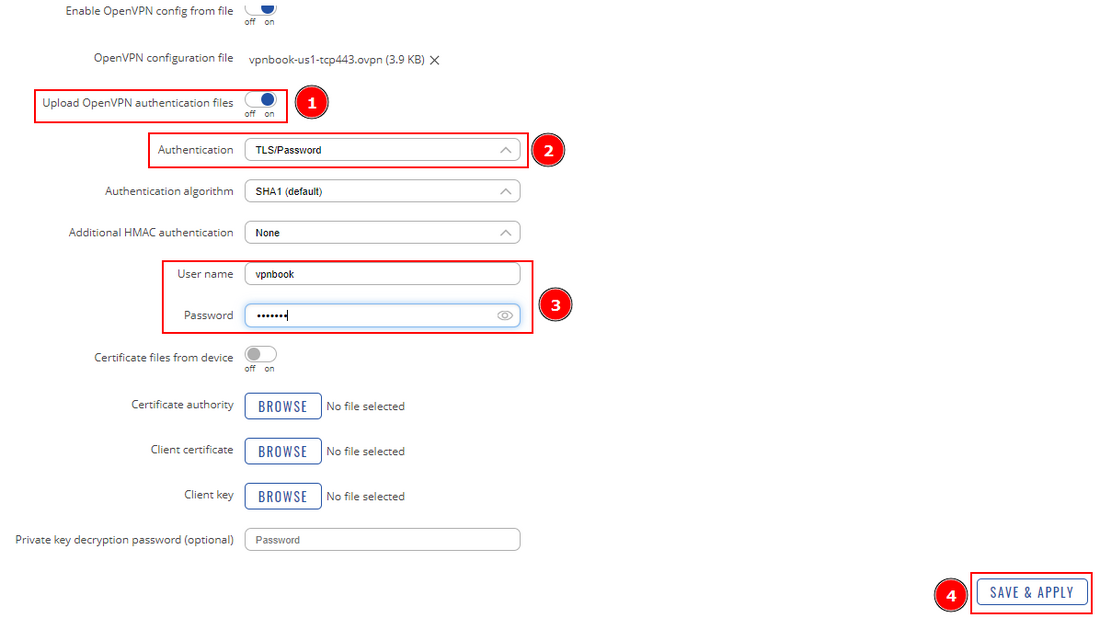
- Enable Upload OpenVPN authentication files.
- Select TLS/Password authentication.
- Type in the Username and password, that you found on the service provider, in this example - from VPNBOOK.
- No additional TLS certificates need to be uploaded as they are already on the .ovpn file.
- Save
Step 5: Testing the VPN connection
After a few moments you're newly created VPN tunnel should be established and status should change to Connected.
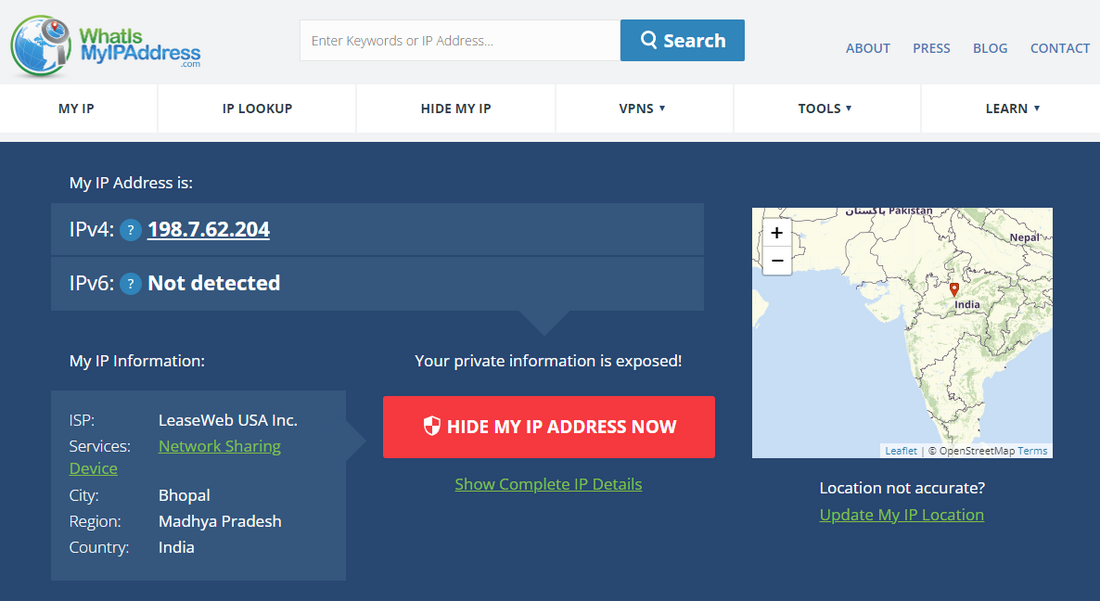
You can check your IP location on WhatIsMyIPAddress.


