RUT230 Wake on LAN PC setup (Windows)
Wake on LAN (WOL) is a feature that can "wake up" computers from sleep mode by sending a "magic packet" to the network interface adapter.
Introduction
This chapter contains a step-by-step guide on how to make a Windows PC Wake on LAN compatible so that it can be woken up by a RUT router's WOL feature.
Prerequisites
You will need:
- A router from the RUT2xx or RUT9xx series.
- A PC with a Wake on LAN compatible network card.
Instructions
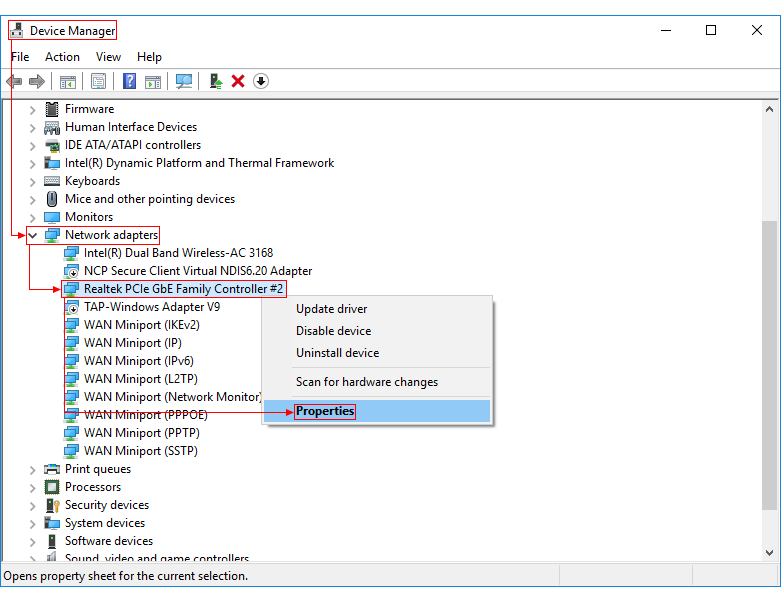
- Open the Windows Device Manger (press Windows Key + R and search for "device manager") and find your Ethernet network interface card under the Network adapters section. Right click on the adapter and select Properties:

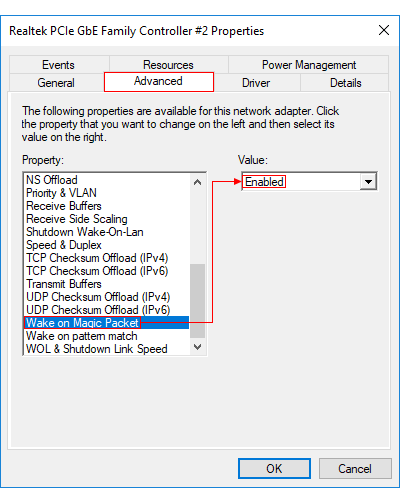
- Go to the Advanced tab, find and select the Wake on Magic Packet option and set its value to Enabled:

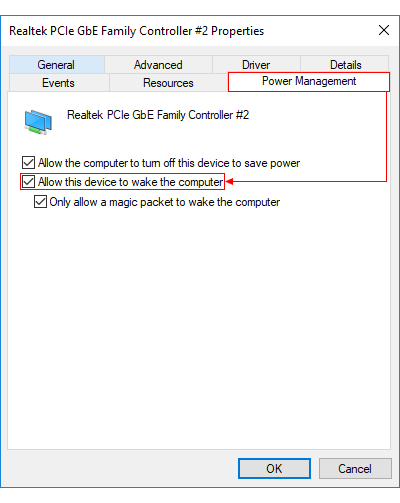
- Then enter the Power Management tab and place a check mark next to the Allow this device to wake the computer option:

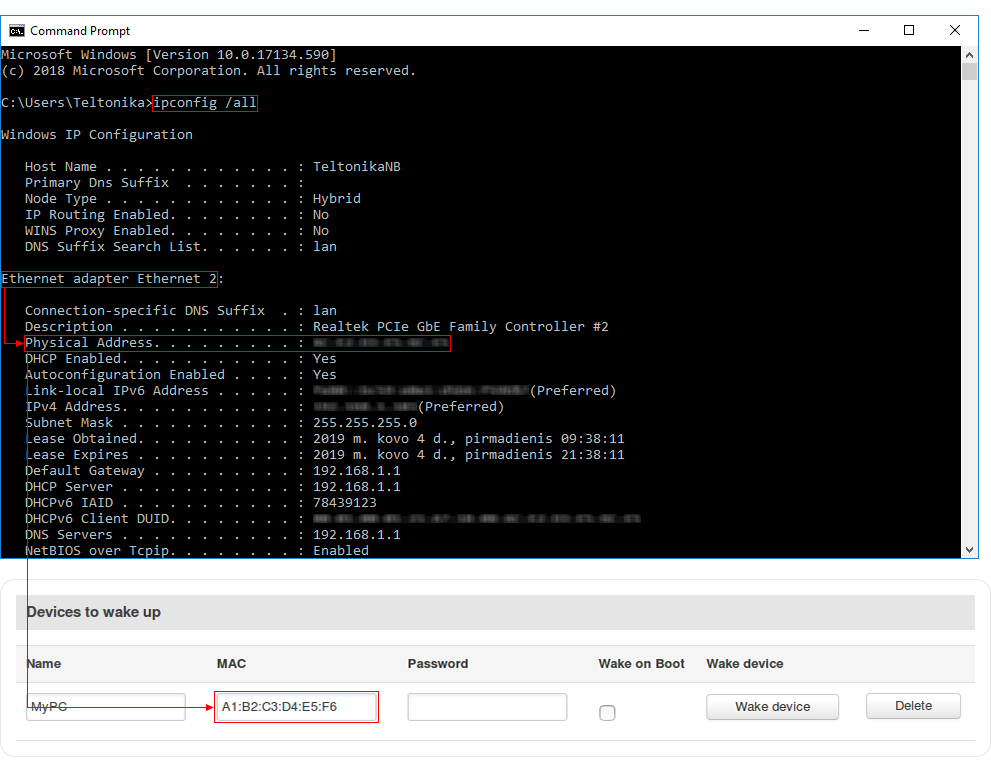
- Save the configuration. Now open the Windows Command Prompt (press Windows Key + R and search for "cmd") and enter the ipconfig /all command. This action will display all network interface related information. Find the relevant network adapter and copy its MAC (Physical) Address into the router's WOL configuration (Services → Wake on LAN):

- Save the router configuration. Put your PC to sleep and click the "Wake device" button to test if your configuration works.
Additional notes
In order for Wake on LAN to work, some PCs will require you to set up some additional power management settings in the PCs BIOS menu. Since the process of reaching the BIOS menu and change its settings is dependent on a PC's motherboard manufacturer, this part is not included in the step-by-step instructions.
If you have followed all the steps but can't wake up your PC anyway, try doing an online search on how to modify your computer's BIOS settings in order to allow Wake on LAN.
See also
- Wake on LAN manual page: Wake on LAN
