Setting UP RUTX12 LAN as WAN
The information in this page is updated in accordance with firmware version .
Introduction
This article contains instructions on how to set up RUTX12 LAN port as WAN if you have a need for multiple wired WAN connections.
Setting up second WAN interface
To change LAN port purpose to WAN you will have to perform changes in 3 different locations of RUTX12 WebUI
Creating additional VLAN
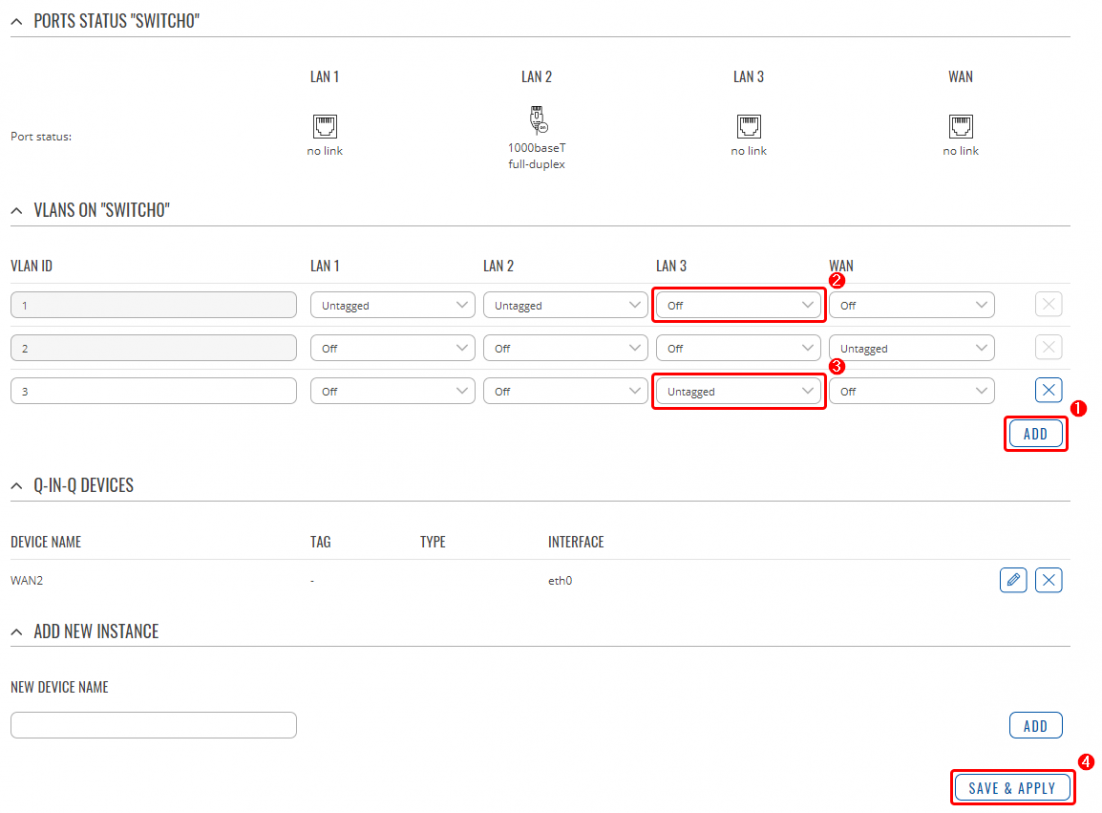
Go to Network > VLAN section in device WebUI and perform following actions:
- Create new VLAN ID by clicking ADD button.
- On VLAN ID: 1 (LAN interface), select Off from drop-down list, on port that you want to use as secondary WAN.
- On newly created VLAN ID (3 in this example), from drop-down list, select Untagged, on same port.
- After performing these actions press Save & Apply in VLAN settings.
Add new WAN interface
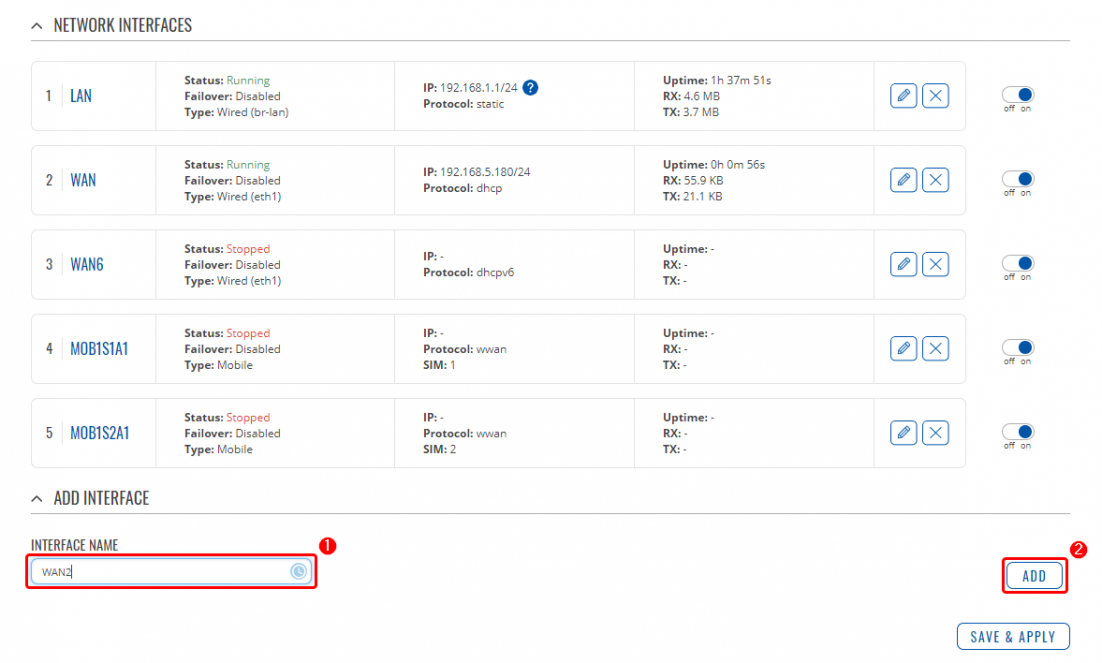
Go to Network > Interfaces WebUI section.
- Enter new Interface Name.
- Click on Add button.
After doing that you will be redirected to new window to set up new interface, when there:
- Choose DHCP Protocol from drop-down list.
- Press on Switch Protocol.
After switching protocol More setting options will appear.
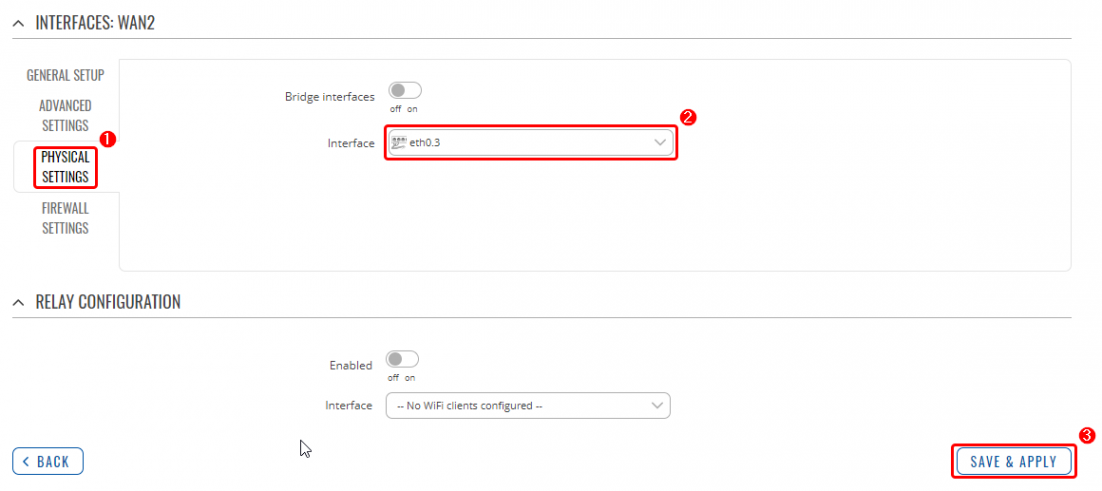
- Go to Physical Settings.
- From drop-down list choose previously created VLAN interface (in this example it is eth0.3)
- Press Apply & Save.
Set/Check Firewall
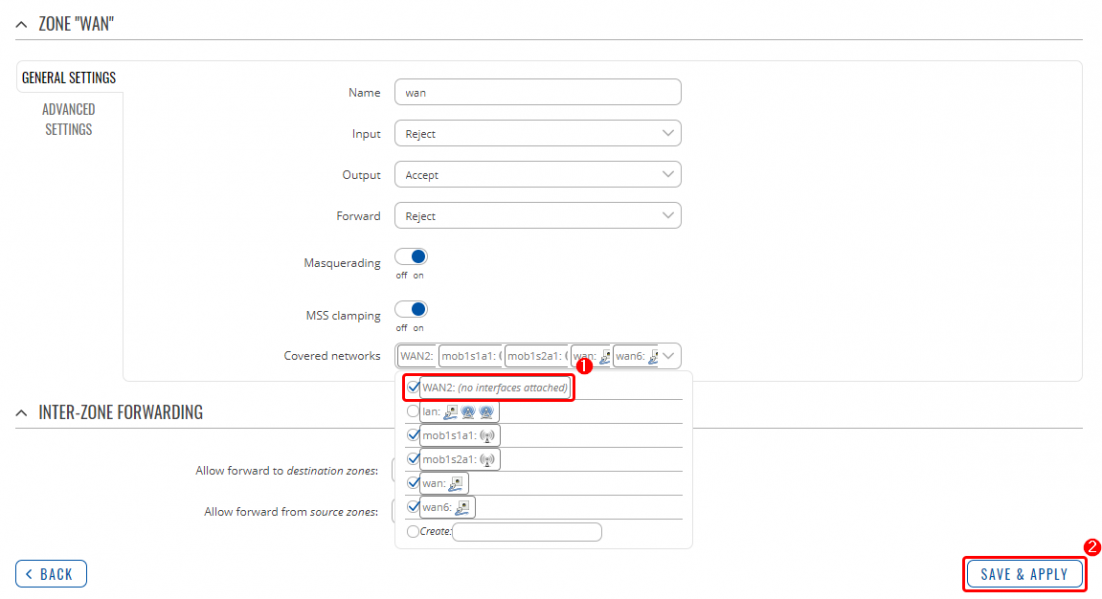
Go to Network > Firewall > General Settings WebUI section. Click on Edit button on WAN zone.
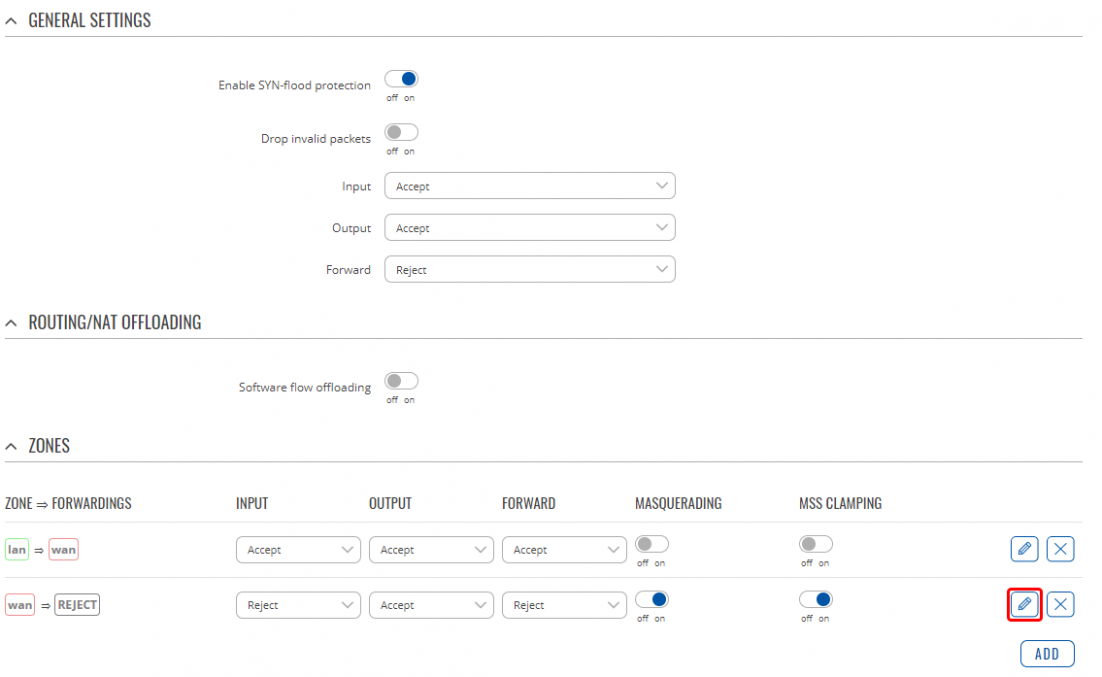
In WAN zone settings
- Make sure that yours newly created interface is selected in Covered networks list.
- Click Save & Apply.
Check new WAN interface
Insert WAN cable in selected port, go to Network > Interfaces WebUI section and if you followed steps correctly yours newly created WAN interface should be running and have an IP.


