Setting up IPTV using RUTX10 router
Introduction
Nowadays almost all people around the globe uses IPTV which is provided through their internet service provider. In a lot of cases, ISP (internet service provider) insist that you should use their router. The problem with those routers is that the usage of them is limited but you want to have more functionality then they provide. You start using other routers, but you can’t get IPTV to work. The question is how to do that? In this tutorial we want to show how it’s easy to set up IPTV using RUTX series routers.
Overview
Prerequisites
In this configuration example we will going to use a RUTX series router. It can be RUTX08, RUTX09, RUTX10 or RUTX11 router model. The most important here is the ISP. Your ISP should provide IPTV service and you should have the IPTV service enabled.
Important: If the IPTV service isn’t enabled for you, this tutorial will not help you.
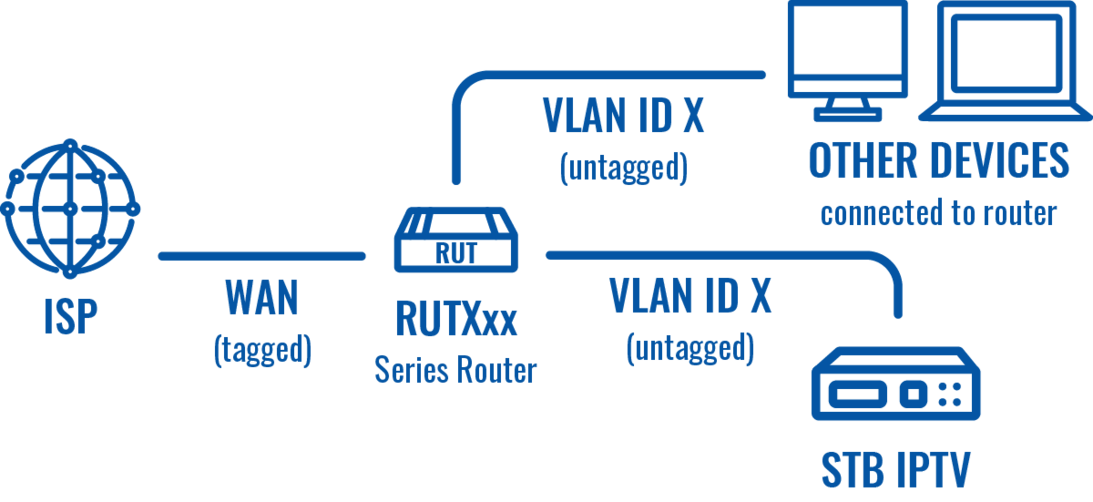
Network topology
Suggestions
Before you start we recommend to watch this quick start guide video how to set up your router for work.
Step1: Configure WAN
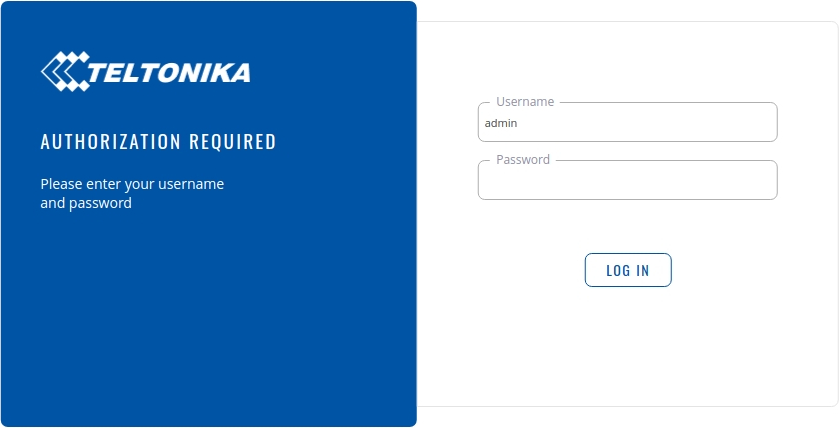
To get started, first you need to login on to your router. You can do this by typing your router’s IP address into your web browser’s url bar. By default your IP address should be 192.168.1.1. If the IP address is correct, you should see a web page like in the picture below.
In this page you have to enter your Username and Password to login on to your router.
After login in to your router, you need to set up your WAN. To find WAN configuration, you need to navigate to “Network→WAN”. You should see a web page like in the picture below.
How to set up your WAN configuration can be found here.
Step 2: Configure VLANs
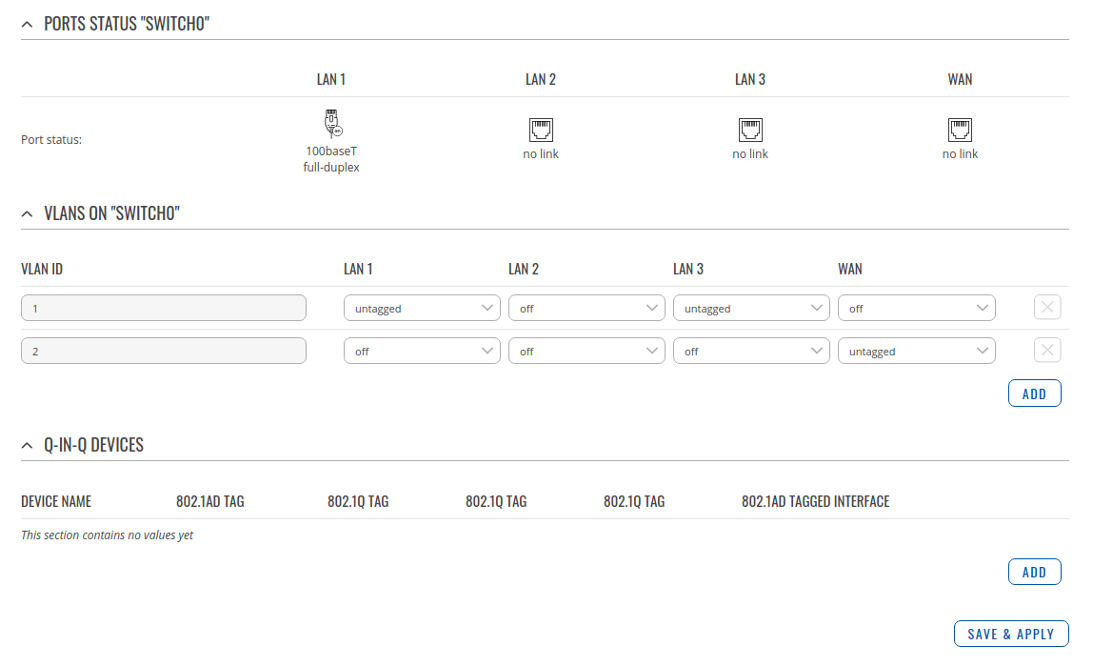
When WAN configuration is done, it’s time to configure VLAN’s. VLAN configuration can be found by navigating to “Network→VLAN”. You should see a page like in the picture below.
Now press the “ADD” button, which is located in the “VLANS ON SWITCH0” section.
A new row should appear in the “VLANS ON SWITCH0” section.
- Change the ID of VLAN to your ISP VLAN ID on which IPTV is working
- Change your desired LAN port to "untagged"
- Change WAN port to "tagged"

After changing the values press the "SAVE & APPLY" button for our configuration to take effect.
NOTICE:
Different ISP will provide IPTV service on different VLAN ID. In our case the ID number is 6.
The “untagged” port can be only one in the column.
VLAN configuration is now done. If you need a more detailed explanation about VLANs, you can find it here.
Step 3: Configure LAN
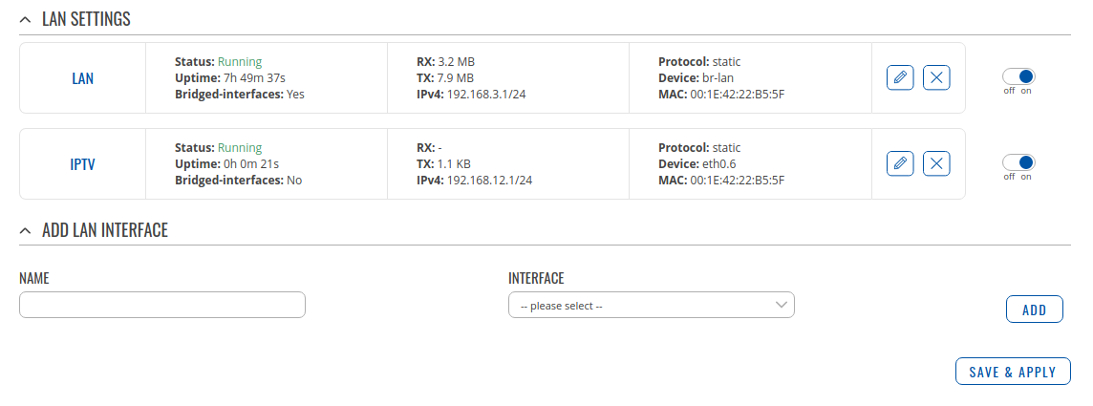
After configuring VLAN, the desired port does not have an IP address because now that port is using a new interface which has no configuration yet. You can configure the interface through LAN configuration page. The LAN configuration page can be found by navigating to “Network→LAN”.
- Write your desired name for the interface in the "NAME" field
- Select the new created interface from the interface list. It should be named like this eth0.<VLAN_ID>
- Click the "ADD" button

- Click the "SWITCH PROTOCOL" button

- Change the IP address of your interface into your desired one
- Select the necessary netmask for your subnet
- Enable DHCP server
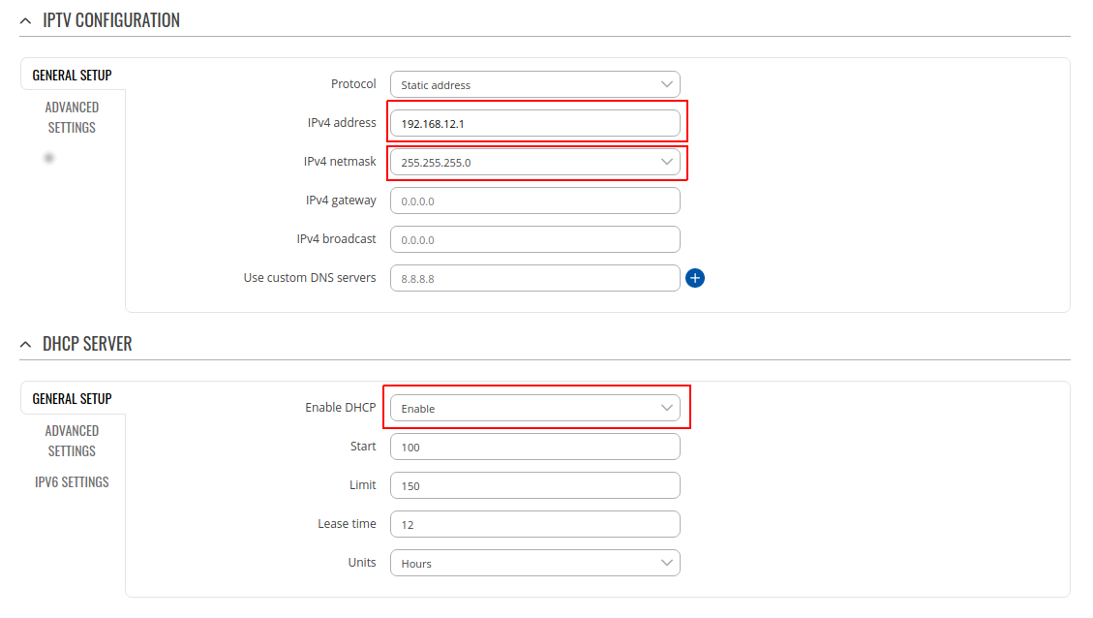
After changing the values press the "SAVE & APPLY" button for our configuration to take effect.
After saving the configuration, you should be redirected to main LAN page.
If you need a more detailed explanation about LANs, you can find it here.
Step 4: Configuration testing
When WAN, VLAN and LAN configuration is done, it’s time to connect your STB to the router. Don’t forget, you need to connect your STB to that port that was selected in the VLAN section. If you did everything as it was written, by this time you should have been started enjoying your IPTV. Good watching.
Conclusion
It is easy to change the router provided by your ISP to a router from RUTX series. You only need to know the VLAN ID, which is usually specified on ISP website.

