Template:Networking rutos manual maintenance rut2 rut9
The information in this page is updated in accordance with firmware version .
Summary
This page is an overview of the Maintenance section of {{{name}}} devices.
Auto Reboot
Summary
Various automatic device reboot scenarios can be configured in the Auto Reboot section. Automatic reboots can be used as a prophylactic or precautionary measure that ensures the device will self-correct some unexpected issues, especially related to connection downtime.
This chapter is an overview of the Auto Reboot section of {{{name}}} devices.
If you're having trouble finding this page or some of the parameters described here on your device's WebUI, you should turn on "Advanced WebUI" mode. You can do that by clicking the "Advanced" button, located at the top of the WebUI.
Ping/Wget Reboot
The Ping/Wget Reboot functions periodically send ICMP or Wget requests to a specified IP address or host and waits for a response. If no response is received, the device will attempt the same action a defined number of times at a defined frequency. If there is still no response, the device will execute the specified action (reboot, by default).
The Ping/Wget Reboot section contains one pre-configured rule by default:
To enable the default rule, use the off/on slider next to it. You can add more rules with the 'Add' button or delete them using the 'Delete' button. If you wish to customize a rule, click the button that looks like a pencil next to it.
[[File:Networking_rutos_manual_auto_reboot_ping_wget_reboot_settings_configuration_mobile_{{{mobile}}}_v2.png|border|class=tlt-border]]
| Field | Value | Description |
|---|---|---|
| Enable | off | on; default: off | Turns the rule on or off. |
| Type | Ping | Wget; default: Ping | Method used for health checking.
|
| Action if no echo is received | Device reboot | None; default: Device reboot | Action that will be executed if there is no response after the specified amount of retries. If None is selected, only a message to syslog will be logged. |
| Interval | 5 mins | 15 mins | 30 mins | 1 hour | 2 hours; default: 5 mins | The frequency at which ping/Wget requests are sent to the specified host. |
| Interval count | integer [1..9999]; default: 2 | Indicates how many additional times the device will try sending requests if the initial one fails. |
| Timeout (sec) | integer [1..9999]; default: 5 | Maximum response time. If no echo is received after the amount of time specified in this field has passed, the ping/wget request is considered to have failed. |
| Packet size | integer [0..1000]; default: 56 | ICMP packet size in bytes. |
| IP type | IPv4 | IPv6; default: IPv4 | IP address version of the host to ping. |
| Host to ping | host | ip; default: 8.8.8.8 | Hostname or IP address to which the Ping/Wget requests will be sent. |
Reboot Scheduler
The Reboot Scheduler is a function that reboots the device at a specified time interval regardless of other circumstances. It can be used as a prophylactic measure, for example, to reboot the device once at the end of every day.
You can add more rules with the 'Add' button or delete them using the 'Delete' button. If you wish to customize a rule, click the button that looks like a pencil next to it.
The figure below is an example of the Periodic Reboot configuration page and the table below provides information on the fields contained in that page:
| Field | Value | Description |
|---|---|---|
| Enable | off | on; default: off | Turns the rule on or off. |
| Action | Device reboot ; default: Device reboot | Action that will be executed at the specified time. |
| Interval type | Week days | Month days; default: Week days | Scheduler instance interval type. |
| Week days | Monday | Tuesday | Wednesday | Thursday | Friday | Saturday | Sunday; default: Monday | Week day(s) when actions will be executed. This field becomes visible when Interval type is set to Week days. |
| Month day | integer [1..31]; default: 1 | Day of the month on which the reboot will occur. This field becomes visible when Interval type is set to Month days. |
| Month | month(s) [january..december]; default: none | The month(s) on which the reboot will occur. Leave empty to apply to all months. This field becomes visible when Interval type is set to Month days. |
| Day time | time [00:00..23:59]; default: none | Exact time of day the reboot will take place |
| Force last day | off | on; default: off | Forces intervals to accept last day of month as a valid option if selected day doesn't exist in the ongoing month. This field becomes visible when Interval type is set to Month days. |
Backup
Summary
The Backup page is used to generate configuration backup files or upload existing ones to the device. This chapter is an overview of the Backup page in {{{name}}} devices.
Create default configuration
The Create default configuration section is used to create or delete a file which stores current device configuration. The default configuration can later be loaded in [[{{{name}}}_Administration|Administration]] page or via reset button.
Click the 'Create' button to generate default configuration file from your current device configuration.
Backup configuration
The Backup configuration section is used to generate and download a file which stores the current device configuration. The backup file can later be uploaded to the same device or another device of the same type (product codes must match).
This section contains MD5, SHA256 checksum fields generated from latest downloaded backup file, 'Encrypt' option and the 'Download' button to generate and download the device configuration backup file.
Important notes:
1. Password field is required if Encrypt is turned on and that's when the field appears. If Encryption is turned on, but router does not have package 7-zip installed, a pop-up window should appear that prompts the user to download the package from [[{{{name}}} Package Manager|Package Manager]]. The password that will be used to encrypt the backup file will need to be provided when extracting the formatted 7z archive to access the tar file.
2. Backup file stores PIN code configured in [[{{{name}}} Mobile]] page, but it will only be restored if device does not have PIN code already set when backup file is uploaded - PIN code from backup file will be set only if device does not have one set already.
3. If the device does not have an Internet connection when a Backup file is being loaded, it will not reinstall software packages installed from [[{{{name}}} Package Manager|Package Manager]]. You can add the package installation files to the Backup file manually, a {{{name}}} device will automatically install them when you load the Backup file even without a data connection.
To embed a Backup file with package installation files, follow these steps:
- Download the necessary software package installation files [[{{{name}}} Package Downloads|from here]]
- Download a Backup file.
- Open the Backup file and create a new folder called backup_packages in the /etc directory.
- Add the necessary package files to /etc/backup_packages
- Make sure files in /etc/backup_packages are fully extracted with the *.ipk extensions
Restore configuration
The Restore configuration section is used to upload a configuration file that was taken from this device or another device of the same type.
Turn on 'Encrypted' if backup file was previously encrypted and click the 'Browse' button to select a backup file from your computer and click the 'Upload archive' button to apply the selected configuration on to this device.
Important notes:
- Password will be used when extracting formatted 7z archive to gain access to a tar file.
- Backup files can be uploaded only if they are taken from an identical device (identical Product code (can be checked in the Status → [[{{{name}}} System|System]] page)) with identical or older firmware.
- It is important to remember that the backup file not only changes the device configuration, but also the password. If you are unsure of the backup file's password, you may want to reconsider uploading it because you may lose access to device.
Backup Security Check
After uploading a backup file your device will calculate checksums for uploaded file and display them. If this backup file was the latest downloaded in your device then you can compare these checksums with the ones in your Backup configuration section to verify backup's integrity.
If everything is in order click Proceed to restore configuration to backup.
Restore default settings
The Restore default settings section is used for restoring device's configuration.
| Field | Value | Description |
|---|---|---|
| Restore to factory defaults | -(interactive button) | Restores device to manufacturer's default settings. |
| Restore to user's defaults* | -(interactive button) | Restores device to custom configuration set by the user. |
* You will not see this button until you have created a [[{{{name}}}_Maintenance#Create_default_configuration|User's default configuration]].
Troubleshoot
Logging Settings
The Logging Settings section is used to configure how and where the device stores system log data. The system log is a file that contains information on various system related events and is useful to engineers for troubleshooting the device.
| Field | Value | Description |
|---|---|---|
| System log buffer size | integer; default: 128 | System log buffer size in kibibytes (KiB). |
| External system log server | ip; default: none | IP address of an external server that will be used to store device logs. |
| External system log server port | integer [0..65535]; default: none | TCP/UDP port number of the external log server. |
| External system log server protocol | UDP | TCP; default: UDP | Communication protocol used by the external log server. |
| Save log in | RAM memory | Flash memory; default: RAM memory | Specifies which type of memory to use for storing system logs. |
| System log file size | integer [10..500]; default: 200 | Maximum size (in kilobytes) of a log file. When threshold is reached, log rotation is performed. Can be set to value from 10kB to 500kB. Smaller the file, larger amount of old logs is saved. |
| Compress | off | on; default: off | Compress old rotated logs using GZ format. |
| Delete | - (interactive button) | Deletes log file from router. |
| Show hostname | off | on; default: off | Show hostname instead of IP address in syslog. |
Troubleshoot
The Troubleshoot section is used to download various files that contain information used for troubleshooting the device. Refer to the figure and table below for information on the Troubleshoot page.

| Field | Value | Description |
|---|---|---|
| System log | - (interactive button) | Displays the contents of the device system log file. The system log contains records of various system related events, such as starts/stops of various services, errors, reboots, etc. |
| Kernel log | - (interactive button) | Displays the contents of the device kernel log file. The kernel log contains records of various events related to the processes of the operating system (OS). |
| Troubleshoot file | - (interactive button) | Downloads the device Troubleshoot file. It contains the device configuration information, logs and some other files. When requesting support, it is recommended to always provide the device Troubleshoot file to Teltonika engineers for analysis. |
| TCP dump file* | - (interactive button) | Downloads the device TCP dump file. TCP dump is a program used to capture packets moving through network interfaces. By default, the device does not store TCP dump information. You must enable TCP dump and save the changes before you can download the file. |
| Enable TCP dump* | off | on; default: off | Turns TCP dump packets capture on or off. |
* As of {{{series}}}_R_00.07.00, TCPdump is not part of core functionality anymore. To see these options, the TCPdump package must be downloaded from [[{{{name}}}_Package_Manager|Package Manager]].
TCP dump
TCP dump is an optional downloadable functionality* used to capture packets moving through network interfaces. By default, the device does not store TCP dump information. You must enable TCP dump and save the changes before you can download the file.
If you enable TCP dump, you will notice additional configuration fields appear. Refer to the figure and table below for realted information.
* You can download the TCPdump package from [[{{{name}}}_Package_Manager|Package Manager]].
| Field | Value | Description |
|---|---|---|
| Enable TCP dump | off | on; default: off | Turns TCP dump packet capture on or off. |
| Select interface | network interface; default: br-lan | Only captures packets that move through the specified network interface. |
| Select protocol filter | All | ICMP | TCP | UDP | ARP; default: All | Only captures packets that match the specified protocol. |
| Select packets direction | Incoming/Outgoing | Incoming | Outgoing; default: Incoming/Outgoing | Only captures packets coming from the specified direction. |
| Host | ip | host; default: none | Only captures packets related to the specified host. |
| Port | integer [0..65335]; default: none | Only captures packets related to the specified communication port. |
| Select storage | RAM memory; default: RAM memory | Specifies where the TCP dump file will be stored. |
Diagnostics
The Diagnostics section is used to execute simple network diagnostic tests, including ping, traceroute and nslookup.
| Field | Value | Description |
|---|---|---|
| Method | Ping | Traceroute | Nslookup; default: Ping | Selects diagnostic method.
|
| Protocol | IPv4 | IPv6; default: IPv4 | Selects IP address family for diagnostic test. |
| Address | ip | host; default: none | IP address or hostname on which the diagnostic test will be performed. |
| Perform | -(interactive button) | Performs diagnostic test when clicked. |
Events Log
Summary
The Events Log page contains information on various device related events. This article is an overview of the Events Log page for {{{name}}} routers. If you're having trouble finding this page or some of the parameters described here on your device's WebUI, you should turn on "Advanced WebUI" mode. You can do that by clicking the "Advanced" button, located at the top of the WebUI.
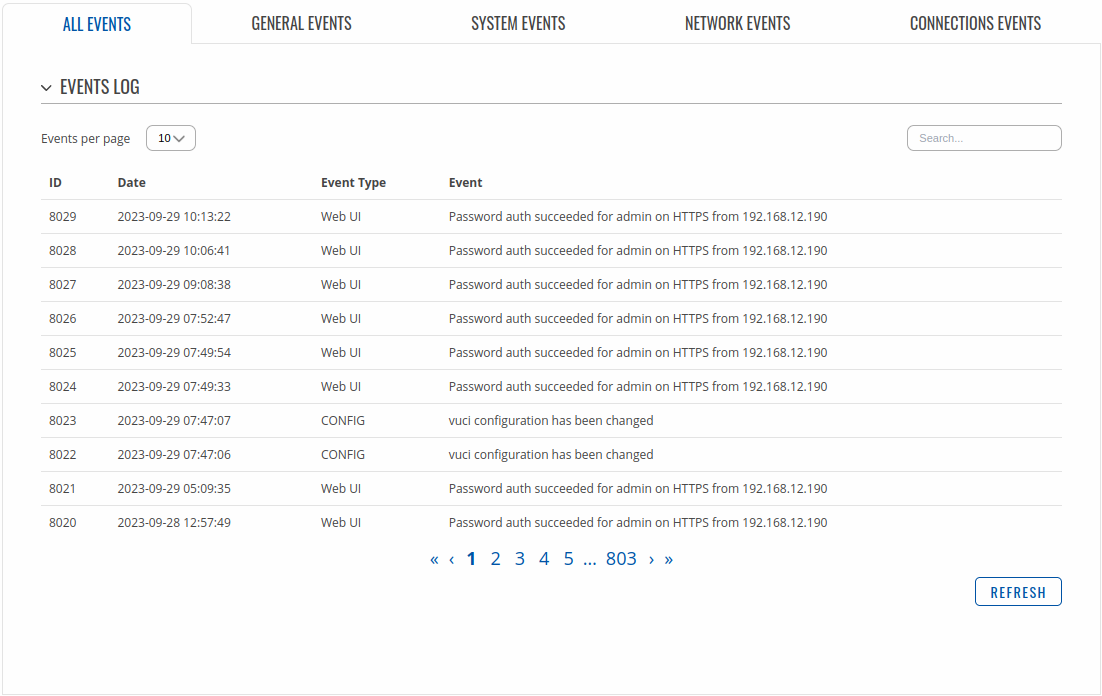
All Events
The All Events page contains a chronological list of various events related to the device. The figure below is an example of the Events Log section:
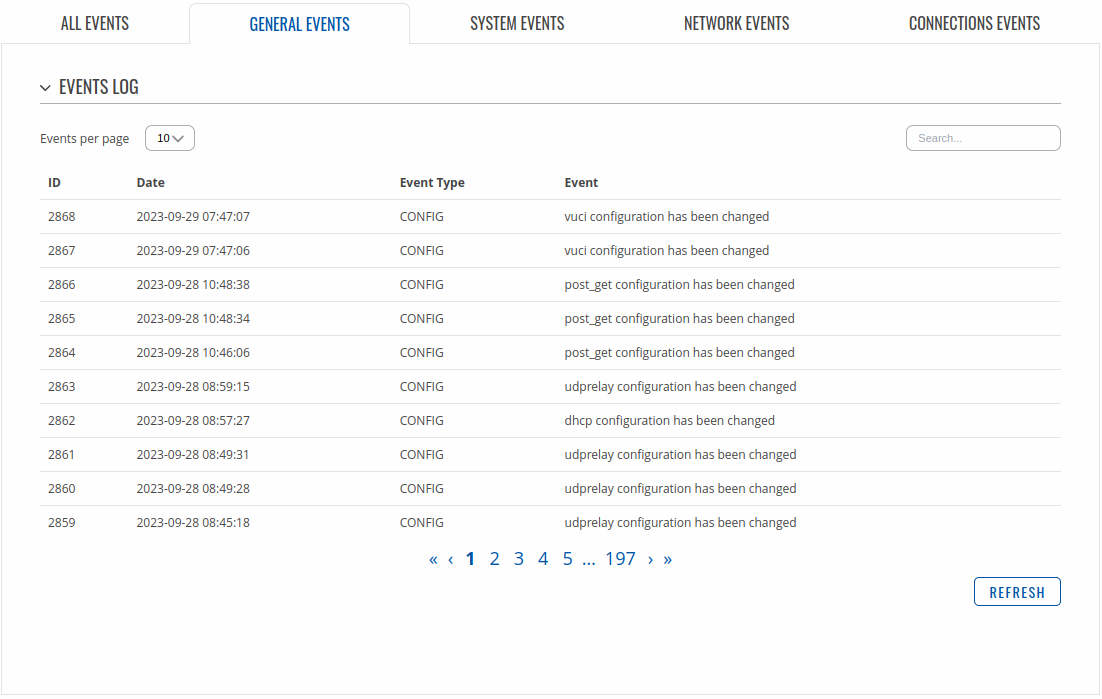
General Events
The General Events page contains a chronological list of general events related to the device. The figure below is an example of the Events Log section:
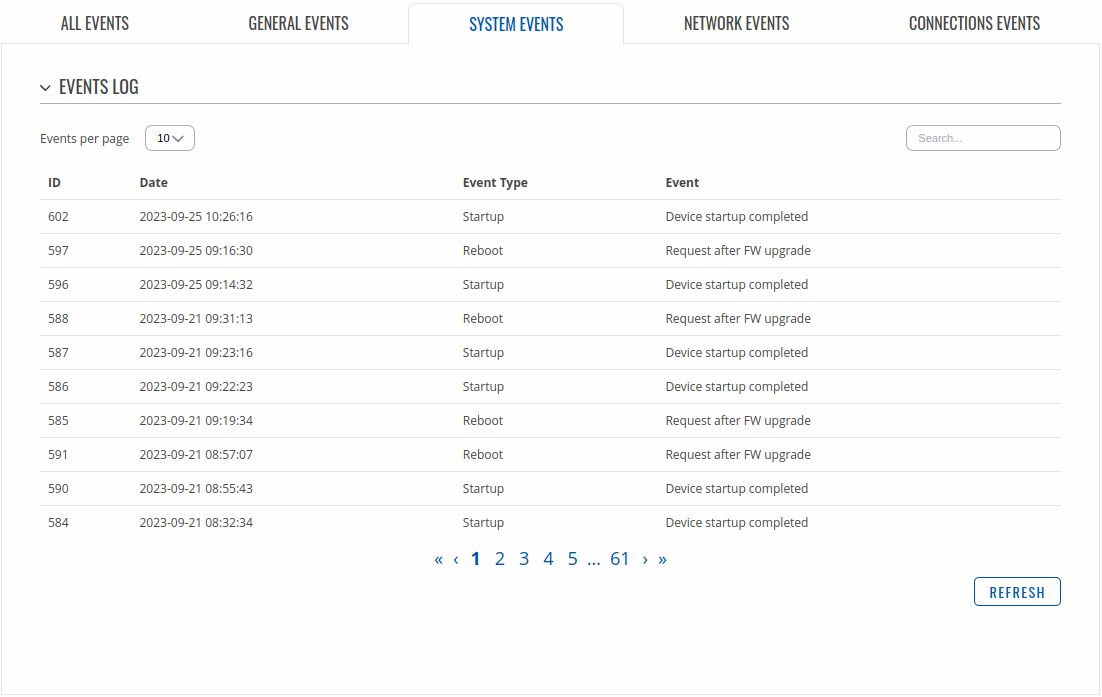
System Events
The System Events page contains a chronological list of system events related to the device. The figure below is an example of the Events Log section:
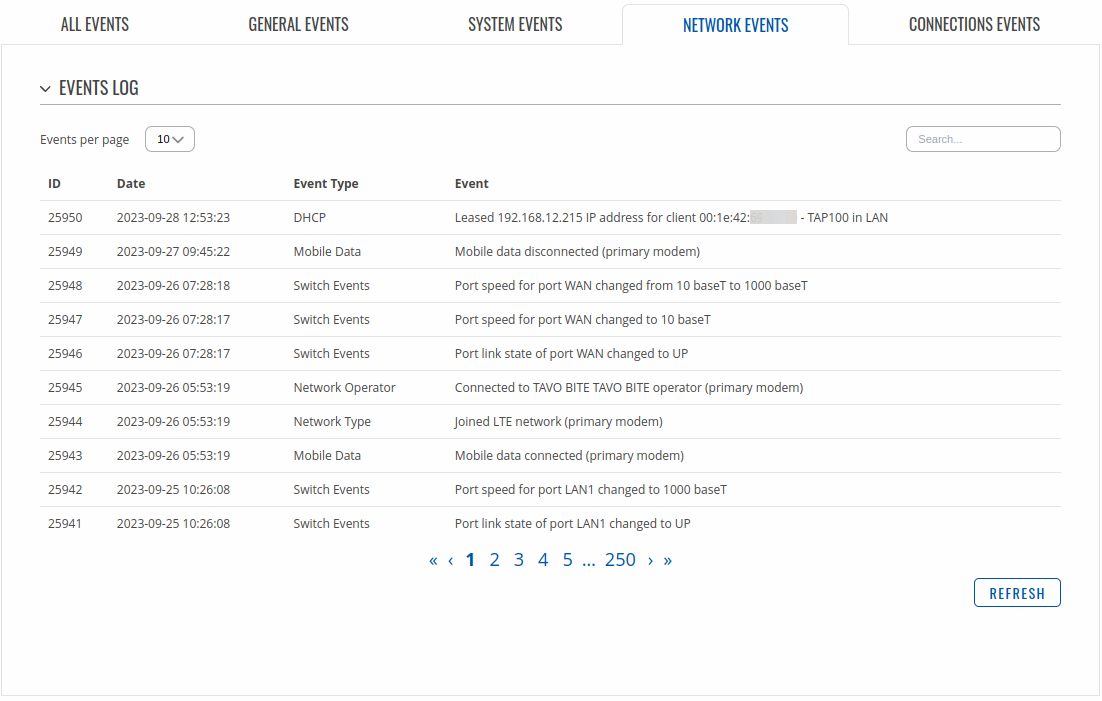
Network Events
The Netwrok Events page contains a chronological list of network events related to the device. The figure below is an example of the Events Log section:
Connections Events
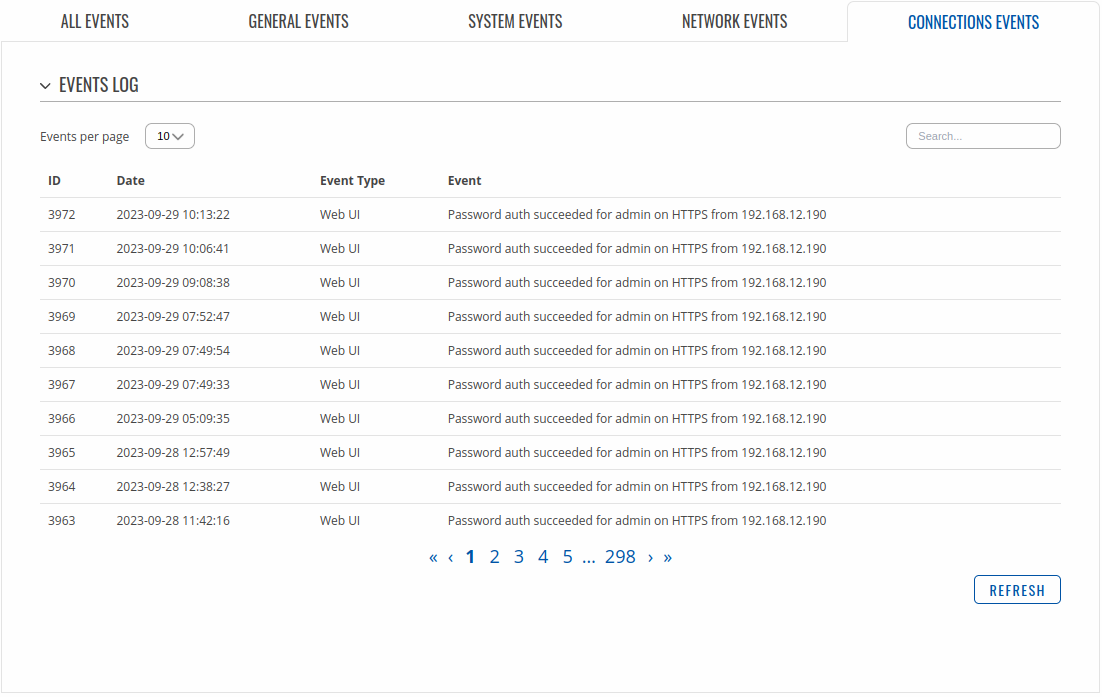
The Connections Events page contains a chronological list of connections events related to the device. The figure below is an example of the Events Log section:
Traffic Log
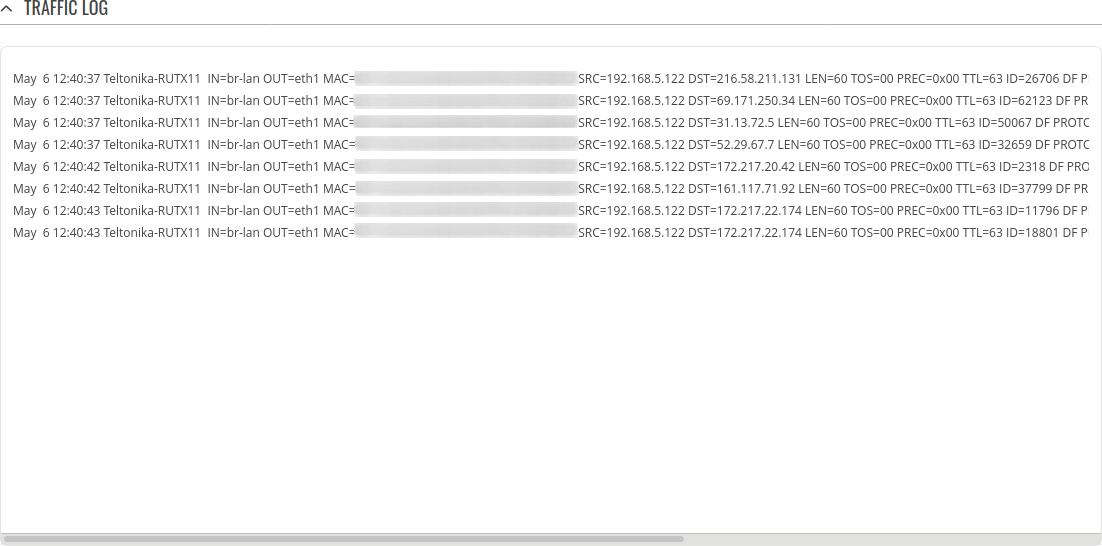
The Traffic Log section displays traffic which goes through one of the WAN interfaces. The device does collect data for the Traffic Log by default. To see Traffic Log information you must first enable Traffic Logging from the Services → [[{{{name}}} Traffic Logging|Traffic Logging]] page.
The figure below is an example of the Traffic Log.
CLI
Summary
The CLI or Command-line interface functionality allows you to enter and execute Linux commands within the device. This manual page provides an overview of the CLI page in {{{name}}} devices.
If you're having trouble finding this page or some of the parameters described here on your device's WebUI, you should turn on "Advanced WebUI" mode. You can do that by clicking the "Advanced" button, located at the top of the WebUI.
CLI
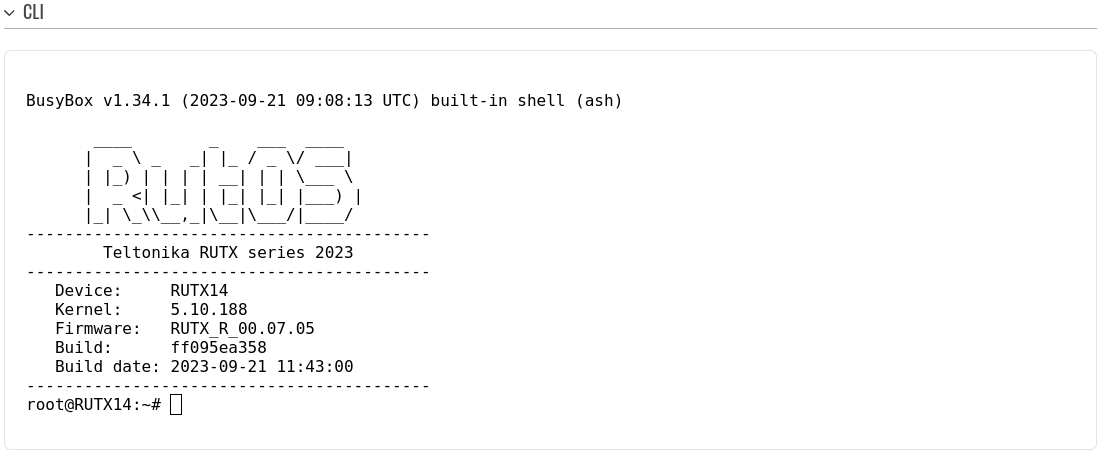
The RutOS CLI is a console interface similar to the Linux Terminal program. Use the following credentials to log in:
- Username: root
- Password: device's password
If the login was successful, you should be greeted with a window similar to this:
Speed Test
Introduction
The Speed Test page provides with the possibility to test the data transfer speed of your WAN connection. This manual page provides an overview of the Speed Test windows in {{{name}}} devices.
Important note: speed tests can drain a significant amount of data. Therefore, please make according considerations before using the speed test tool, especially if your data plan includes data limiting.
Note: Speed Test is additional software that can be installed from the System → [[{{{name}}} Package Manager|Package Manager]] page.
Speed Test
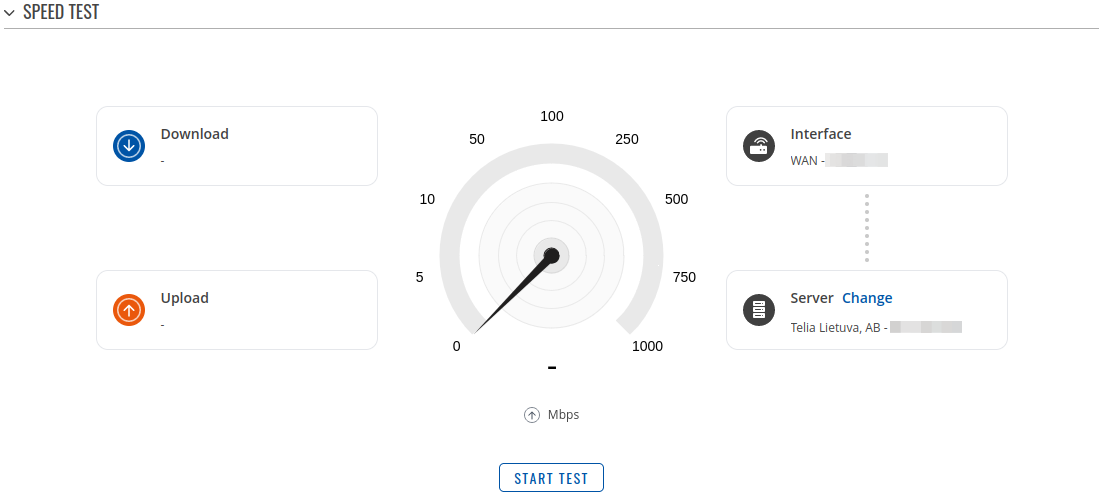
This network traffic speed speedometer will let you know what is your download and upload speed in Mbps.
Change Server
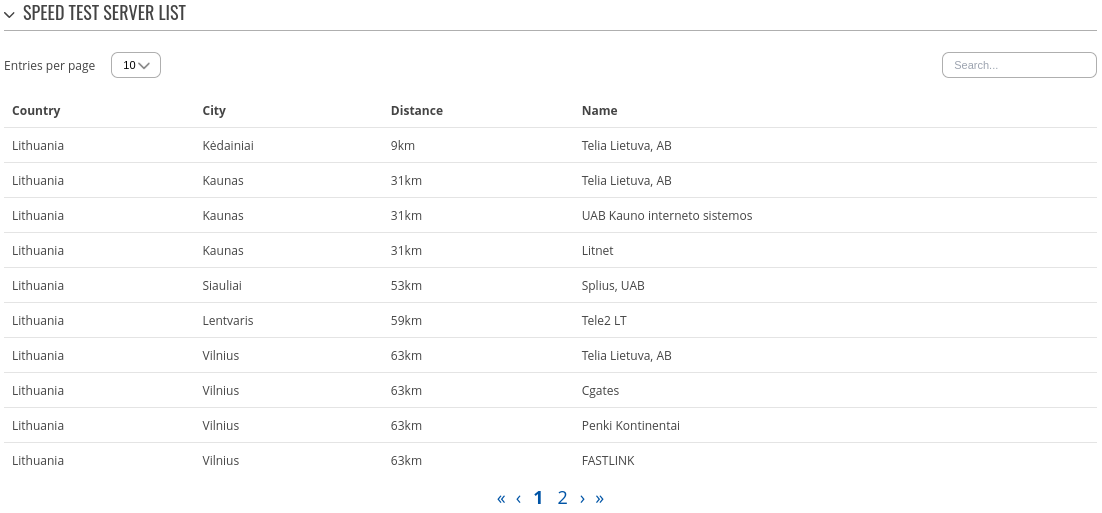
The speed test works by sending and downloading data from a public server and calculating the data transfer speed over a period of time. Usually the nearest server is selected automatically, but you can use the 'Change Server' button open to open a list of list of servers to choose from. This is optional, but using different servers may provide different results.
Once you choose a server you should see the server's service provider name appear and the IP of the server next to it. You can start the speed test by clicking the 'Start Speed Test' button.
Custom Scripts
Summary
The User Scripts function allows users to write their own shell scripts that will be executed during the device's booting process. This page is an overview of the User Scripts function in {{{name}}} devices.
Startup Script
The Startup Script section shows the contents of the /etc/rc.local file and allows the user to edit it. This scripts written in this file are executed at the end of the device's boot cycle. You can also execute the script via a command line interface with the following command:
sh /etc/rc.local
The figure below is an example of the Startup Script management section:
[[Category:{{{name}}} System section]]


