Template:Networking rutos manual overview rut2 rut9
The information in this page is updated in accordance with firmware version .
Summary
The Overview page contains various information summaries and shortcuts to other pages. It is also the homepage of the WebUI. This chapter is an overview of the Overview page for {{{name}}} router. If you're having trouble finding this page or some of the parameters described here on your device's WebUI, you should turn on "Advanced WebUI" mode. You can do that by clicking the "Advanced" button, located at the top of the WebUI.
Overview
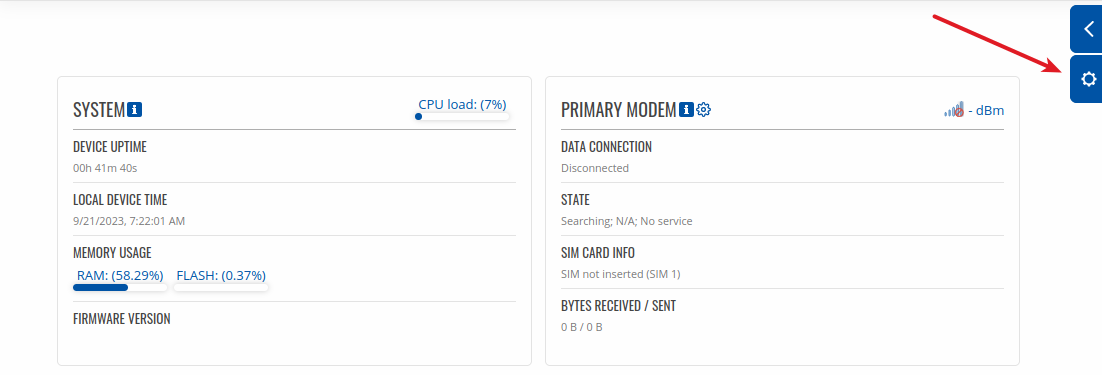
The Overview page contains widgets that display the status of various systems related to the device. The figure below is an example of the Overview page:
[[File:Networking_rutos_manual_overview_{{{modem}}}_{{{wifi}}}_v3.png]]
Widget button: Info
The Info (![]() ) button is located
next to the name of some widgets. Clicking the Info button redirects the user to a status page related
to the widget's displayed information. For example, clicking the Info button on the System widget
would redirect the user to the Status → [[{{{name}}} System|System]] page:
) button is located
next to the name of some widgets. Clicking the Info button redirects the user to a status page related
to the widget's displayed information. For example, clicking the Info button on the System widget
would redirect the user to the Status → [[{{{name}}} System|System]] page:
Widget button: Settings
The Settings button is located next to the name of some widgets. Clicking the Settings button redirects the user to a configuration page related to the widget's displayed information. For example, clicking the Info button on the Mobile widget would redirect the user to the Network → LAN Configuration page:
Adding more widgets
There is a default set of widgets displayed in the Overview page, but more can be added by clicking Overview Settings button.
From here you can add non-default widgets.
[[File:Networking_rutos_manual_overview_settings_{{{modem}}}_{{{wifi}}}_{{{dualsim}}}.png|border|class=tlt-border]]
[[Category:{{{name}}} Status section]]


