Template:Profinet configurator windows
Teltonika PROFINET Configurator Setup on Windows 11
This tutorial explains how to install and use the Teltonika PROFINET Configurator on Windows 11 to configure the {{{name}}} switch.
After assigning a suitable IP address and subnet mask, the WebUI of the {{{name}}} can be reached.
The {{{name}}} version with enabled PROFINET comes with the following factory settings:
- IP Address 0.0.0.0
- Netmask 255.255.255.0
- Gateway 0.0.0.0
Requirements
- Windows 11 PC
- {{{name}}}
- Network cable connected from the PC to the {{{name}}} device
- Teltonika PROFINET Configurator installer
Step 1: Download the Installer
- Download the installer from this wiki page and locate it in your Downloads folder.
- Double-click the installer file and follow the setup wizard.
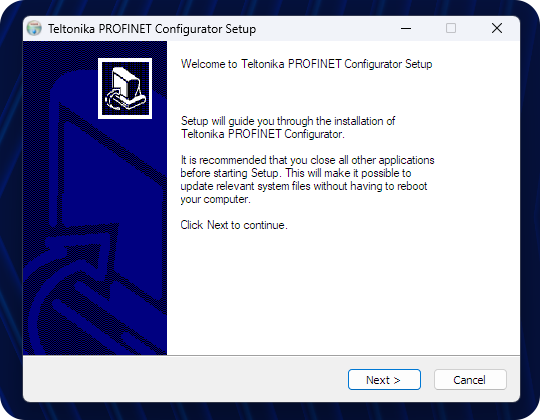
Press Next to continue.
Step 2: Complete Installation
When installation finishes, leave the checkboxes ticked to run the Configurator and create a desktop shortcut.

Step 3: Install WinPcap
The PROFINET Configurator requires WinPcap for network scanning. If prompted, install it by following the wizard.

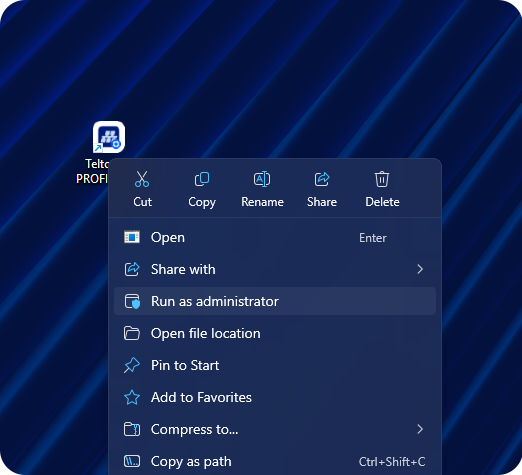
Step 4: Run with Administrator Rights
When first launched, the Configurator may show an error that admin privileges are required.
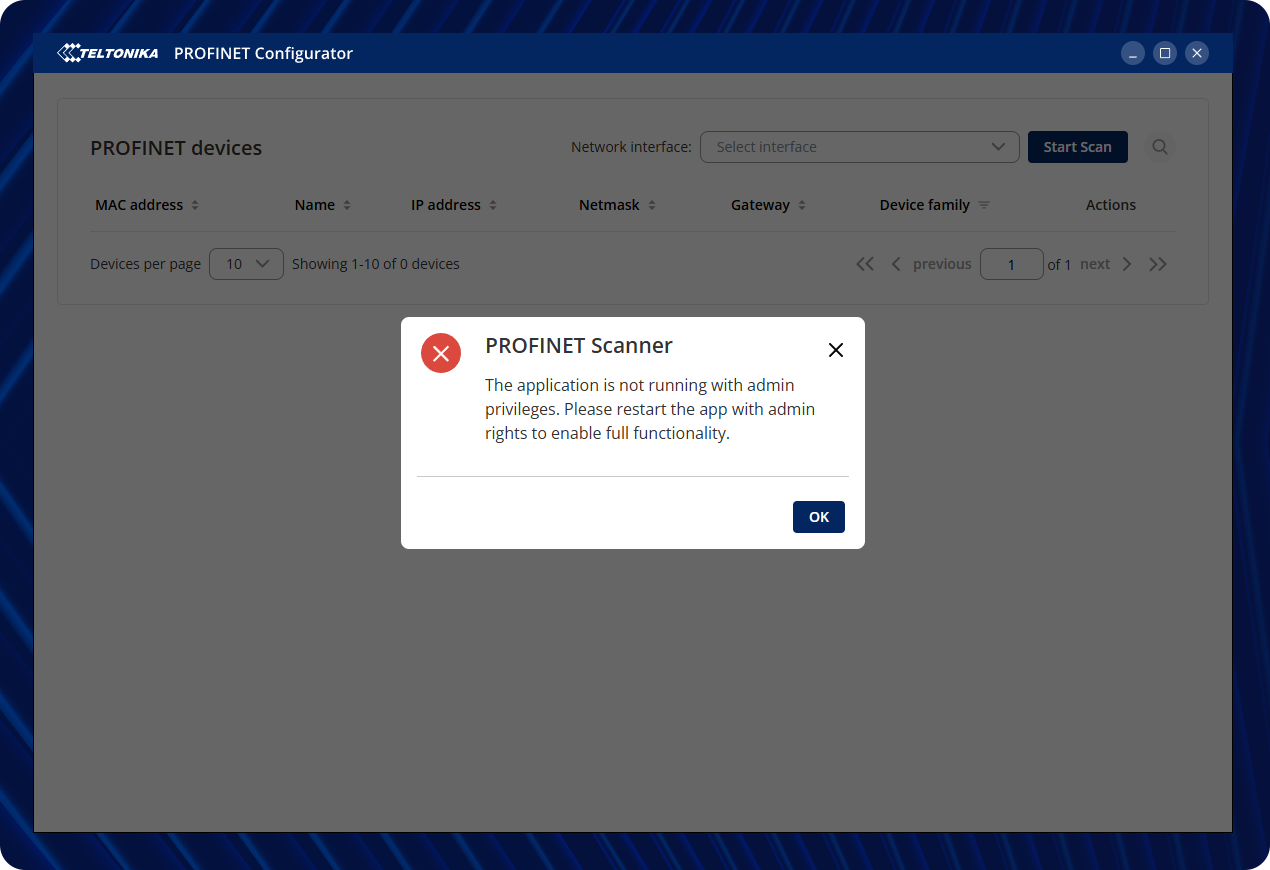
Close the application, right-click the desktop shortcut, and select Run as administrator.
Step 5: Application Interface
After launching with admin rights, the application will open successfully.
ℹ️ The images show TSW202 because its interface and configuration process are identical to other PROFINET-supported devices, including the one used in this tutorial. This makes the instructions fully applicable across models.

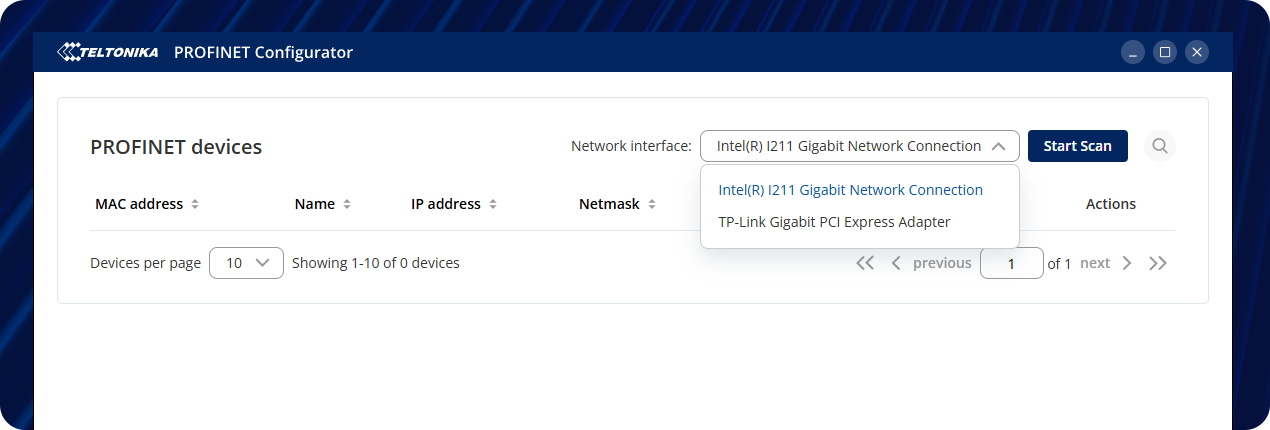
Step 6: Select Network Interface
From the drop-down list, select the correct network adapter connected to the {{{name}}}, then press Start Scan.
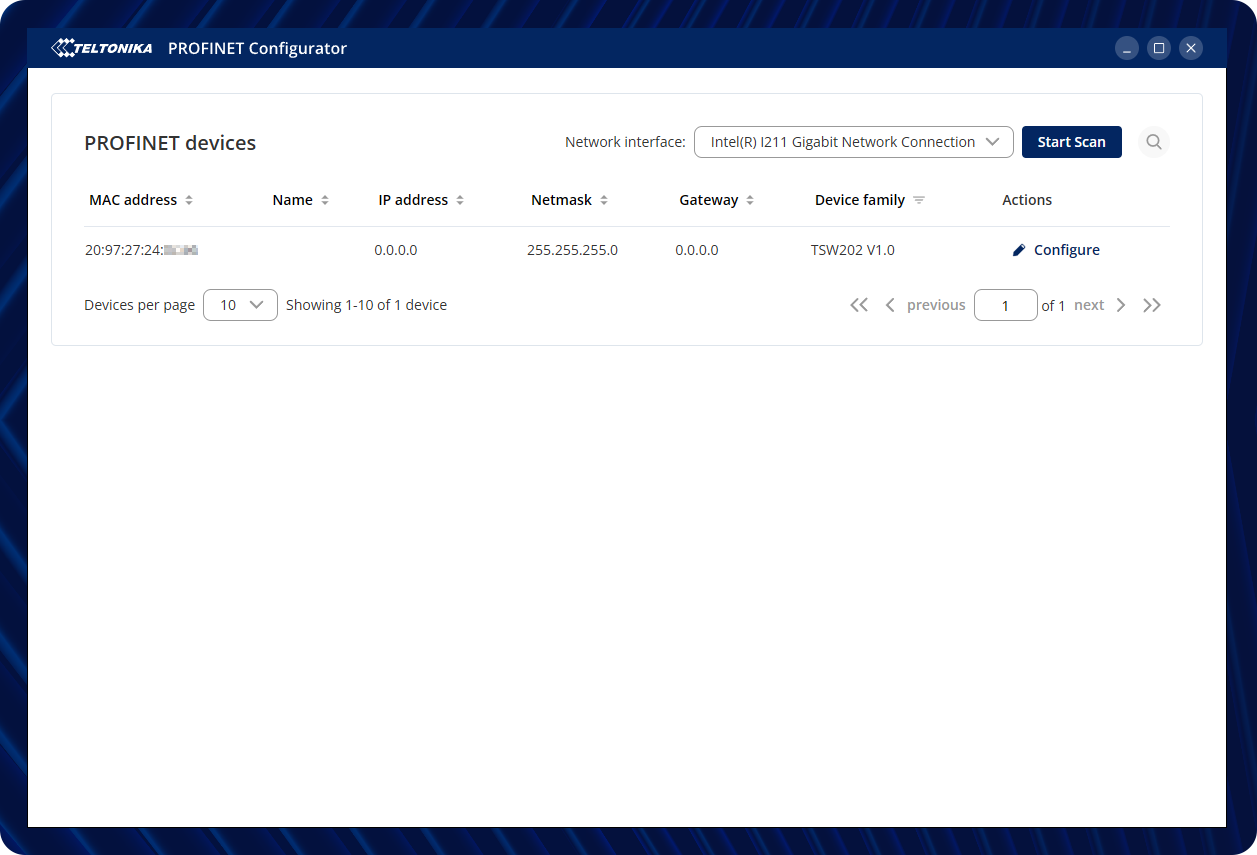
Step 7: Configure {{{name}}}
The connected device ({{{name}}}) will appear in the list.
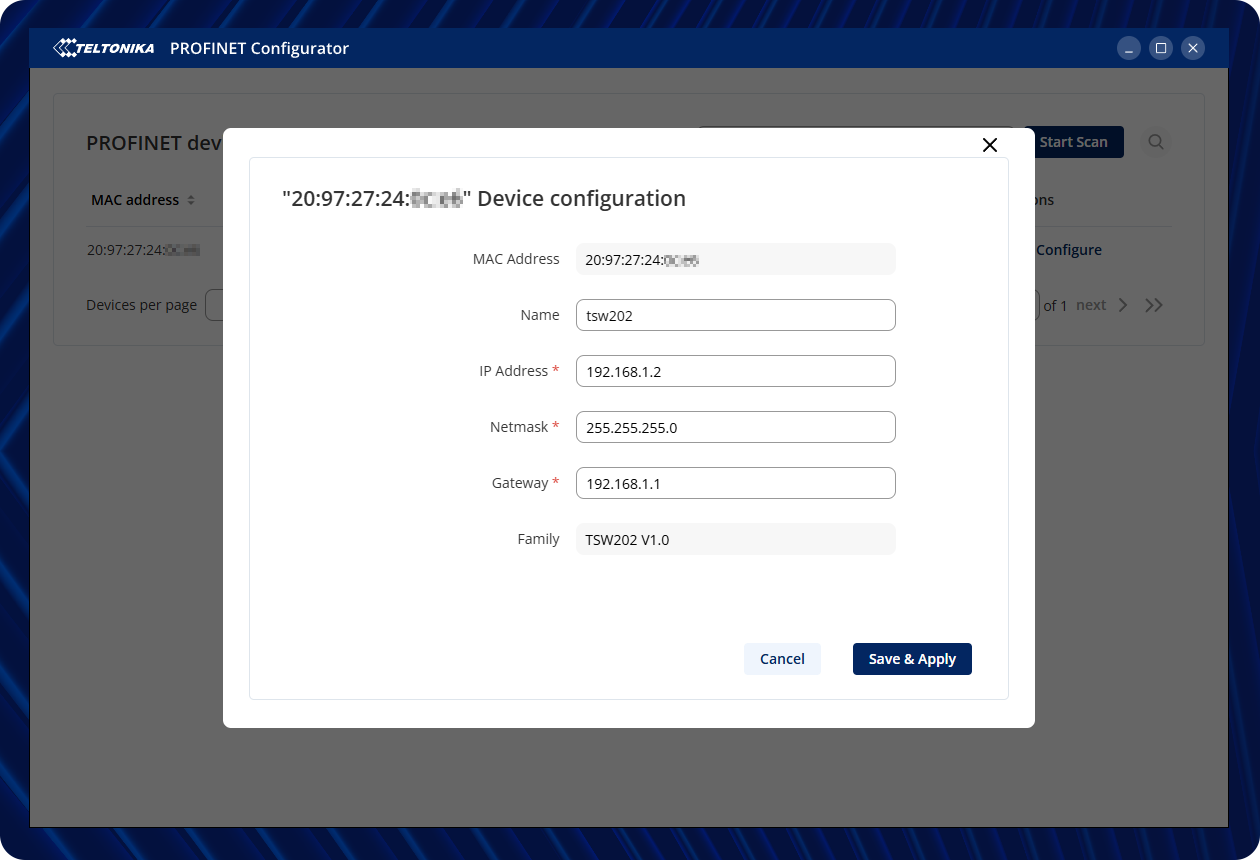
Click Configure to assign the name, IP address, netmask, and gateway.
Enter the desired configuration and press Save & Apply.
Step 8: Confirm Device Configuration
After saving, a confirmation message will appear.
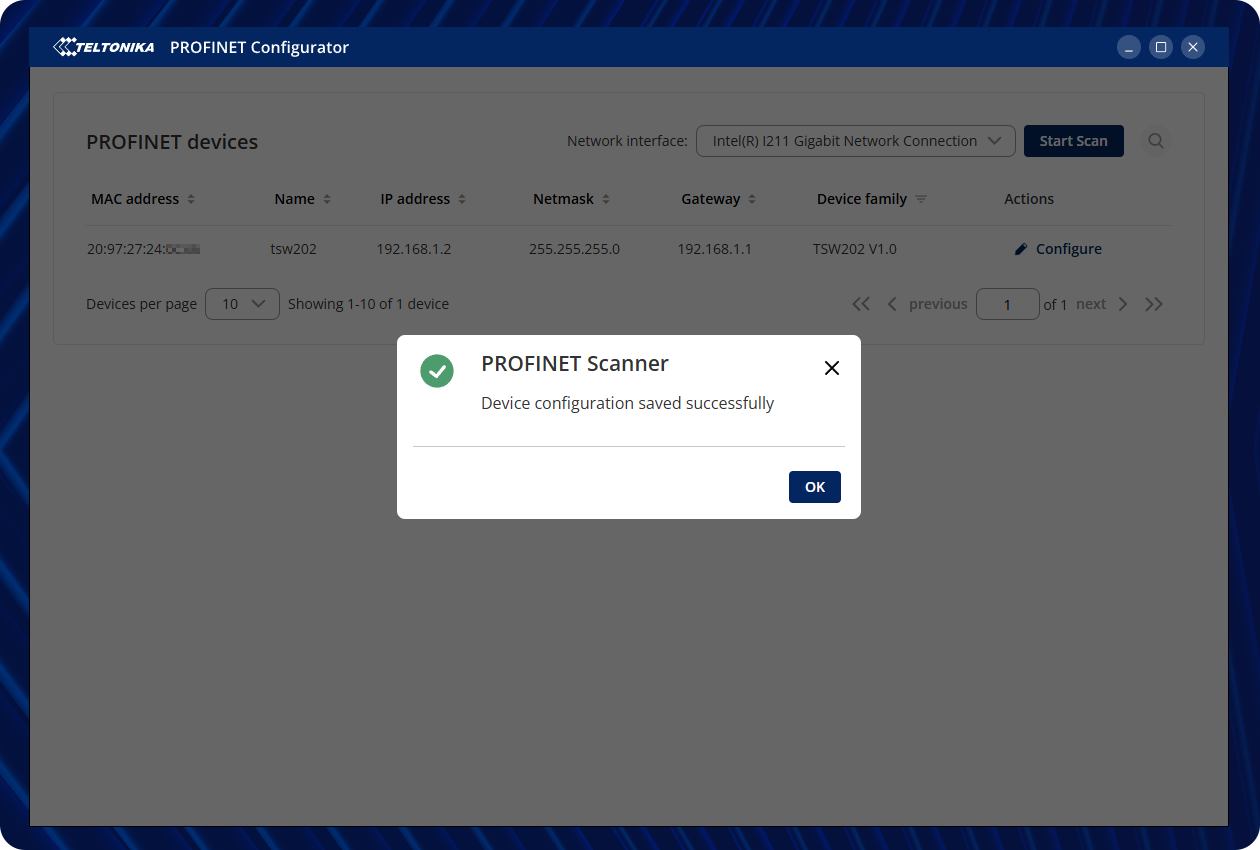
The {{{name}}} will now be listed with its new IP configuration.

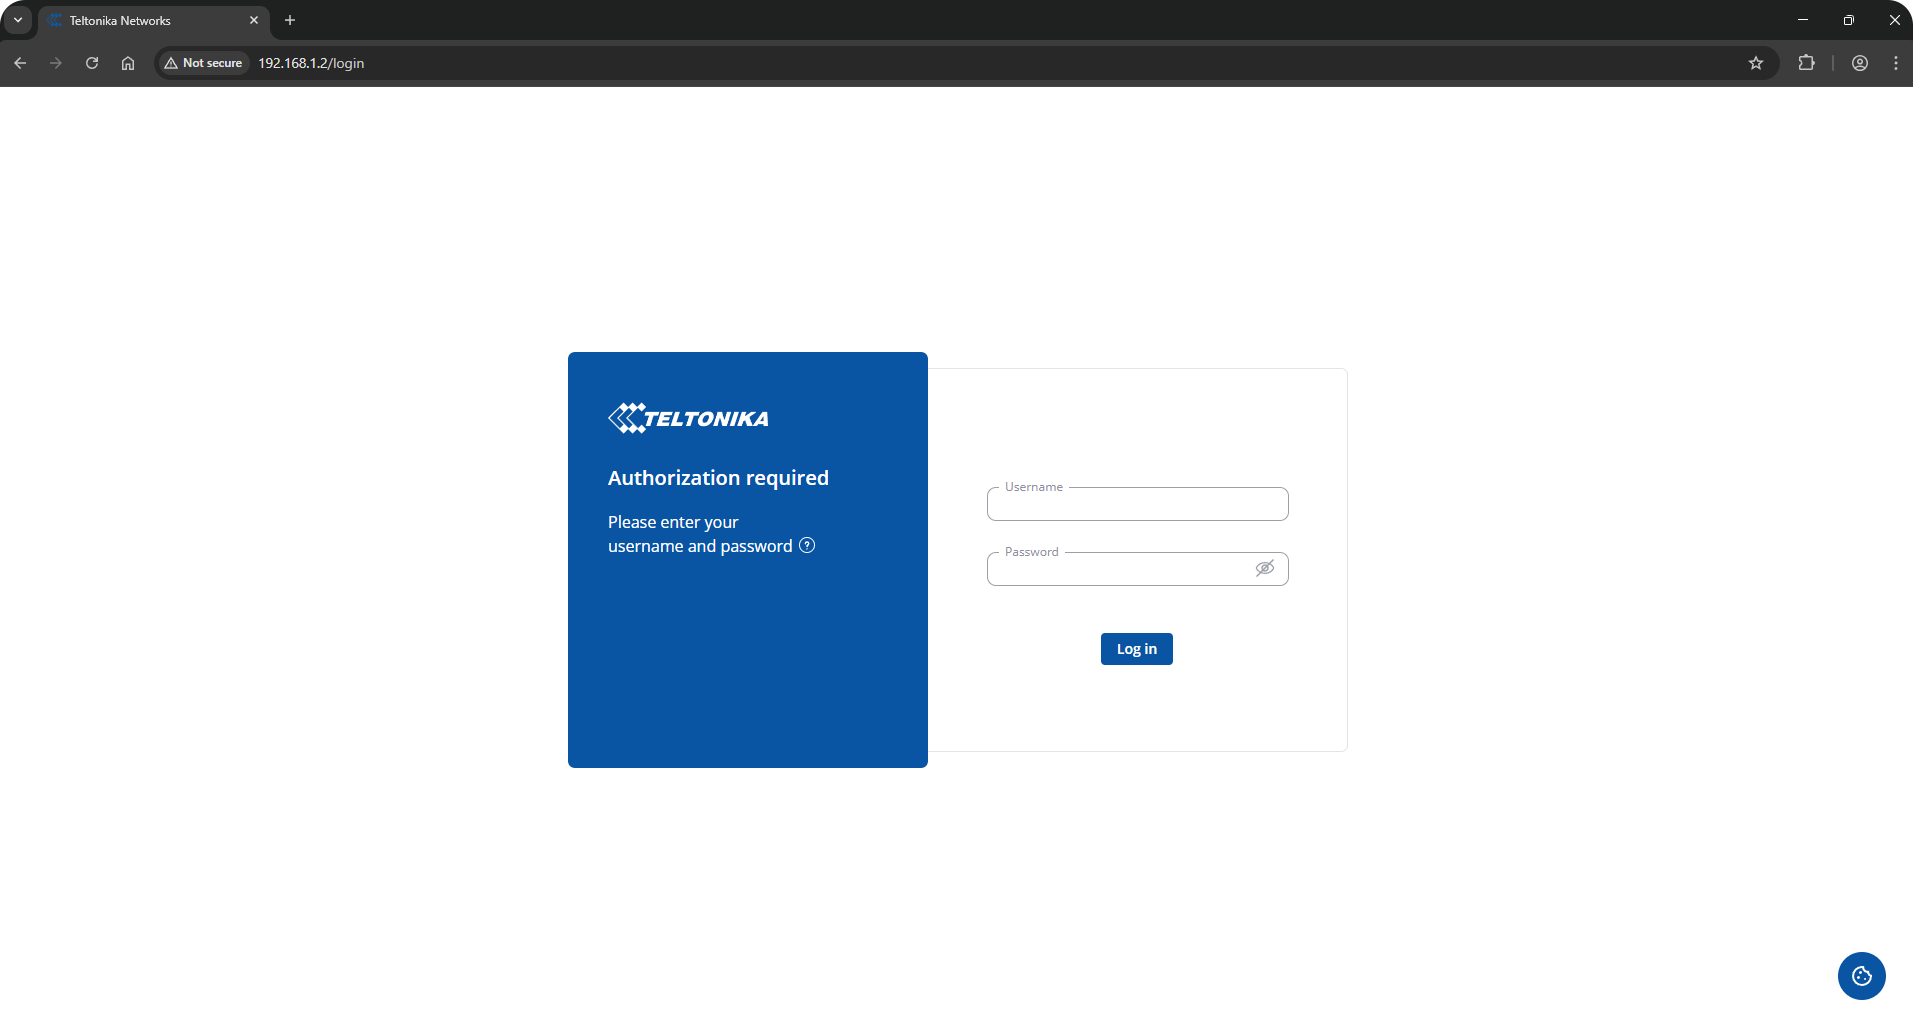
Step 9: Access the WebUI
Open a browser and enter the assigned IP address (e.g., 192.168.1.2). The {{{name}}} WebUI login screen will appear.
Log in using your {{{name}}} device credentials. You will find the username and password are located on your device.