ZeroTier One VPN configuration RutOS
ZeroTier One is an open source software product that establishes Peer to Peer VPN (P2PVPN) connection between laptops, desktops, phones, embedded devices, cloud resources, and apps.
Introduction
This article contains step-by-step instructions on how to set up a Zerotier VPN connection using RUTxxx routers.
Prerequisites
You will need:
- Two RUTxxx routers
- An end device to configure the routers (PC, Laptop, Tablet, Smartphone)
Setting up a ZeroTier network
- Go to https://my.zerotier.com/login and log in or create an account if you haven't already.
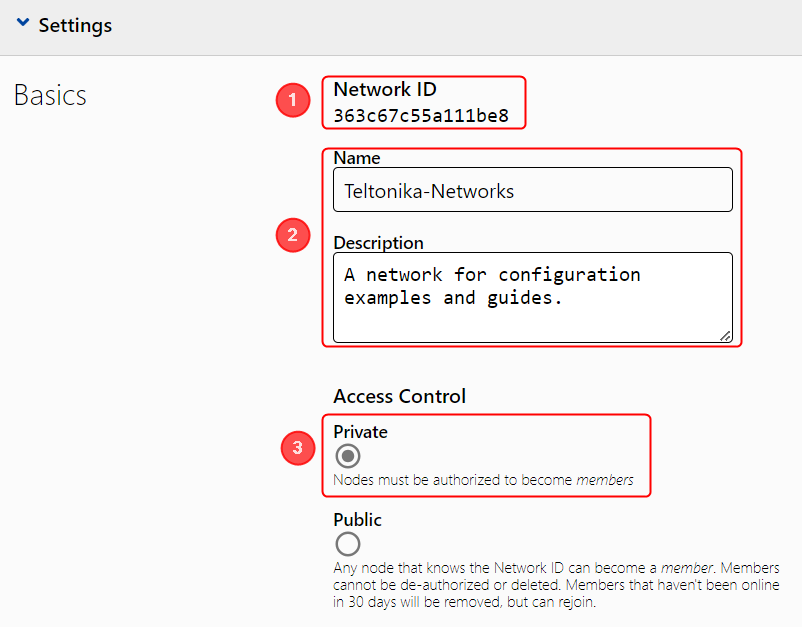
- Open the 'Networks' tab and click the 'Create a Network' button.

- Click the newly created network to begin configuration.

- Before configuring anything else, you may want to set up some basic settings.
- Copy the Network ID; you will need it later for ZeroTier node configuration.
- Optionally, set up a name and description for your network for easier management.
- Select 'Private' access control type; unless you want nodes to connect freely, without authorization.
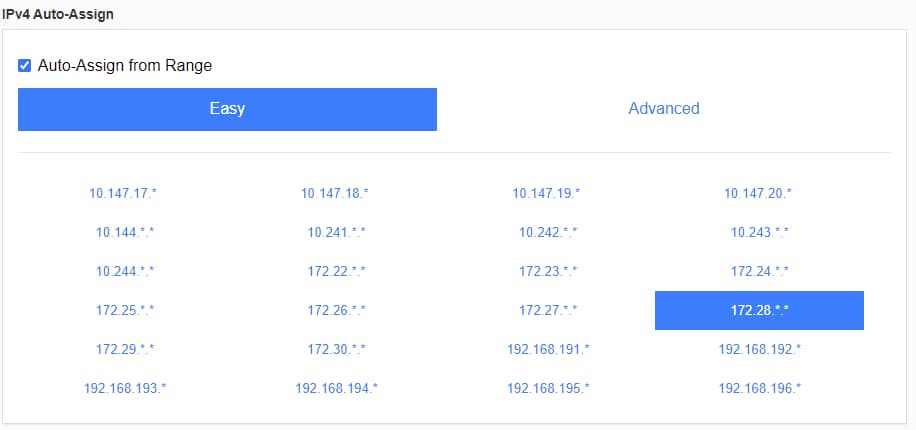
- Scroll down to find the 'IPv4 Auto-Assign' section. Select one of the provided private IP ranges for your network or click 'Advanced' and set up the range manually. For this example we'll be using the 10.147.17.* selection which means our network will be using the 10.147.17.0/24 IP range.


The last step concludes the ZeroTier network configuration. However, you may want to modify to the settings based on your specific requirements, but this particular network will function without any additional settings.
The next step is configuring members (aka nodes) for our ZeroTier network.
RUT1 and RUT2 configuration
The configuration for both of the routers are the same.
- Log in to your device's WebUI, and navigate to the Services → Package Manager page.
- Find the ZeroTier package in the list and install it.
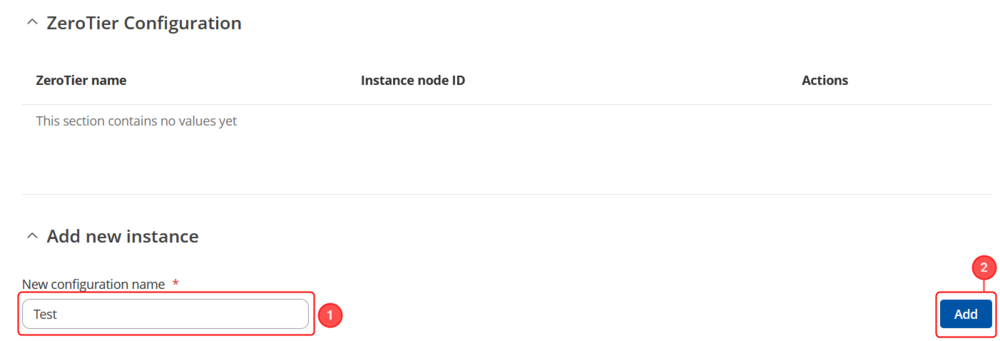
- Navigate to the Services → VPN → ZeroTier page and create a new ZeroTier configuration.
- Enter a custom name for the configuration.
- Click 'Add'.
- Complete the configuration.
- Turn the instance on.
- Add custom instance name.
- Click 'Add'.
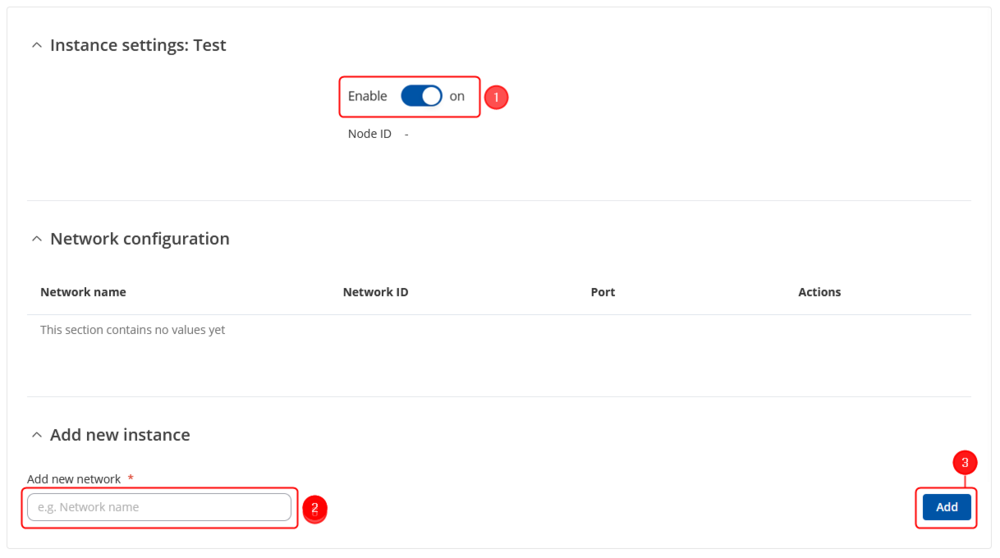
- Complete the configuration.
- Enable instance on.
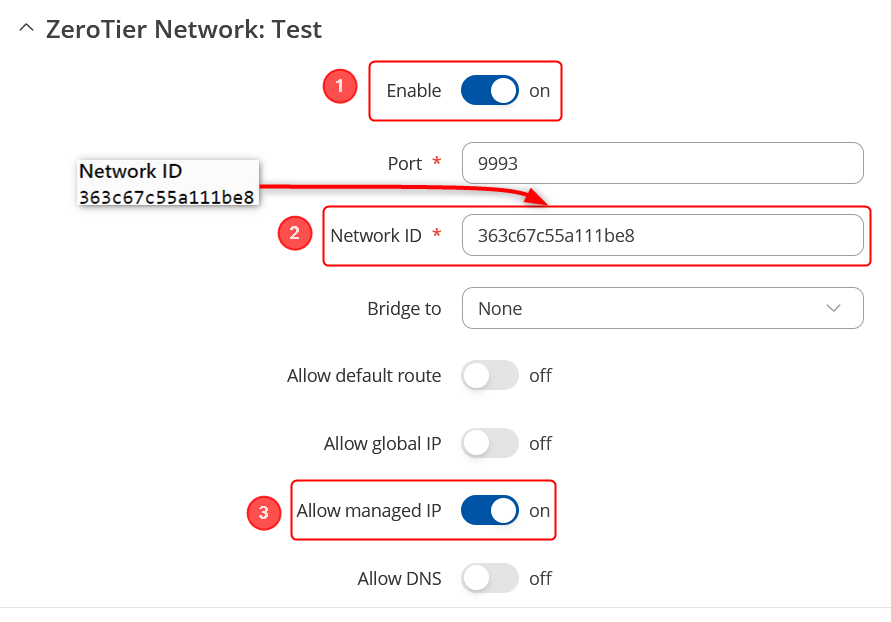
- Paste the ZeroTier Network ID into the Network ID field.
- Enable Allow managed IP.


Testing the configuration
To test out if the configuration is done correctly, you can ping the Managed IP address of the opposite router.