Reaching Cisco router console port remotely RutOS: Difference between revisions
PauliusRug (talk | contribs) No edit summary |
No edit summary |
||
| Line 1: | Line 1: | ||
__TOC__ | __TOC__ | ||
<p style="color:red">The information in this page is updated in accordance with [https://wiki.teltonika-networks.com/view/FW_%26_SDK_Downloads'''07.10.2'''] firmware version.</p> | |||
==Introduction== | ==Introduction== | ||
| Line 9: | Line 9: | ||
You will need: | You will need: | ||
<ul> | <ul> | ||
<li>A router/gateway with USB or RS232 Serial | <li>A router/gateway with USB or RS232 Serial/li> | ||
<li>An <b>RS232 (male) - RJ45</b> cable (to connect to a Cisco AUX port): <br> [[File:Cisco rj45 rs232 cable.jpg|300px]]</li> | <li>An <b>RS232 (male) - RJ45</b> cable (to connect to a Cisco AUX port): <br> [[File:Cisco rj45 rs232 cable.jpg|300px]]</li> | ||
<li>Or a <b>USB type Mini - USB type A</b> cable (to connect to a USB type mini console port): <br> [[File:Cisco usb cable.jpg]]</li> | <li>Or a <b>USB type Mini - USB type A</b> cable (to connect to a USB type mini console port): <br> [[File:Cisco usb cable.jpg]]</li> | ||
==Configuration== | ==Configuration== | ||
| Line 19: | Line 18: | ||
===RS232 - RJ45=== | ===RS232 - RJ45=== | ||
---- | ---- | ||
RS232 can be configured from the Services → RS232/ | RS232 can be configured from the Services → Serial Utilities → Over IP page. Write the desired name for the new instance and select RS232 for the device name, and press the ADD button. | ||
*''' | In the newly opened tab, set the following configurations: | ||
<table class="nd-othertables_2"> | |||
<tr> | |||
*Select | <th width=440; style="border-bottom: 1px solid white;></th> | ||
<th width=800; style="border-bottom: 1px solid white;" rowspan=2> | |||
* | [[File:RS232 Configuration for Serial Over IPp1v1.png|border|class=tlt-border]]</th> | ||
</tr> | |||
<tr> | |||
<td style="border-bottom: 4px solid white> | |||
* Enabled: '''ON''' | |||
</td> | |||
</tr> | |||
</table> | |||
Under the configuration settings: | |||
<table class="nd-othertables_2"> | |||
<tr> | |||
<th width=440; style="border-bottom: 1px solid white;></th> | |||
<th width=800; style="border-bottom: 1px solid white;" rowspan=2> | |||
[[File:RS485 Configuration for Serial Over IPp2v1.png|border|class=tlt-border]]</th> | |||
</tr> | |||
<tr> | |||
<td style="border-bottom: 4px solid white> | |||
* Select mode as '''server''' | |||
* Port: '''5555''' (you can use any port; however, 5555 is used here as an example) | |||
</td> | |||
</tr> | |||
</table> | |||
===USB=== | ===USB=== | ||
---- | ---- | ||
| Line 39: | Line 55: | ||
[[File:Cisco usb config update1.png|border|class=tlt-border|1100x700px]] | [[File:Cisco usb config update1.png|border|class=tlt-border|1100x700px]] | ||
<table class="nd-othertables_2"> | |||
<tr> | |||
<th width=440; style="border-bottom: 1px solid white;></th> | |||
<th width=800; style="border-bottom: 1px solid white;" rowspan=2> | |||
[[File:Cisco usb config update2.png|border|class=tlt-border]]</th> | |||
</tr> | |||
<tr> | |||
<td style="border-bottom: 4px solid white> | |||
Then, we'll need to configure this instance: | Then, we'll need to configure this instance: | ||
*Enable | *Enable | ||
| Line 51: | Line 74: | ||
*Type in '''port''' ('''43223''') | *Type in '''port''' ('''43223''') | ||
*Save configuration | *Save configuration | ||
</td> | |||
</tr> | |||
</table> | |||
===PuTTY configuration=== | ===PuTTY configuration=== | ||
Latest revision as of 10:02, 25 November 2024
Main Page > General Information > Configuration Examples > RS232/485 > Reaching Cisco router console port remotely RutOSThe information in this page is updated in accordance with 07.10.2 firmware version.
Introduction
This article describes how to connect to a console of another device (e.g., a Cisco router, Fortigate firewall, etc.)
Prerequisites
You will need:
- A router/gateway with USB or RS232 Serial/li>
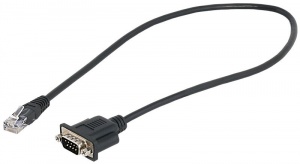
- An RS232 (male) - RJ45 cable (to connect to a Cisco AUX port):
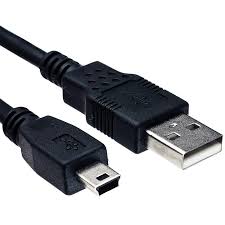
- Or a USB type Mini - USB type A cable (to connect to a USB type mini console port):
- Enabled: ON
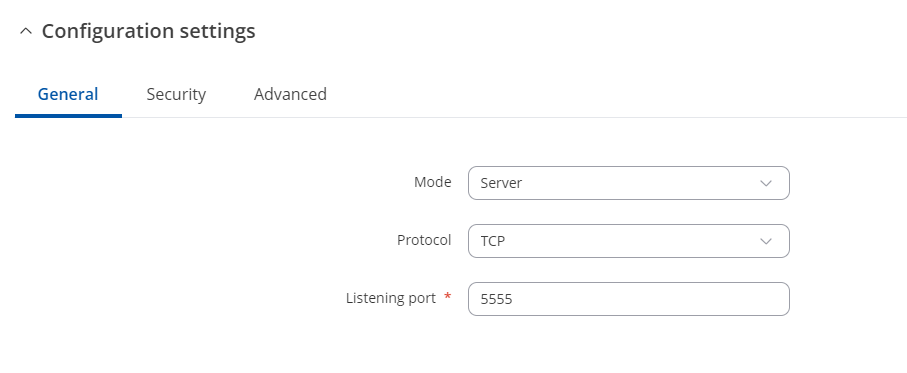
- Select mode as server
- Port: 5555 (you can use any port; however, 5555 is used here as an example)
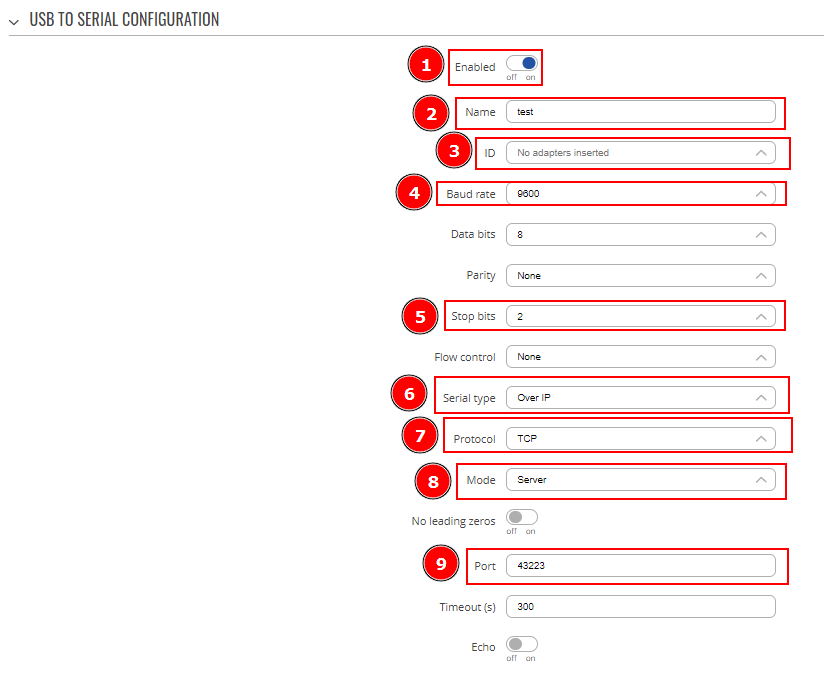
- Type name.
- Press Add.
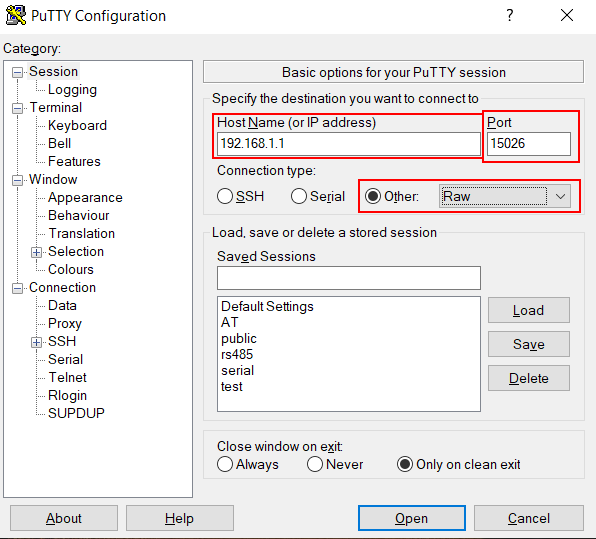
- Type in routers/gateways IP
- Select port you've configured in RS232/USB to Serial.
- Select RAW connection type
- Connect to router's/gateway's CLI
- Type in this command "microcom -s 9600 /dev/rs232"
Configuration
There are multiple ways to connect to a console port, which are described in the sections below:
RS232 - RJ45
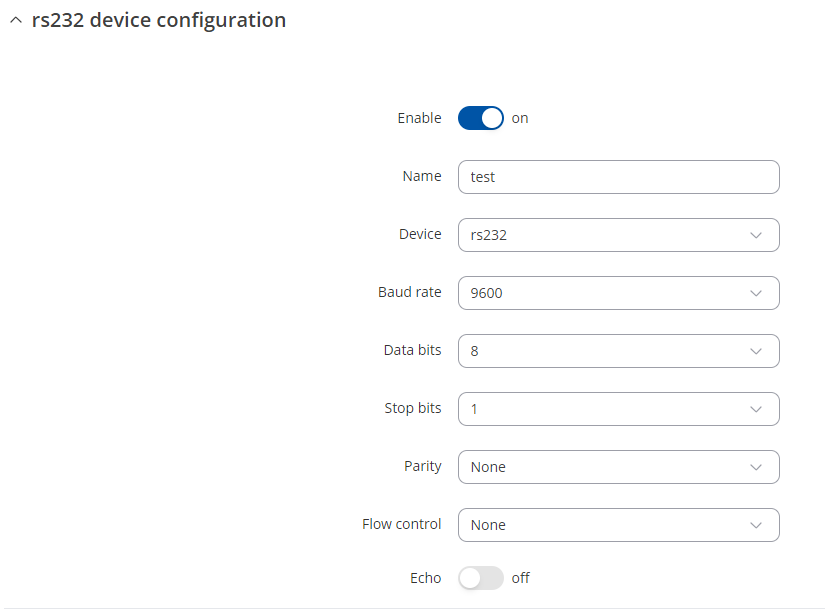
RS232 can be configured from the Services → Serial Utilities → Over IP page. Write the desired name for the new instance and select RS232 for the device name, and press the ADD button. In the newly opened tab, set the following configurations:
 |
|
|---|---|
|
|
Under the configuration settings:
 |
|
|---|---|
|
|
USB
Using Mini USB – USB type A configuration. Configured from the WebUI, Services → USB Tools → USB to Serial page:
Firstly, we'll need to add a new USB to Serial instance:
PuTTY configuration
The console can be accessed by using software such as PuTTY (can be downloaded from here.
The PuTTY configuration should look like this:
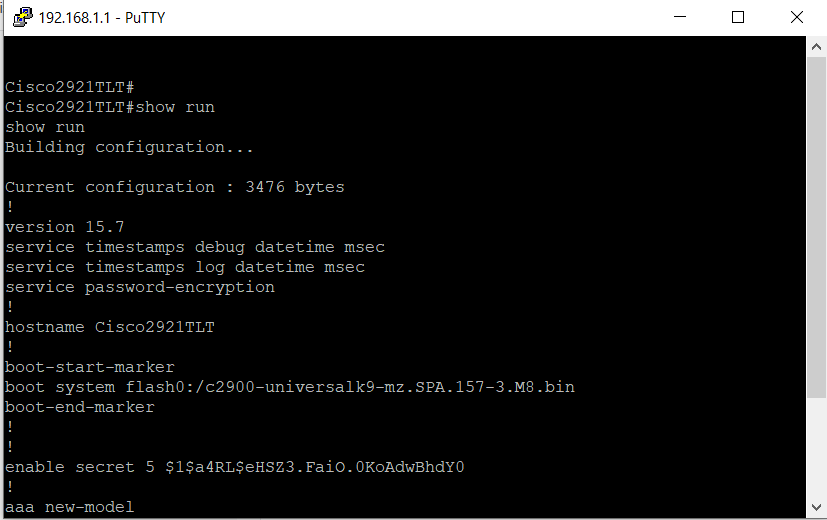
Then you should successfully connect to Cisco device:
If you do encounter any issues with PuTTY, you can try connecting from Teltonika's device directly to Cisco's:
This way you'd know if Teltonika's device is even able to see whats on the other side of RS232.
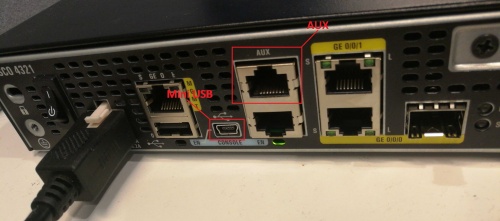
Console port
Example of console ports:


