RMS Devices
Summary
The Management section's primary function is to control, monitor, and configure all your Teltonika Networks devices. First tab under this section is the Devices tab.
Overview
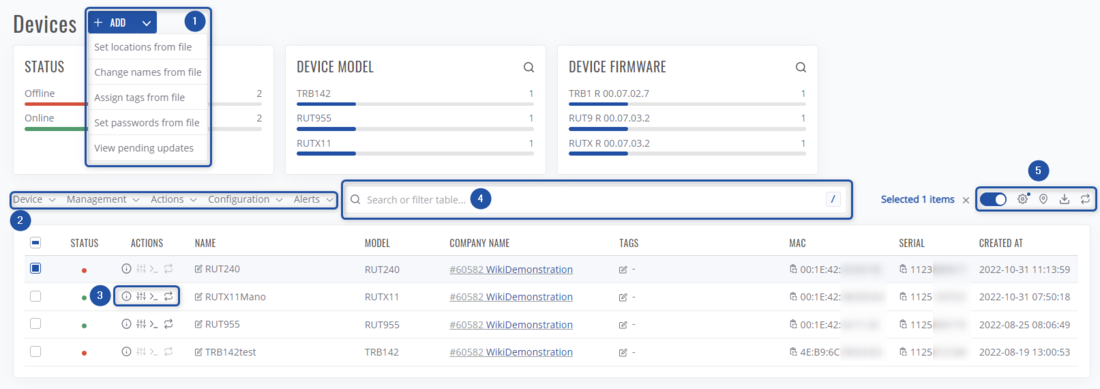
- Add devices to RMS, or change their parameters such as: location, names, tags.
- Configure or do various actions via top control menu.
- Access the device, or view its details/information using device actions menu.
- Search through devices by their name, model, description, etc. or filter the table by various parameters such as: company, tags, mobile state and so on.
- In this action menu you can:
- Enable automatic 30s refresh
- Change table settings, presets, chart settings
- Open devices map
- Download the current table in CSV format.
- Do a manual refresh.
Top Control Menu
All Management section features and functionalities are accessible using the Top Control Menu. Select any device, and the menu will appear left of the search bar. Below you will find in-depth information about each different menu.
Adding devices
Adding a device is the main prerequisite to start using the RMS. You can either add device by manually entering the required Name, Serial, LAN MAC/IMEI and password or by adding devices from the file.
IMPORTANT: An added device must have already done a "First login", meaning the default password was changed after a successful login. This check will be done the first time a device with active RMS Service attempts a connection to RMS after being registered to an RMS company. After this validation, subsequent reconnects to RMS while the device is in the same company will not trigger any additional validations.
Instructions
- Press + ADD Button.
Adding manually
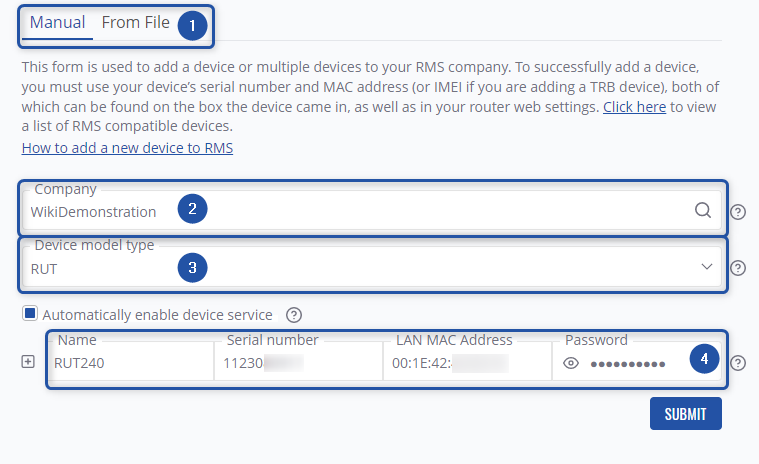
- Now select which way you'd like to add to devices: manually entering device details or adding them from the file.
- Select the company to which devices will be added on.
- Select the type of devices that will be added.
- Type in devices' required info:
- RUT and TCR series devices will require a Serial number, LAN MAC address and the device's current password to be provided
- TRB series will ask for a Serial number, IMEI and the device's current password.
- Enable service on the device immediately after adding it.
Adding from file
From CSV File:
- Select add from file tab.
- Download the demo CSV file (The demo file will change when changing series) on RMS.
- Add your device information and prepare the CSV (see section Preparing CSV file for more details).
- Select the file type as CSV file, choose Company, select Device series and finally select your CSV file.
- When ready, click the Upload button. Keep in mind, adding more than a few hundred devices at once will take some time.
A pop-up indicating the number of new devices that have been added should appear on the screen:
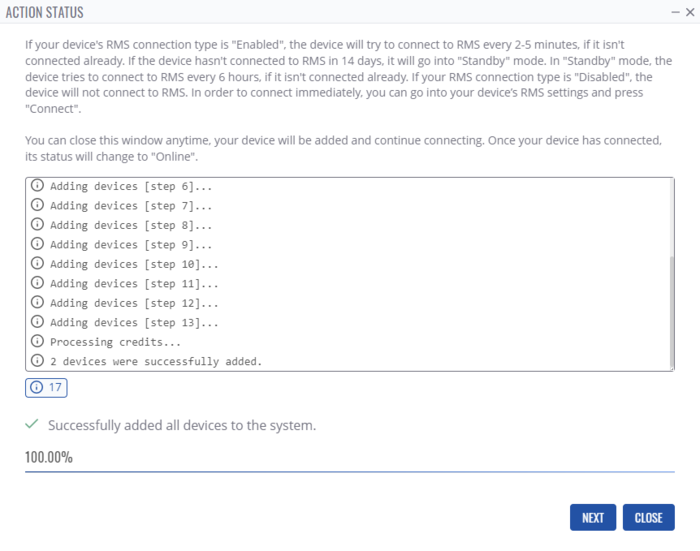
Finishing adding process
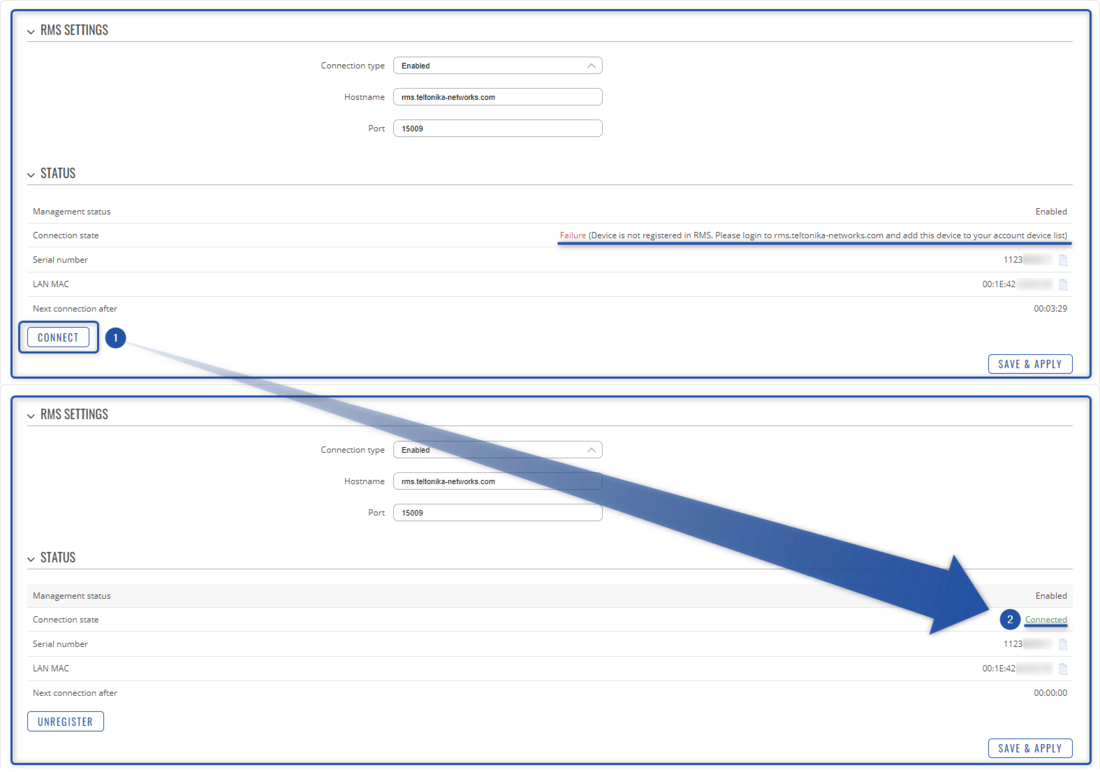
After you've added devices on RMS, you'll need to connect them to RMS on the device itself. Navigate to Services->Cloud solutions->RMS.
- Press Connect to initiate the connection between the device and RMS.
- After a few moments you should see the state's status (Connected).
Preparing CSV file
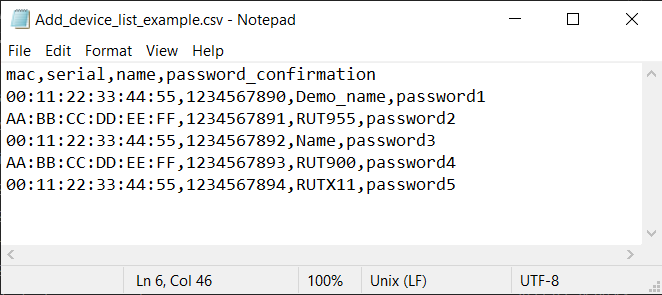
You can download an example file from here. Or you can prepare the CSV file for your list of devices manually. The list must be comprised of devices' LAN MAC addresses, (IMEIs for TRB) Serial numbers, Name and Password columns. You must save it as a CSV file. You can create/edit CSV files with programs like Microsoft Excel, OpenOffice Calc, or a simple text editor like Notepad, which we'll use for this example.
Create a new text file and set the order of device parameters in the first line. For example:
mac,serial,name,password_confirmation
Single entry for single device consists of the device's LAN MAC address (or IMEI), serial number and password separated by commas (,). Each line should contain information about a single device (see example below).
Important!
- Do not forget to save your file as *.csv.
- If you are editing the file with Notepad. Click the "Save As" option. Then next to "Save as type", choose "All Files" and add the .csv extension next to the file name.
- If you're using Linux, you can add the same extension to the file name after saving the file the regular way).
Actions using CSV files
CSV (Comma Separated Values) is a simple file format used to store tabular data. This file must contain a serial number / MAC address (both Serial number and MAC address can be used interchangeably but not simultaneously), and a parameter you're configuring, all separated by a separation symbol. Each device must be in a separate line.
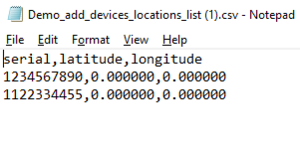
Setting device location from file
Here you need to provide the device's serial number / MAC address and location coordinates.
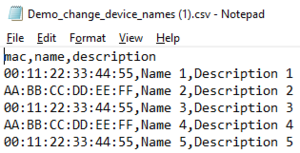
Changing device name from file
Here you need to provide the device's serial number / MAC address, name, and description.
Assigning device's tags from file
Here you need to provide the device's serial number / MAC address and choose tags to assign in the pop-up window.
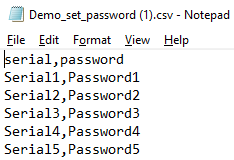
Setting device's password from file
Here you need to provide the device's serial number / MAC address and password.
View pending updates
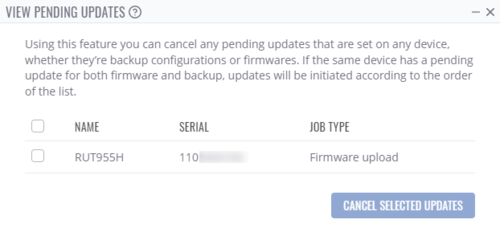
If there are any devices with Pending status (⬤) you can check any pending updates by clicking on View pending updates. There you'll be able to select any pending updates on devices and cancel them.
Page settings
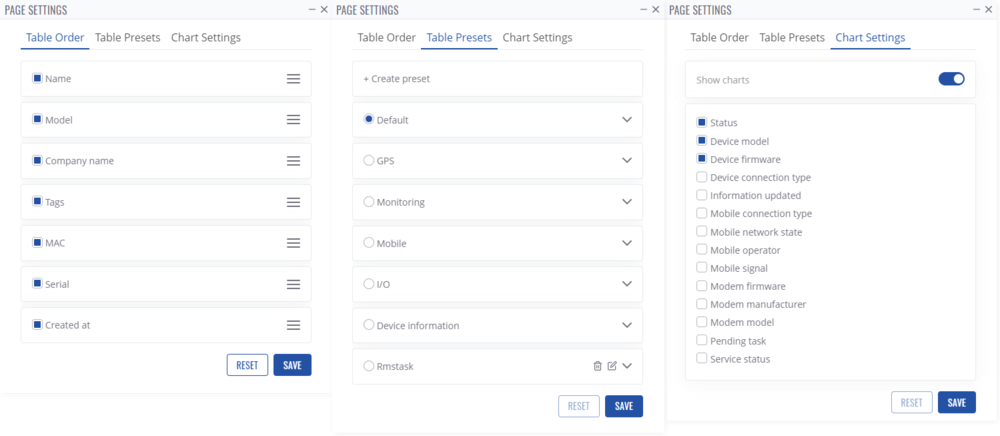
Here, you'll be able to:
- Change the order of the table and toggle on/off the table's columns.
- Change table presets, and make a custom one.
- Toggle on/off various charts, that you see on the top of the Devices page.
Toggle devices map
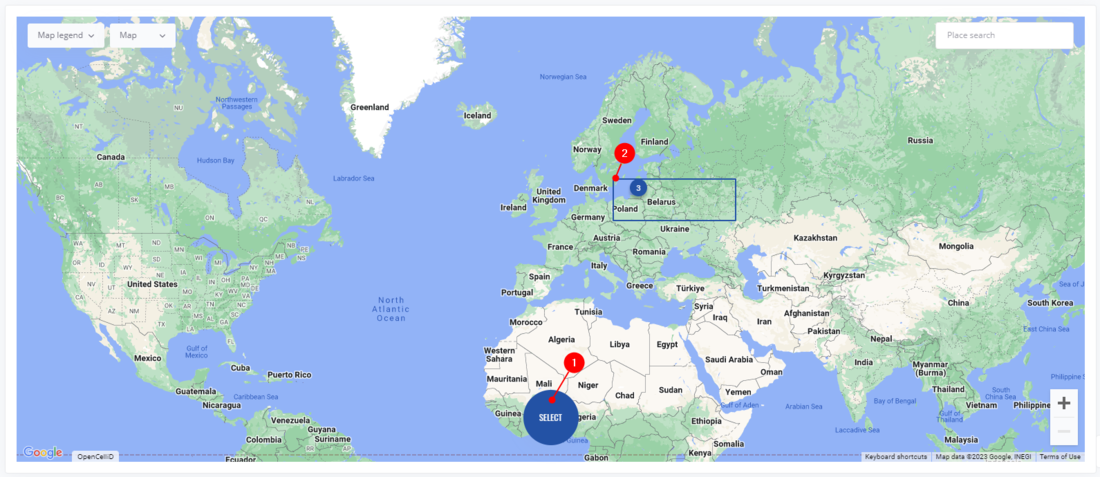
Here, you'll be able to view the devices' current location (either has to be set manually or have GPS enabled). You can also select any device by clicking on its point, or doing an Area select.
Selecting devices
To do an area selection:
- Simply click on the White "Select" Button.
- The button changed its color to blue, which means that you can do a selection by dragging an area on the map.
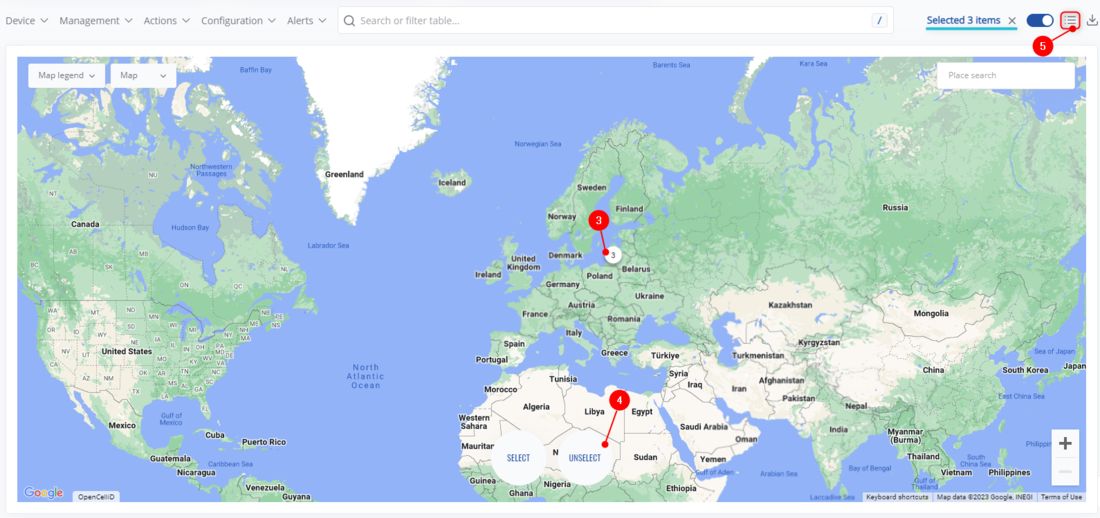
- Selected devices now have white points.
- You can unselect them.
- Toggle device table. If devices are selected on the map, they will also be selected in the device table.
- Left of this button it will show how many devices were selected.
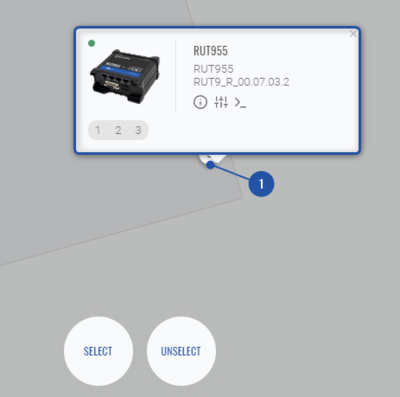
Selecting a single device:
- You can also select just a single device by clicking on its point.
- This will open a small overview of the device, from here you can view device details, and access its WebUI or CLI.
Device details
By clicking on the Device details icon in the action columns you'll be redirected to Device Details.

