Configuration file .ovpn upload tutorial
Appearance
Summary
This tutorial will show you how to upload the existing OpenVPN configuration file .ovpn onto our RutOS devices.
Uploading file onto the device
Navigate to Services -> VPN -> OpenVPN and create new client instance.
- Type name
- Choose Client
- Add new client
Now on the new client configuration:
- Enable
- Enable OpenVPN config from file.
- Press browse.
- In the new window select select OpenVPN config file .ovpn.
- Press Open
- And save
This is enough for most basic OpenVPN setups to successfully establish connection between the server and the client.
TLS, user managament
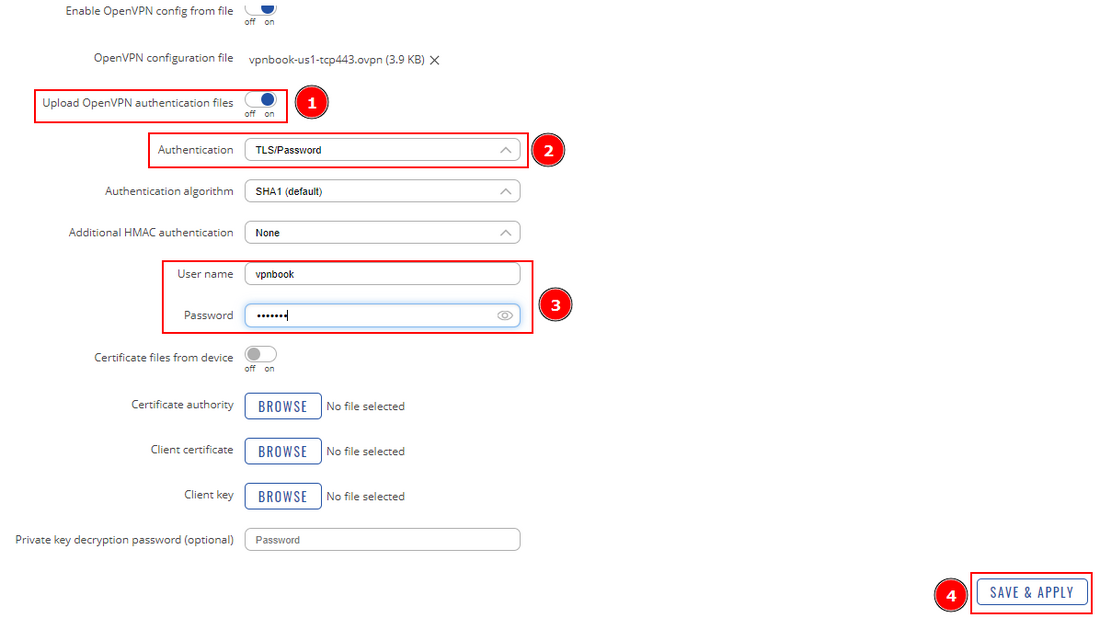
Some VPN setups require you to provide a username and password to establish the connection. To do so you need:
- Enable Upload OpenVPN authentication files.
- Select TLS/Password authentication.
- Type in the Username and password, that you have from your VPN provider.
- No additional TLS certificates need to be uploaded as they are already on the .ovpn file.
- Save
See also
An example use of .ovpn: OpenVPN configuration file (VPNBook example)


