RUT900 L2TP over IPsec (Windows 10)
Introduction
The information in this page is updated in accordance with the RUT9XX_R_00.06.06.1 firmware version.
Because of the lack of confidentiality inherent in the Layer 2 Networking Protocol (L2TP) protocol, Internet Protocol Security (IPsec) is often used to secure L2TP packets by providing confidentiality, authentication and integrity. The combination of these two protocols is generally known as L2TP over IPsec (or simply L2TP/IPsec).
This article provides a guide on how to configure L2TP/IPsec on RUTxxx routers and how to connect them with a Windows 10 client.
It should also be noted that this guide is aimed at more advanced users and, therefore, skips some of the more self-explanatory steps in order to preserve the overall coherence of the article. For example, instead of showing how to add new instances step by step, it is only mentioned in a short sentence. If you feel this lack of information impedes your ability to configure the setup, we suggest you check out our separate configuration guides on IPsec and L2TP for reference.
Configuration overview and prerequisites
Before we begin, let's overview the configuration that we are attempting to achieve and the prerequisites that make it possible.
Prerequisites:
- One RUTxxx routers of any type (excluding RUT850)
- A Public Static or Public Dynamic IP addresses
- At least one end device with Windows 10
Configuration scheme:

The figure above depicts the L2TP/IPsec scheme. - The router with the Public IP address (RUT1) acts as the L2TP/IPsec server and the Windows 10 device acts as client. L2TP connects the networks of RUT1 and Windows 10 client and IPsec provides the encryption for the L2TP tunnel.
When the scheme is realized, L2TP packets between the endpoints are encapsulated by IPsec. Since the L2TP packet itself is wrapped and hidden within the IPsec packet, the original source and destination IP address is encrypted within the packet.
Router configuration
If you have familiarized yourself with the configuration scheme and have all of the devices in order, we can start configuring the routers using instructions provided in this section. To summarize, we'll be configuring an L2TP server and an IPsec Transport instance (server) on RUT1; an a Windows 10 VPN connection (client).
L2TP Server
First, you'll need to configure an L2TP server instance on your router. Adhere to the instructions below for guidance.
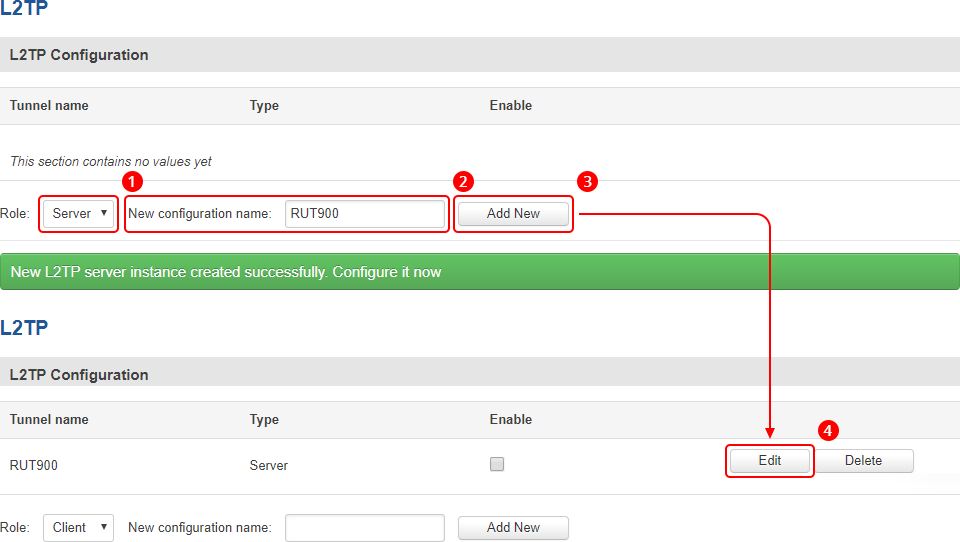
- Login to the router's WebUI and navigate to the Services → VPN → L2TP page and do the following:
- Select Role: Server.
- Enter a custom configuration name.
- Click the Add New button.
- Click the Edit button next to the newly created L2TP instance.
- Configure the L2TP server instance:
- Enable the L2TP instance.
- Enter a User name and Password for authentication for the client.
- Optionaly, set a fixed IP for this client (if left empty, client will receive first free IP from the IP range).
- Don't forget to Save the changes.


IPsec
Next, you must configure a working IPsec Transport connection. This subsection contains instructions on how to do just that. Other used parameters will be defaults; you can find explanations for those parameters in the VPN manual page, IPsec section.
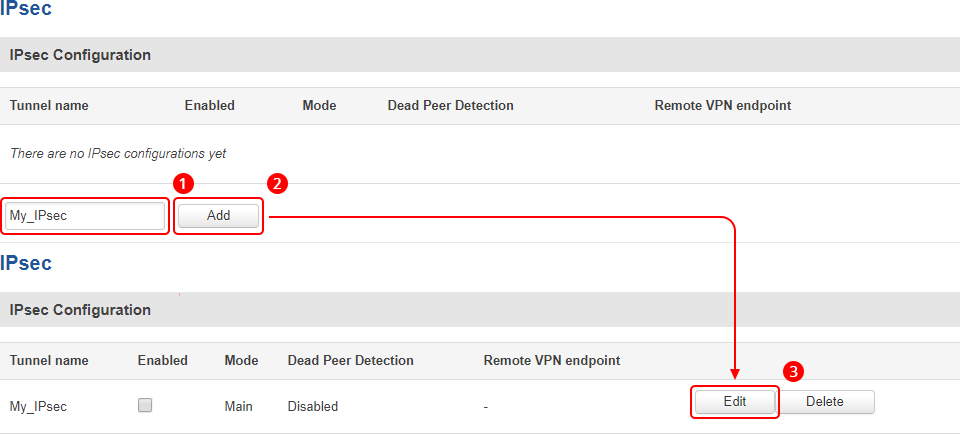
- Go to the Services → VPN → IPsec page and do the following:
- Enter a custom name for the IPsec instance.
- Click the Add button.
- Click the Edit button next to the newly created instance.
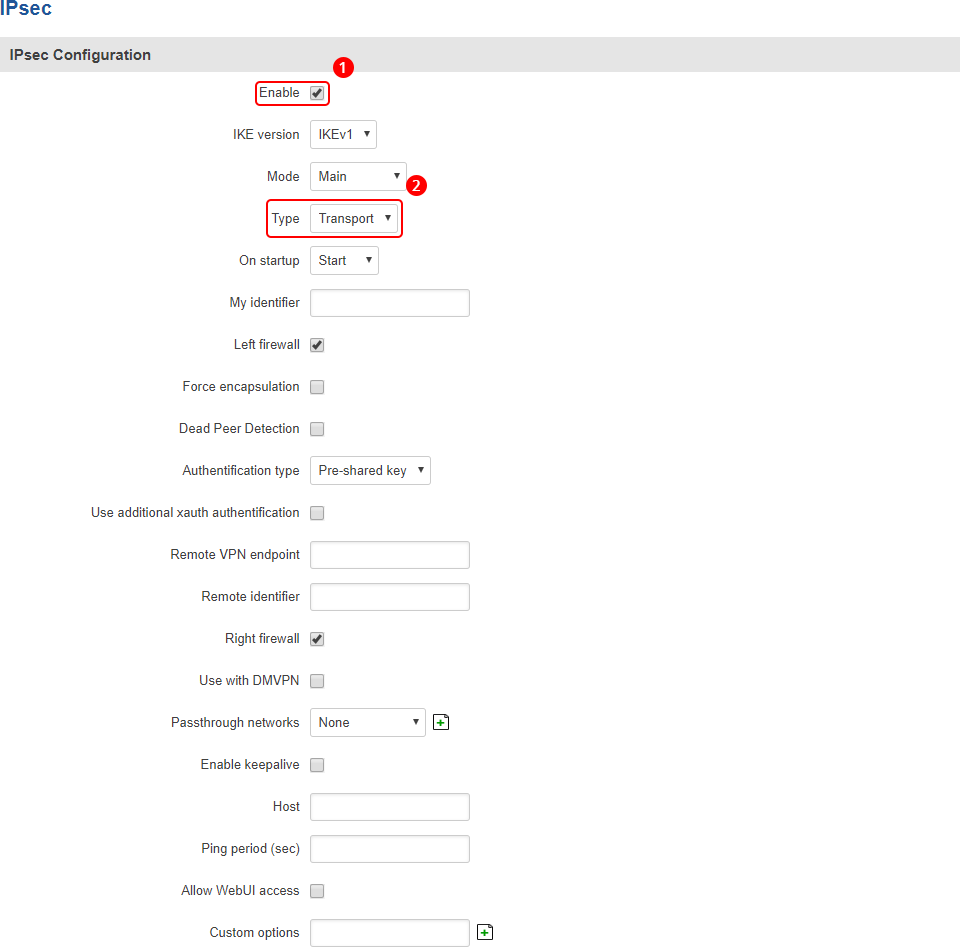
- In the IPsec Configuration page, do the following (and leave the rest as defaults, unless your specific configuration requires otherwise):
- Enable the instance.
- Select Type: Transport and save changes.
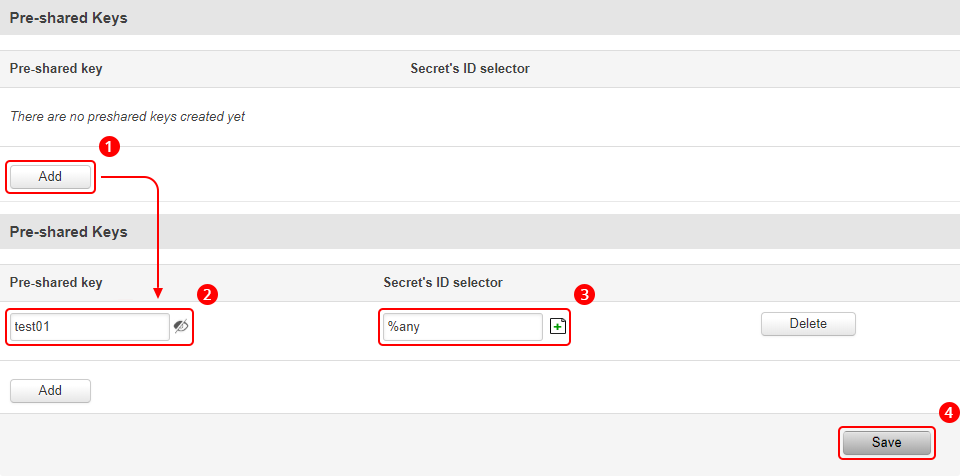
- After having saved the changes, you will be redirected back to the main IPsec page. While there, locate the Pre-shared Keys section and do the following:
- Click the Add button.
- Enter your Pre-shared key.
- Enter %any under Secret's ID selector.
- Click the Save button.


Windows 10 client Configuration
Finally, configure the L2TP/IPsec client on your Windows 10 computer.
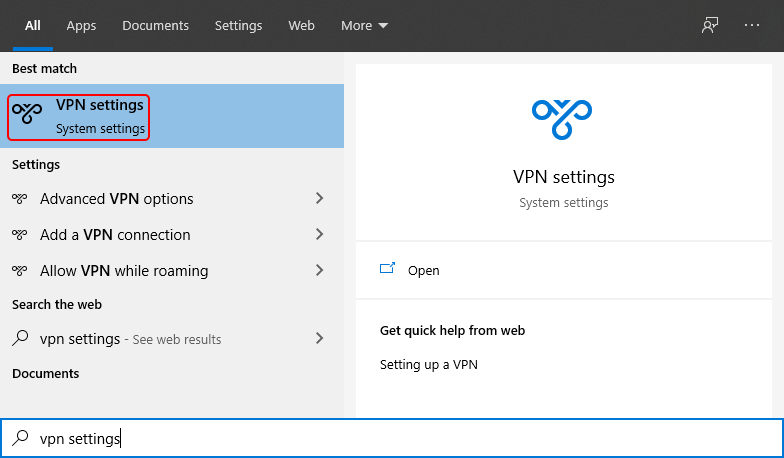
- Type VPN setting in the Windows search bar:
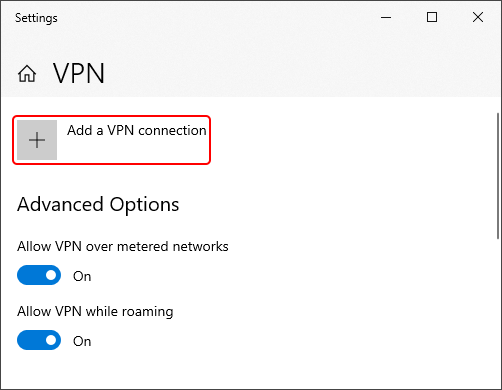
- Click the Add a VPN connection button:
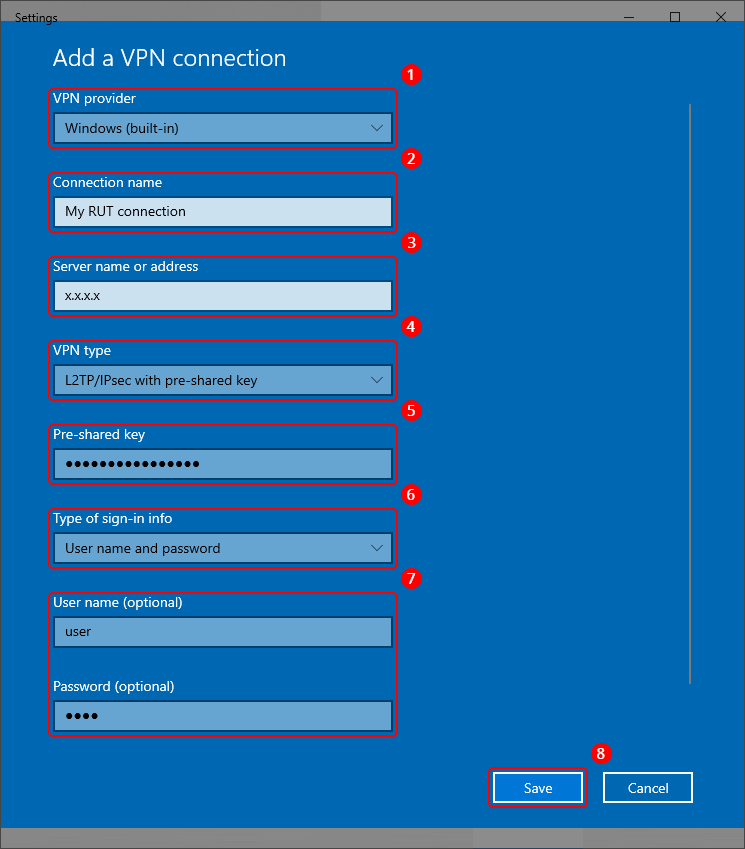
- Configure the following parameters:
- Select VPN provider: WIndows (built-in).
- Enter a custom Connection name.
- Enter the router's WAN IP address into the Server name or address field.
- Select VPN type: L2TP/IPsec with pre-shared key.
- Enter the Pre-shared key exactly as it was specified on the router.
- Select Type of sign-in info: User name and password.
- Enter the User name and Password exactly as they were specified on the router.
- Click Save
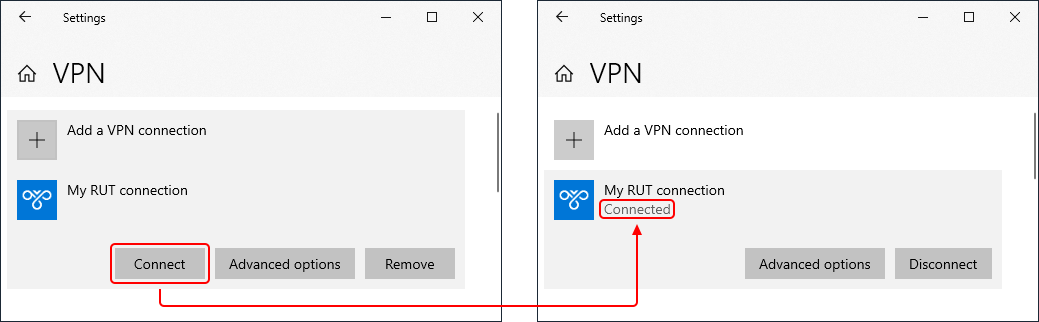
- After you are redirected back to the VPN settings page, locate your new connection and click the Connect button. If the connection was successful, you should see the word "connected" appear under the connection name:
- Other types of VPNs supported by RUT900 devices:


Testing the configuration
Open the Windows Command Prompt and attempt to ping router's L2TP address:

If your computer is receiving replies, then the L2TP/IPsec connection was a success.