Setting up an IPsec tunnel between RUT and Android phone
The information in this page is updated in accordance with firmware version 00.07.13.3
Introduction
In this example, we're going to configure IPsec tunnel between RUT and Android phone. Since L2TP VPN configuration is not available on the newest Android phones, only IPsec tunnel has to be configured.
Configuration overview and prerequisites
Before we begin, let's take a look at the configuration that we are attempting to achieve and the prerequisites that make it possible.
Prerequisites:
- RUT/RUTX series router with RUTOS firmware and Public IP (information about public and private IPs can be found here);
- An end device (PC, Laptop) for configuration;
- Android phone with Android 13 or newer version;
Topology
In this configuration example we have a Teltonika router on one end of the tunnel and an Android phone on the other end. Router has a Public Static IP address and is reachable from the internet, phone in this case has a Private IP provided by the ISP.
Router configuration
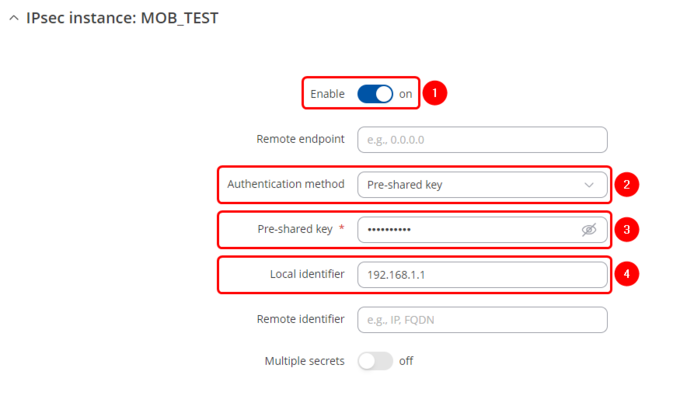
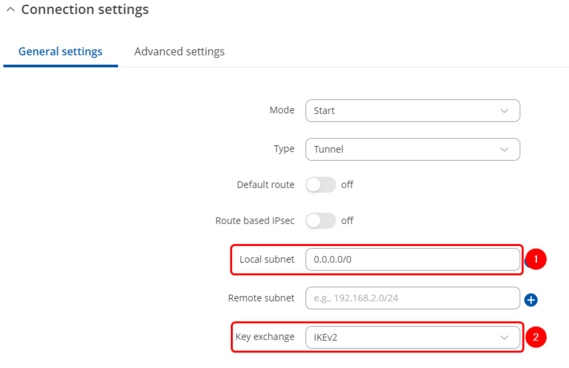
Start by configuring the router. Login to the WebUI, navigate to Services → VPN → IPsec and add a new IPsec instance. Configure everything as follows.
Note: Not specified fields can be left as is or changed according to your needs.
Instance configuration
 |
|
|---|---|
|
Connection configuration
 |
|
|---|---|
|
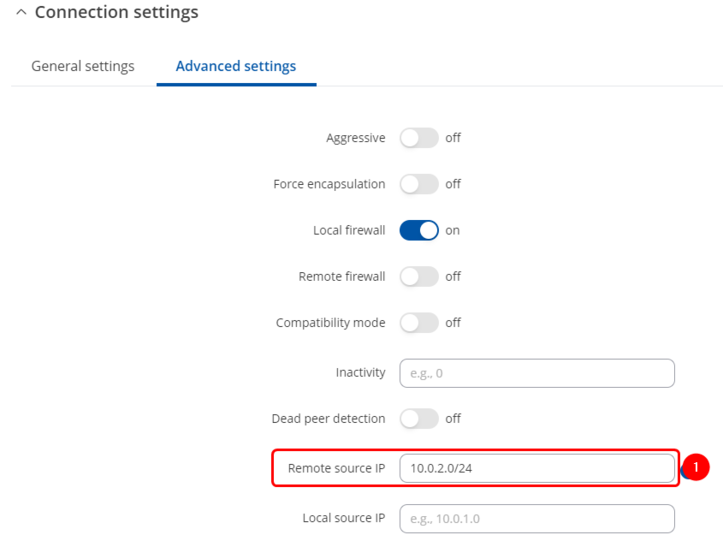
Advanced Connection settings
 |
|
|---|---|
|
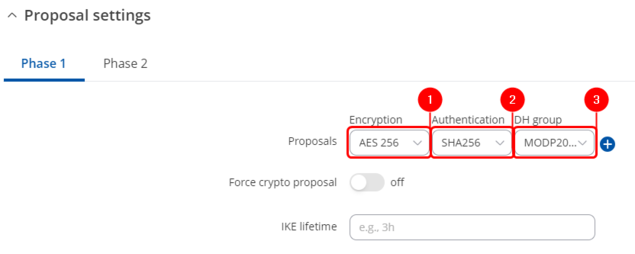
Proposal configuration
 |
|
|---|---|
|
 |
|
|---|---|
|
Android configuration
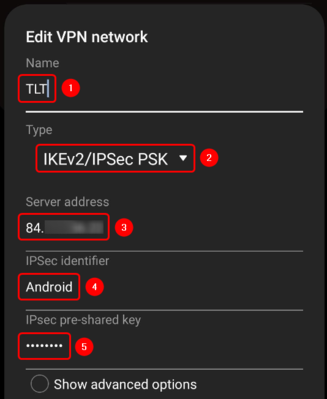
Open Settings, navigate to Connections → More connection settings → VPN and Add VPN profile (VPN configuration could be placed in a different location, which could vary from phone to phone, if you're not able to find the settings, please refer to user manual). Configure everything as follows.
VPN Profile configuration
Testing the configuration
If you've followed all the steps presented above, your configuration should be finished. But as with any other configuration, it is always wise to test the setup in order to make sure that it works properly.
To test the connectivity, initiate connection from the Phone.
Using the ipsec status command we can see that IPsec tunnel is successfully established between the devices. The command output on RUT:
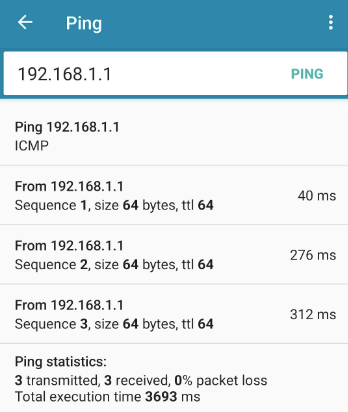
Also, as the router's LAN should be reachable from the phone, we can try pinging the router using Ping tools application:
See also
IPsec on Teltonika Networks devices


