Difference between revisions of "Cumulocity Configuration"
From Teltonika Networks Wiki
Kristijonasb (talk | contribs) |
|||
| (6 intermediate revisions by 4 users not shown) | |||
| Line 32: | Line 32: | ||
<ul> | <ul> | ||
<li>Log in to your device's WebUI.</li> | <li>Log in to your device's WebUI.</li> | ||
| − | <li><b>Go to | + | <li><b>Go to Services → Package Manager</b> and install Cumulocity.<br>[[File:Networking_rutos_configuration_examples_cumulocity_3.png|border|class=tlt-border]]</li> |
<li></b>Go to Services → Cloud Solutions → Cumulocity</b> and configure it as follows. | <li></b>Go to Services → Cloud Solutions → Cumulocity</b> and configure it as follows. | ||
<ol> | <ol> | ||
<li>Enable Cumulocity</li> | <li>Enable Cumulocity</li> | ||
| − | |||
<li>Specify your Cumulocity server's address in the 'Server Address' field.</li> | <li>Specify your Cumulocity server's address in the 'Server Address' field.</li> | ||
<li>Set a connection frequency interval (at least 1 minute).</li> | <li>Set a connection frequency interval (at least 1 minute).</li> | ||
<li>Click 'Save & Apply'.</li> | <li>Click 'Save & Apply'.</li> | ||
| − | </ol>[[File: | + | </ol>[[File:Networking_rutos_configuration_examples_cumulocity_4.png|border|class=tlt-border]] |
</li> | </li> | ||
</ul> | </ul> | ||
| Line 59: | Line 58: | ||
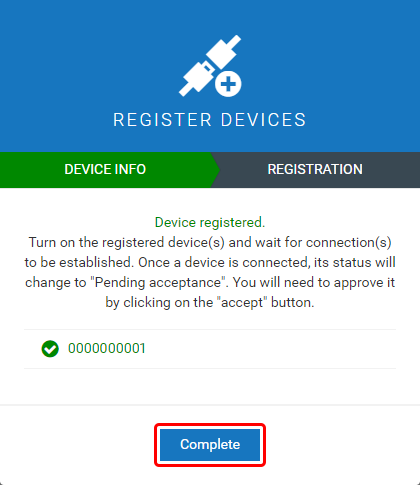
<li>If the device connects successfully, you should see an indication similar to the one below. Click 'Complete' to finish the registration.<br>[[File:Networking_rutos_configuration_examples_cumulocity_8.png|border|class=tlt-border]]</li> | <li>If the device connects successfully, you should see an indication similar to the one below. Click 'Complete' to finish the registration.<br>[[File:Networking_rutos_configuration_examples_cumulocity_8.png|border|class=tlt-border]]</li> | ||
</ul> | </ul> | ||
| − | |||
| − | |||
| − | |||
| − | |||
| − | |||
| − | |||
| − | |||
| − | |||
| − | |||
| − | |||
| − | |||
| − | |||
| − | |||
| − | |||
| − | |||
| − | |||
| − | |||
| − | |||
| − | |||
| − | |||
| − | |||
| − | |||
| − | |||
| − | |||
| − | |||
| − | |||
| − | |||
| − | |||
| − | |||
| − | |||
| − | |||
| − | |||
| − | |||
| − | |||
| − | |||
| − | |||
| − | |||
| − | |||
| − | |||
| − | |||
| − | |||
| − | |||
| − | |||
| − | |||
| − | |||
| − | |||
| − | |||
| − | |||
| − | |||
| − | |||
| − | |||
| − | |||
| − | |||
| − | |||
| − | |||
| − | |||
| − | |||
| − | |||
| − | |||
| − | |||
| − | |||
| − | |||
| − | |||
| − | |||
| − | |||
| − | |||
| − | |||
| − | |||
| − | |||
| − | |||
| − | |||
| − | |||
| − | |||
| − | |||
| − | |||
| − | |||
| − | |||
| − | |||
| − | |||
| − | |||
| − | |||
| − | |||
| − | |||
| − | |||
| − | |||
| − | |||
| − | |||
| − | |||
| − | |||
| − | |||
| − | |||
| − | |||
| − | |||
| − | |||
| − | |||
| − | |||
| − | |||
| − | |||
| − | |||
| − | |||
| − | |||
| − | |||
| − | |||
| − | |||
| − | |||
| − | |||
| − | |||
| − | |||
| − | |||
| − | |||
| − | |||
| − | |||
| − | |||
| − | |||
| − | |||
| − | |||
| − | |||
| − | |||
| − | |||
| − | |||
| − | |||
| − | |||
| − | |||
| − | |||
| − | |||
| − | |||
| − | |||
| − | |||
| − | |||
| − | |||
| − | |||
| − | |||
| − | |||
| − | |||
| − | |||
| − | |||
| − | |||
| − | |||
| − | |||
| − | |||
| − | |||
| − | |||
| − | |||
| − | |||
| − | |||
| − | |||
| − | |||
| − | |||
| − | |||
| − | |||
| − | |||
| − | |||
| − | |||
| − | |||
| − | |||
| − | |||
| − | |||
| − | |||
| − | |||
| − | |||
| − | |||
| − | |||
| − | |||
| − | |||
| − | |||
| − | |||
| − | |||
| − | |||
| − | |||
<!--==Configuring and launching example application== | <!--==Configuring and launching example application== | ||
| Line 296: | Line 126: | ||
{{Template: trademark disclaimer}} | {{Template: trademark disclaimer}} | ||
--> | --> | ||
| − | |||
Revision as of 13:21, 25 September 2020
Main Page > General Information > Configuration Examples > Third party services > IoT platforms > Cumulocity ConfigurationCumulocity IoT is a cloud-based, real-time IoT management platform that's also compatible with Teltonika-Networks devices.
Introduction
This article contains step-by-step instructions on how to set up a Cumulocity server and register a Teltonika-Networks device on it.
Basic setup
Basic setup consists of:
- Creating a Cumulocity account
- Configuring Cumulocity on a Teltonika-Networks device
- Registering the device on your Cumulocity server
Create an account
First of all, you will need to set up your Cumulocity environment (server).
- Register an account on Cumulocity.
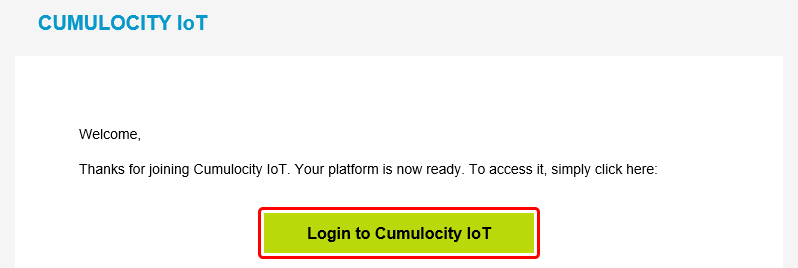
- Wait a few minutes after the registration, open your email account and look for an email with the subject 'Welcome to Cumulocity IoT'. Open it and click 'Login to Cumulocity IoT'.
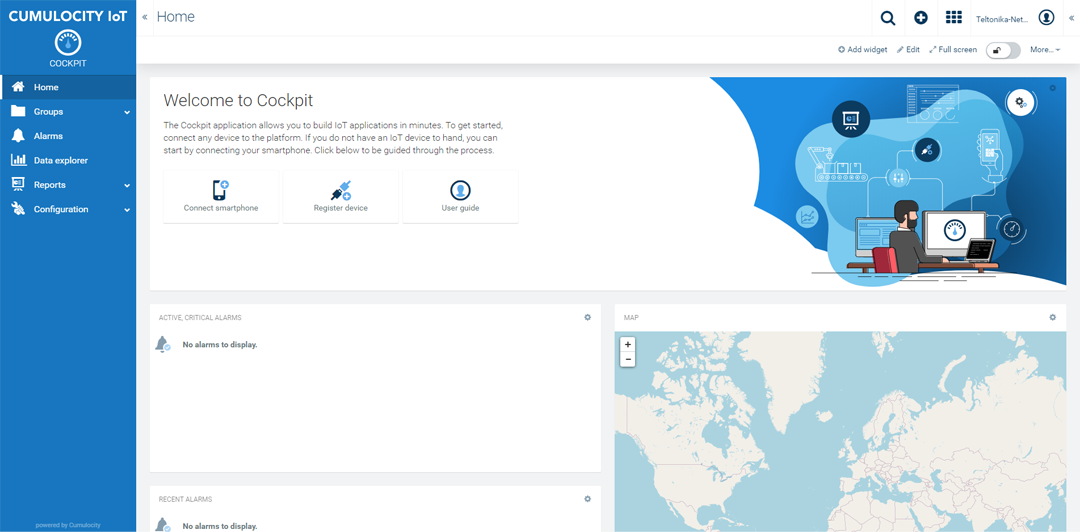
- Upon a successful login you should be redirected to the Cumulocity Cockpit.


Configure a device
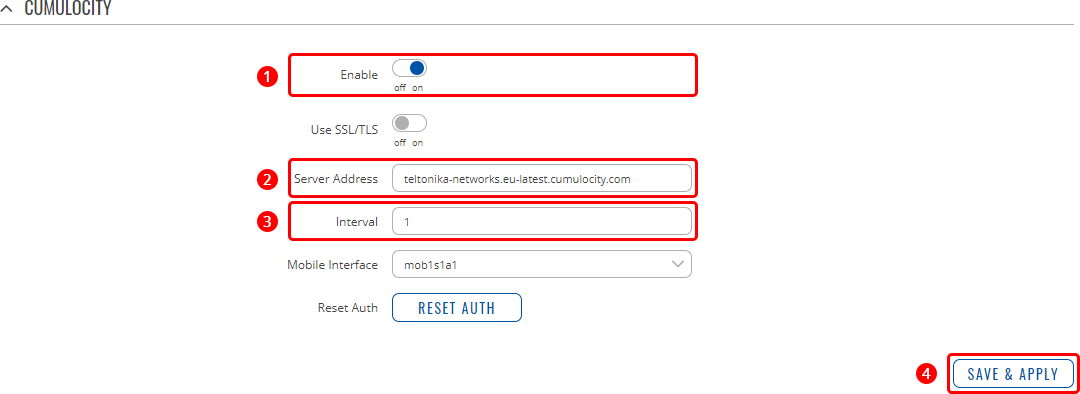
Set up Cumulocity on your Teltonika-Networks device.
- Log in to your device's WebUI.
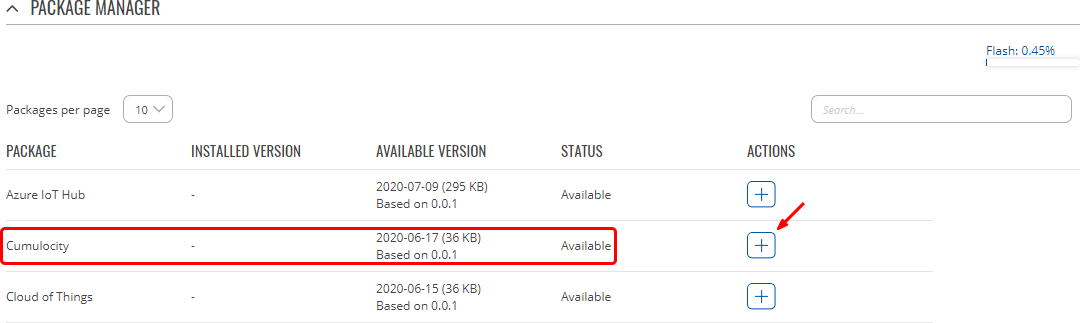
- Go to Services → Package Manager and install Cumulocity.
- Go to Services → Cloud Solutions → Cumulocity and configure it as follows.
- Enable Cumulocity
- Specify your Cumulocity server's address in the 'Server Address' field.
- Set a connection frequency interval (at least 1 minute).
- Click 'Save & Apply'.


Register a device
Register your Teltonika-Networks device on Cumulocity.
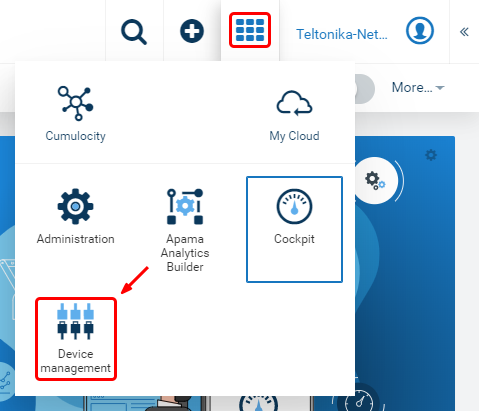
- Find the 'Application switcher' in the top-right corner of the Cumulocity dashboard and go to 'Device management'.
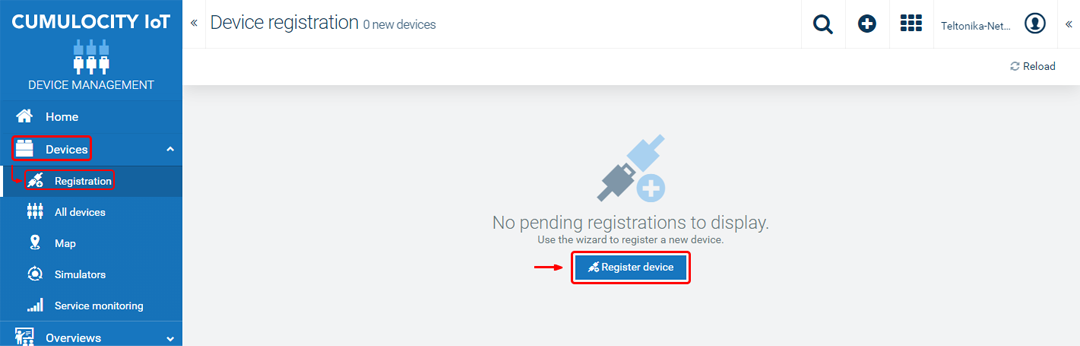
- Then expand the 'Devices' tab in left-hand menu, go to 'Registration' and click 'Register device'.
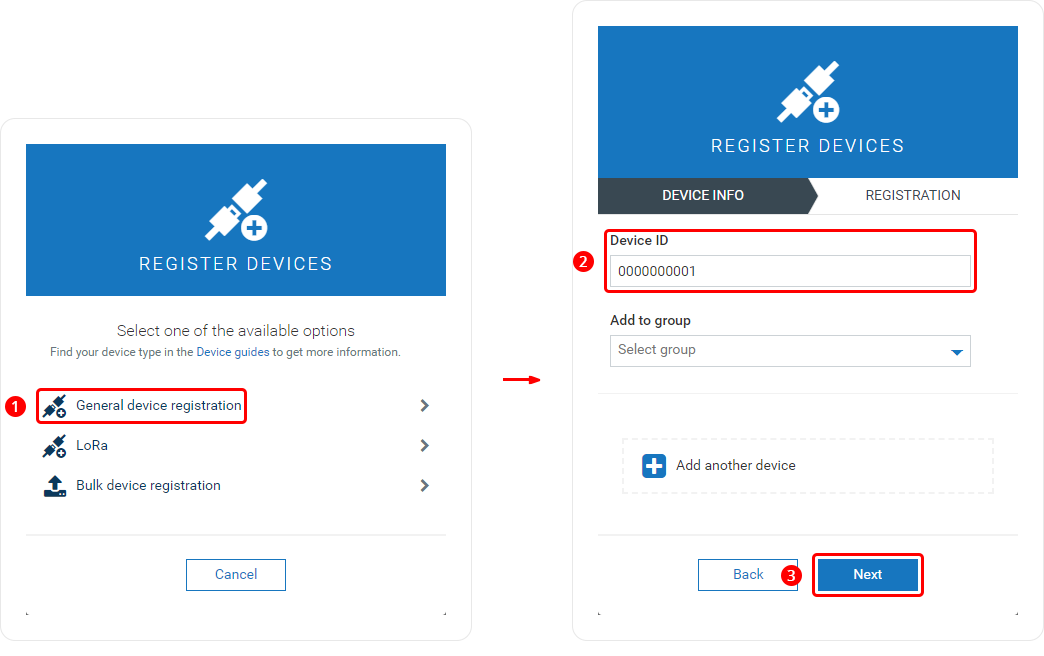
- Complete the registration.
- Choose 'General device registration'.
- Enter your device's serial number into the 'Device ID' field. The serial number can be found on the device's housing, box or in the WebUI, Status → System page.
- Click 'Next'.
- If the device connects successfully, you should see an indication similar to the one below. Click 'Complete' to finish the registration.