MQTT broker bridge
From Teltonika Networks Wiki
Revision as of 17:04, 3 August 2023 by PauliusRug (talk | contribs)
Main Page > General Information > Configuration Examples > Router control and monitoring > MQTT broker bridge
Introduction
The goal of this manual is to help configuring Teltonika Networking Devices to be able to act as a MQTT broker bridge.
MQTT broker configuration
For this example you will need to enable the MQTT broker on your Teltonika device, that can be achieve using these steps:
- In WebUI navigate to Services -> MQTT -> Broker.
- Enable MQTT broker.
- Select the Local Port, in this example we will use port number 1883.
- Enable Remote Access.
MQTT broker bridge configuration
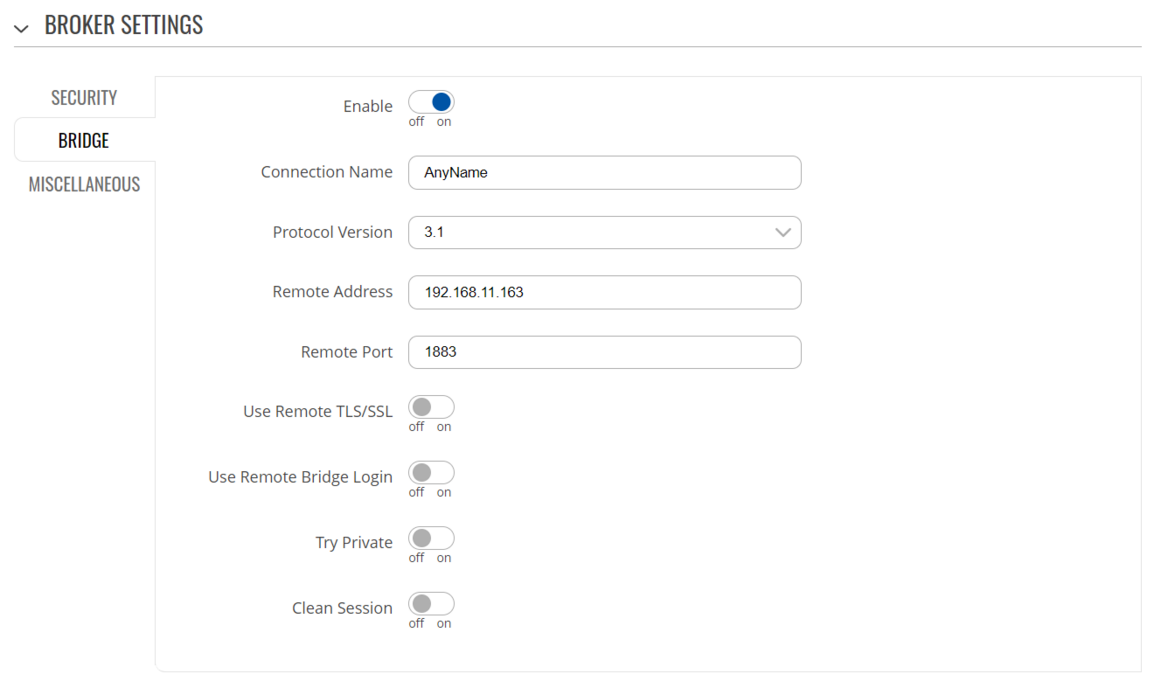
Next, you will need to add the bridge configuration. You will need to go down bellow broker configuration and select the tab called BRIDGE. There we need to add the make the following actions:
- Enable the option Enable.
- Enter the name for this connection, this option is for easy management.
- Chose the MQTT Protocol Version.
- Enter the Remote Address of the MQTT broker you want to make the bridge with.
- Enter the Remote Port of the MQTT broker you want to make the bridge with.
- Enter of upload any of the files or keys required for the connection to the remote broken. In this example no authentication method is used.
Selecting topics
For the broker to be able to send the topics across the MQTT bridge you will need to specify the topics in the TOPICS menu. Example topics are displayed in the image bellow.


