RMS Alerts menu
Summary
The Alerts top control menu located in the Management section. Can be used to set up alerts the user receive via email when a specific event occurs (signal strength changes, SIM switch occurs, mobile data limit is reached, etc.). This section of the RMS user manual provides an overview of the functions of the Alerts menu.
Create alert
The Create alert is used to set up alerts for the selected device in the RMS. To create alert(s) go to Left sidebar panel (Management → Devices) select desired devices and move your mouse pointer to the top menu.
Move your mouse pointer to the Top control Alerts menu and select Create alerts (Alerts → Create alert).
The Create alert function is used to set up a new custom alert event for a specified device.

Instructions
- Select the device for which you want to create alert(s).
- Move your mouse pointer to the top control Alerts menu and select Create alert.
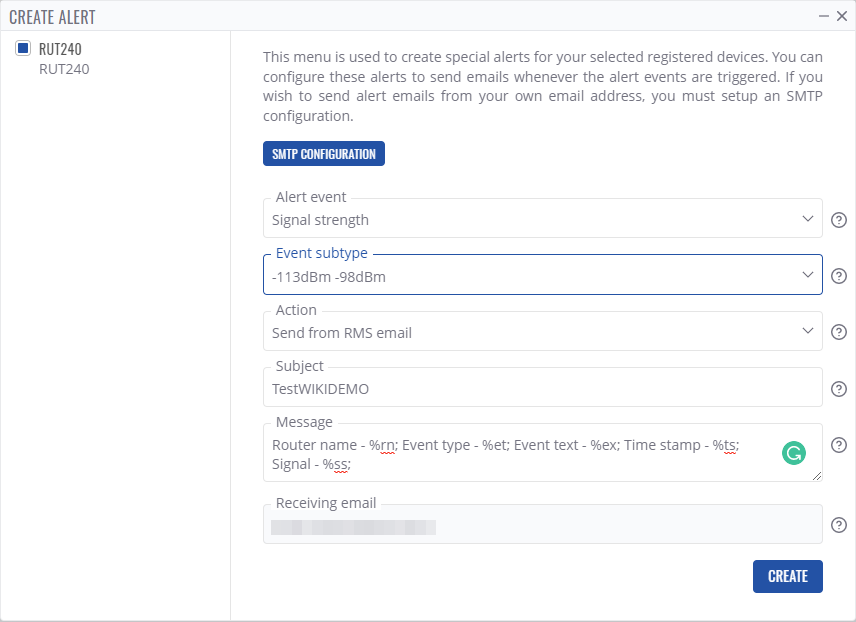
- A pop-up window with alert event, event subtype and other information for selected device will appear.
- Fill out and select the appropriate fields in the window and click the Save button.
- A new pop-up showing alert status for that device will appear. If successful you will get ✔ Device alert created successfully in the Status column.
Device alerts
The Device alerts purpose is manage alerts that were created for the selected device in the RMS. To manage alert(s) go to Left sidebar panel (Management → Devices) and select devices.
Move your mouse pointer to the Top control Alerts menu and select Device alerts (Alerts → Device alerts).
The Device alerts function is used to view and delete already existing alerts on a device.
Instructions
- Select the device for which you want to manage alert(s).
- Move your mouse pointer to the top control Alerts menu and select Device alerts.
- A pop-up window listing alerts for the selected device will appear.
Delete device alert
- Select the device for which you want to manage alert(s).
- Move your mouse pointer to the top control Alerts menu and select Device alerts.
- A pop-up window will be shown a list of alerts existing in the selected device.
- You can delete alerts by clicking the
 symbol located next to each alert.
 - In the next window you will get a Remove device alert confirmation message. Click Yes to proceed.
- After the deletion is complete in the Status column you will get a message: Alert removed successfully.
Email SMTP
The Email SMTP is used to configure email server settings. To configure go to Left sidebar panel (Management → Devices), select the devices on which you'd like to create an alert.
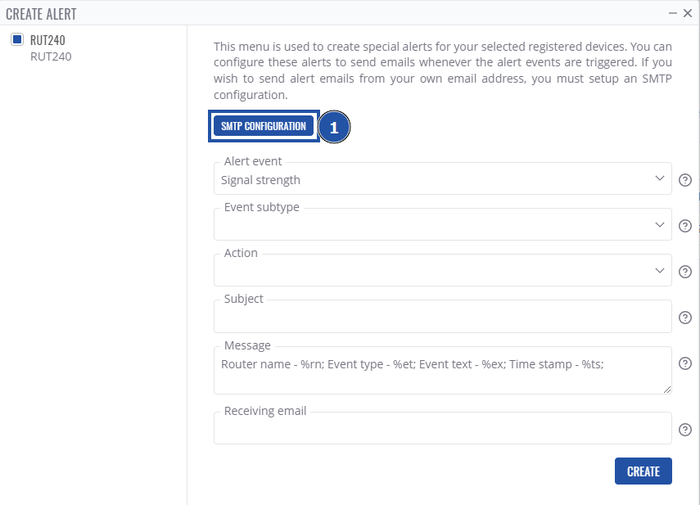
Move your mouse pointer to the Top control Alerts menu and select Create alert (Alerts → Create alert). Here, you'll have the option to configure SMTP:
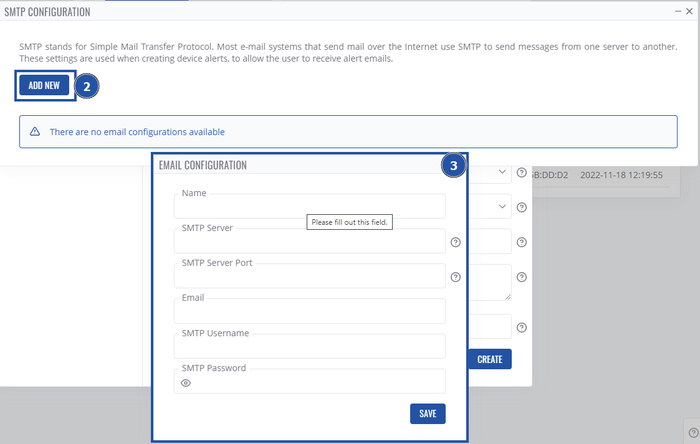
Clicking on SMTP configuration will open a list of existing SMTP configurations and let you create a new one, fill out all fields and press Save.
SMTP stands for Simple Mail Transfer Protocol. Most e-mail systems that send mail over the Internet use SMTP to send messages from one server to another. Email SMTP settings are used when creating device alerts, to allow the user to receive alert emails.
Here, once you have at least one SMTP configuration, you'll be able to view it in the list, remove or edit it.
Instructions
- Move your mouse pointer to the Configuration menu and click Email SMTP.
- You will get a pop-up, if it's the first time you configure Email SMTP, you will click the Add new button.
- In the next window, you will be able to set Email configuration settings.
- Finally, click the Save button when ready.
- The next window will display configuration progress.
- Click the Close button and close the Email SMTP window.


