RMS Configuration menu
Summary
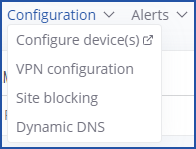
The Configuration top control menu is located in the Devices section. It can be used to configure device(s) registered on your RMS profile. This section of the RMS user manual provides an overview of the functions of the Configuration menu.
Configure devices
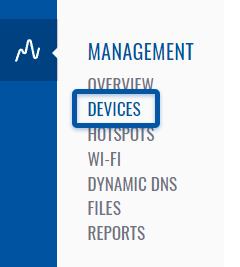
The Configure device option allows you to modify configuration for your selected device(s). To configure your devices go to the RMS web page, Left sidebar panel, (Management → Devices) and click on Devices submenu.
Scroll your mouse pointer to the Top control Configuration menu and select Configure device (Configuration → Configure device).
The Configuration function is used to change configuration of devices selected from your device table. You will get different configuration options depending on the device.
Step by step instructions
- Select the device(s) that you wish to configure.
- Move your mouse pointer to the Configuration menu and click Configure device.
- You will get a pop-up box, where you will be able to choose settings you want to configure.
- Fill out the information and click Save button when ready.
- In the next window will display configuration progress.
- Click the Close button and close the Configure devices window.
Important!
- Allow some time for your device(s) to load new settings. It might take some time.
Upload backup
Using Upload backup option you can upload configuration (backup) file for your selected device(s). To upload files go to the RMS web page, Left sidebar panel, (Management → Devices) and click on Devices submenu.
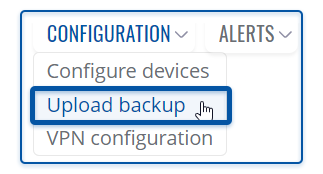
Move your mouse pointer to the Top control Configuration menu and select Upload backup (Configuration → Upload backup).
The Upload backup option provides you with the ability to upload configuration files to devices registered on your RMS profile.
Step by step instructions
Read the instructions to learn how to upload configuration (backup) for your device(s).
- Select the device(s) that will upload configuration (backup) file to.
- Move your mouse pointer to the Configuration menu and click Upload backup.
- After a pop-up window will appear. Select the configuration file you've uploaded to RMS previously from a drop-down menu. And click Select button.
- In the next window will display configuration upload progress.
- After the configuration (backup) is uploaded in the Status column you will you will get a message: ✔ Done.
Important!
- Allow some time for your device(s) to load new configuration. They wont be reachable for up to 1 minute.
- When the ⬤ red circle (Offline) will change to ⬤ green circle (Online) configuration got uploaded and device(s) are fully operational.
VPN Configuration
The VPN Configuration gives you an option set up a VPN. To configure your devices go to the RMS web page, Left sidebar panel, (Management → Devices) and select desired devices.
Move your mouse pointer to the Top control Configuration menu and select VPN Configuration (Configuration → VPN Configuration).
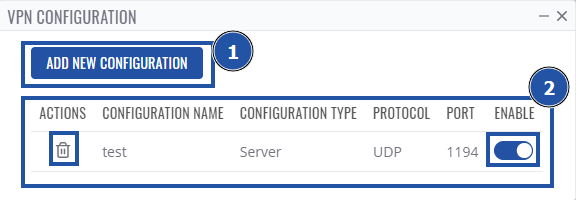
A pop-up window will appear, there you'll be able to see existing VPN configurations or create new ones. The VPN Configuration function is used to set up the VPN configuration of devices selected from your device table. You will get different configuration options depending on the device.
Step by step instructions
- Select the device(s) that you wish to configure.
- Move your mouse pointer to the Configuration menu and click VPN Configuration.
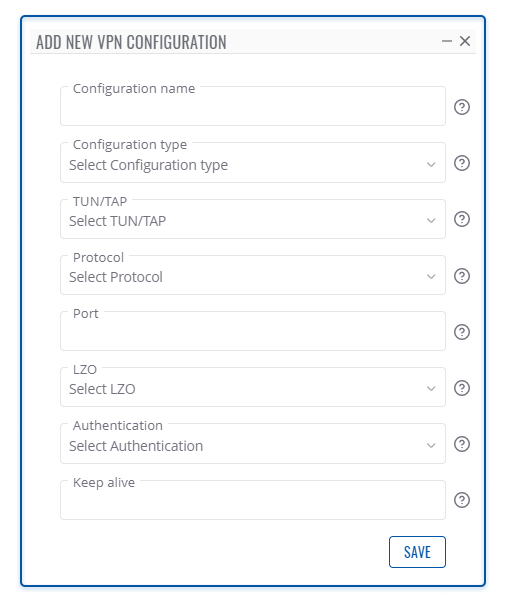
- You will get a pop-up, if it's the first time you perform a VPN configuration, you will click the Add new configuration button.
- In the next window, you will be able to set VPN settings.
- For additional information on how to configure, look at configuration examples for RUTX11 and RUT955 routers.
- Finally, click the Save button when ready.
- The next window will display configuration progress.
- Click the Close button and close the VPN configuration window.
Site blocking
The "Site blocking" allows you to configure device's web filter from RMS. To configure your devices go to the RMS web page, Left sidebar panel, (Management → Devices) and select desired devices.
Move your mouse pointer to the Top control Configuration menu and select Site Blocking (Configuration → Site Blocking).
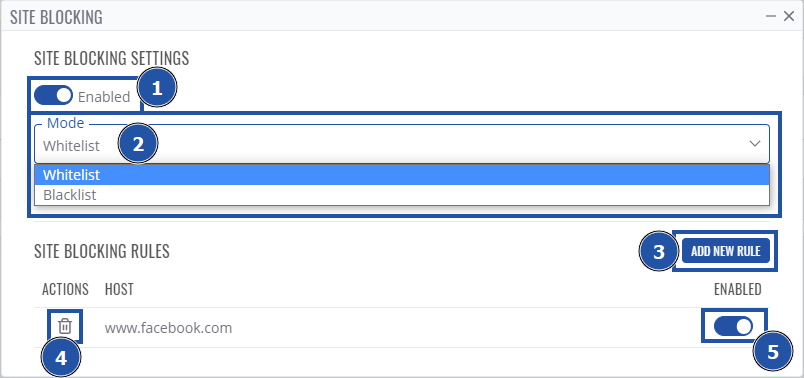
A pop-up window will appear, here you'll be able to:
- Enable/disable site blocking.
- Choose site blocking mode - Whitelist (To only allow selected domains) or Blacklist (To only block selected domains).
- Add a new domain rule to allow/block.
- Remove existing rule.
- Enable/disable a specific rule.
Dynamic DNS
The "Dynamic DNS" lets you configure DDNS service on your selected RMS devices. To do so, go to the RMS web page, Left sidebar panel, (Management → Devices) and select desired devices.
Move your mouse pointer to the Top control Configuration menu and select Dynamic DNS (Configuration → Dynamic DNS).
A pop-up window will appear:

Here you'll see a list of existing DDNS rules. Additionally, you can:
- Add a new rule.
- Edit or remove an existing one.
- Enable/disable a specific rule.
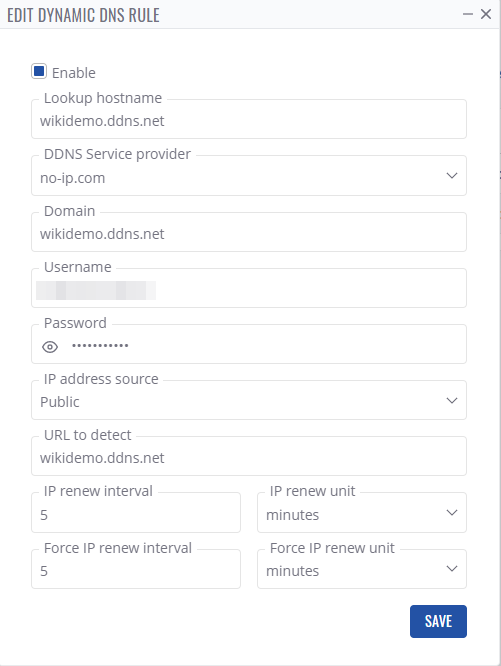
By clicking Add new rule a window of DDNS configuration will appear same as in WebUI:
Provide the necessary information and click Save to add a new DDNS rule.
