1NCE Configuration
From Teltonika Networks Wiki
Revision as of 16:59, 10 February 2022 by LukasU (talk | contribs) (Created page with "<b>1NCE</b> is the global Tier-1 IoT Carrier specialized in providing managed connectivity services for low bandwidth IoT applications ==Introduction== This article contains...")
Main Page > General Information > Configuration Examples > VPN > 1NCE Configuration
1NCE is the global Tier-1 IoT Carrier specialized in providing managed connectivity services for low bandwidth IoT applications
Introduction
This article contains step-by-step instructions on how to set up Teltonika-Networks devices as 1NCE OpenVPN clients.
Downlowding configuration files
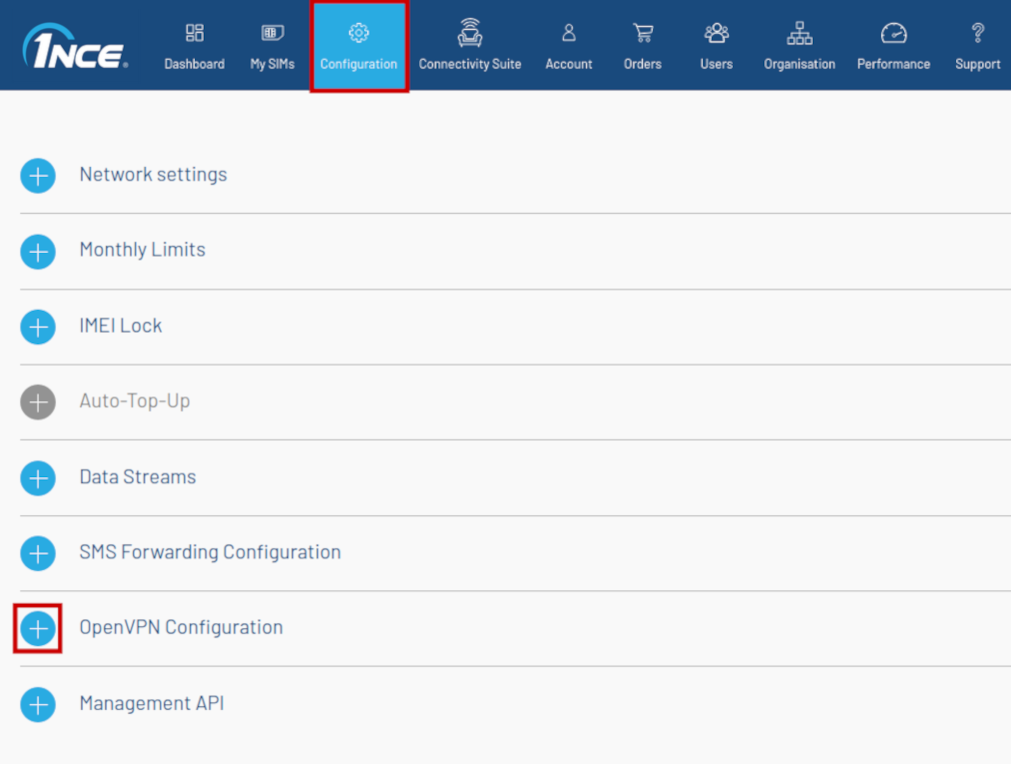
- Go to https://portal.1nce.com/portal/customer/login and log in.
- Open the 'Configuration' tab and click the on 'OpenVPN Configuration' button.
- Click the newly created network to begin configuration.
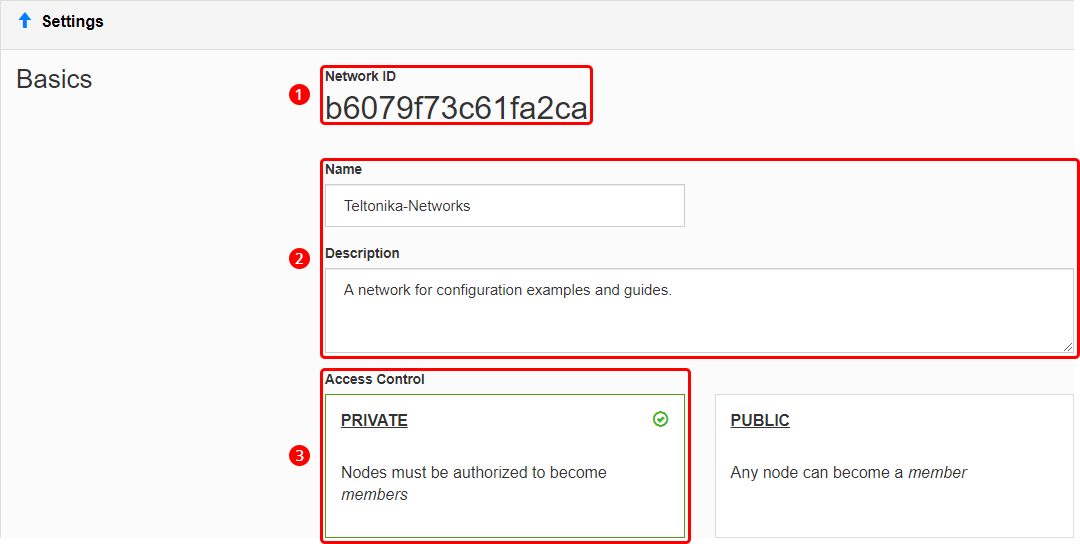
- Before configuring anything else, you may want to set up some basic settings.
- Copy the Network ID; you will need it later for ZeroTier node configuration.
- Optionally, set up a name and description for your network for easier management.
- Select 'Private' access control type; unless you want nodes to connect freely, without authorization.
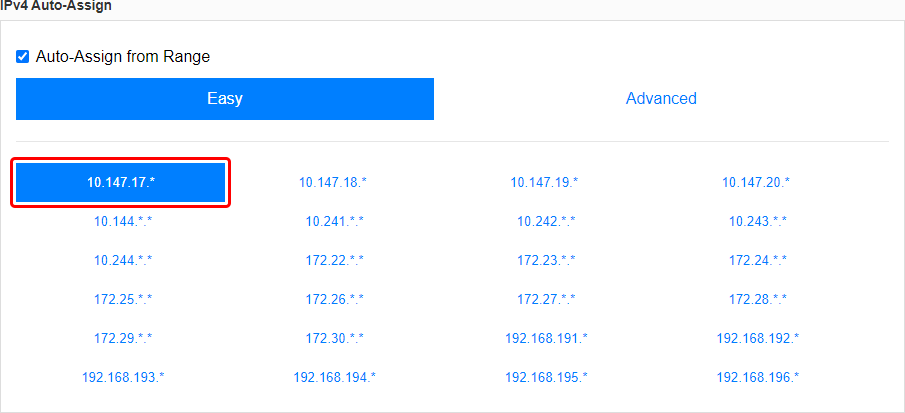
- Scroll down to find the 'IPv4 Auto-Assign' section. Select one of the provided private IP ranges for your network or click 'Advanced' and set up the range manually. For this example we'll be using the 10.147.17.* selection which means our network will be using the 10.147.17.0/24 IP range.