Setting up a GRE over IPsec tunnel between Teltonika Networks and Mikrotik devices
From Teltonika Networks Wiki
Main Page > General Information > Configuration Examples > VPN > Setting up a GRE over IPsec tunnel between Teltonika Networks and Mikrotik devices
Introduction
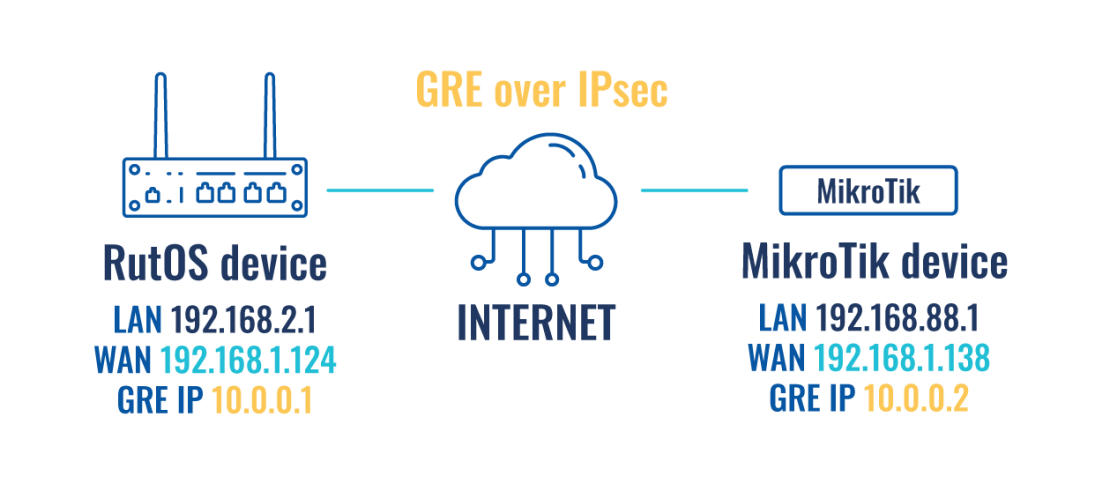
This article provides a configuration example with details on how to configure a GRE over IPsec connection between MikroTik and RUTOS devices.
Prerequisites
- Teltonika Networks router (RUTX11 will be used in this case).
- MikroTik device.
- Both devices must have WAN access with a static public IP.
- At least one end device (PC, Laptop) to configure the routers.
Configuration scheme
RUTOS device configuration
- Login to the router's WebUI, navigate to the Services → VPN → GRE page.
- Add a new GRE instance by entering custom New configuration name and clicking Add button.
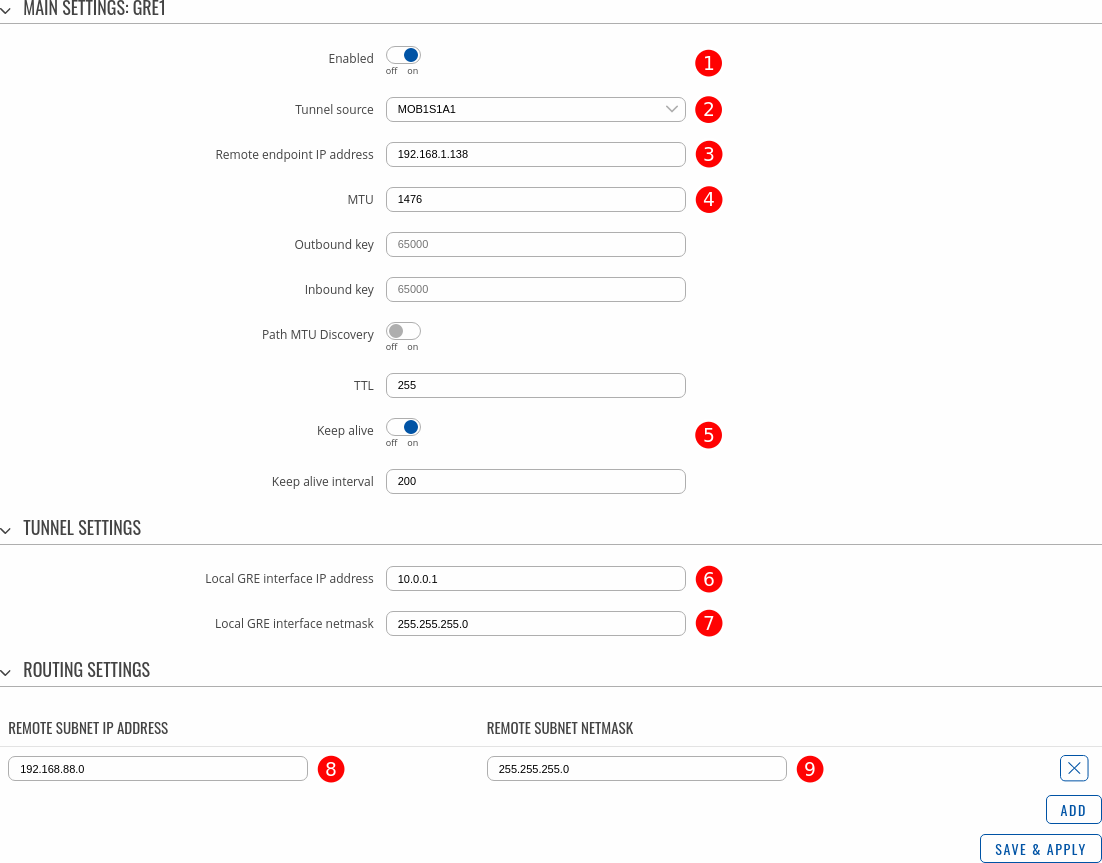
- A configuration window should appear. Configure the GRE instance accordingly:
- Enabled - ON.
- Tunnel source - select the network interface with Public IP which is used to establish GRE tunnel.
- Remote endpoint IP address - Public IP address of MikroTik device.
- MTU - 1476
- Keep alive - ON
- Local GRE interface IP address - 10.0.0.1
- Local GRE interface IP netmask - 255.255.255.0
- Remote subnet IP address - 192.168.88.0
- Remote subnet netmask - 255.255.255.0
- Navigate to Services → VPN → IPsec and create a new instance.
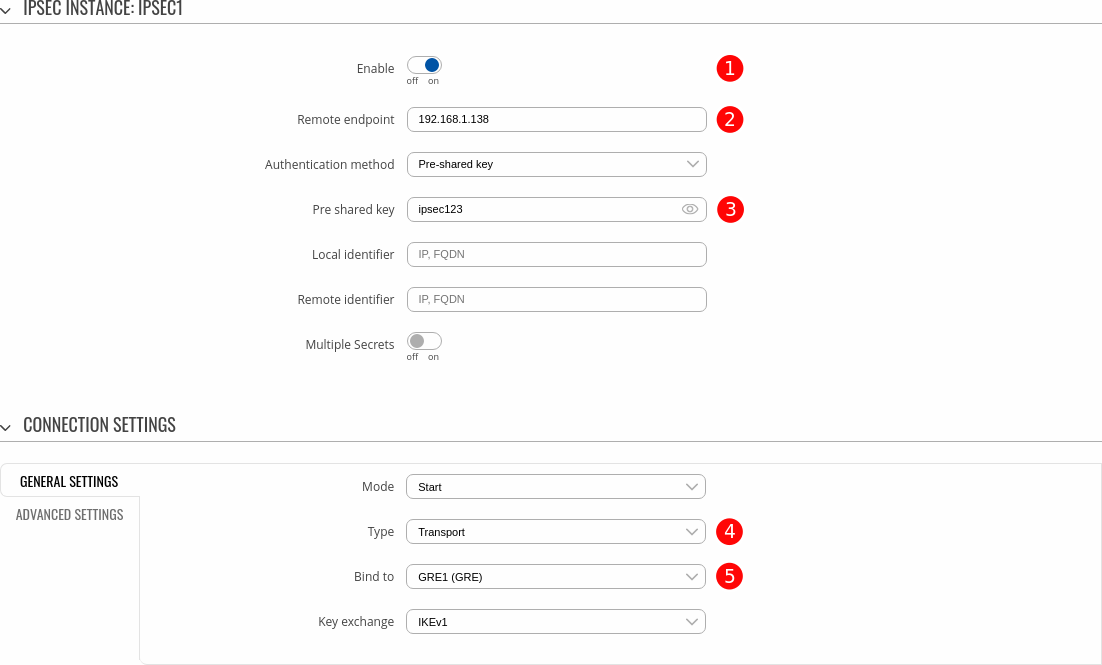
- A configuration window should appear. Configure the IPsec instance accordingly:
- Enabled - ON
- Remote endpoint - 192.168.1.138
- Pre shared key - ipsec123
- Type - Transport.
- Bind to - GRE1 (GRE).
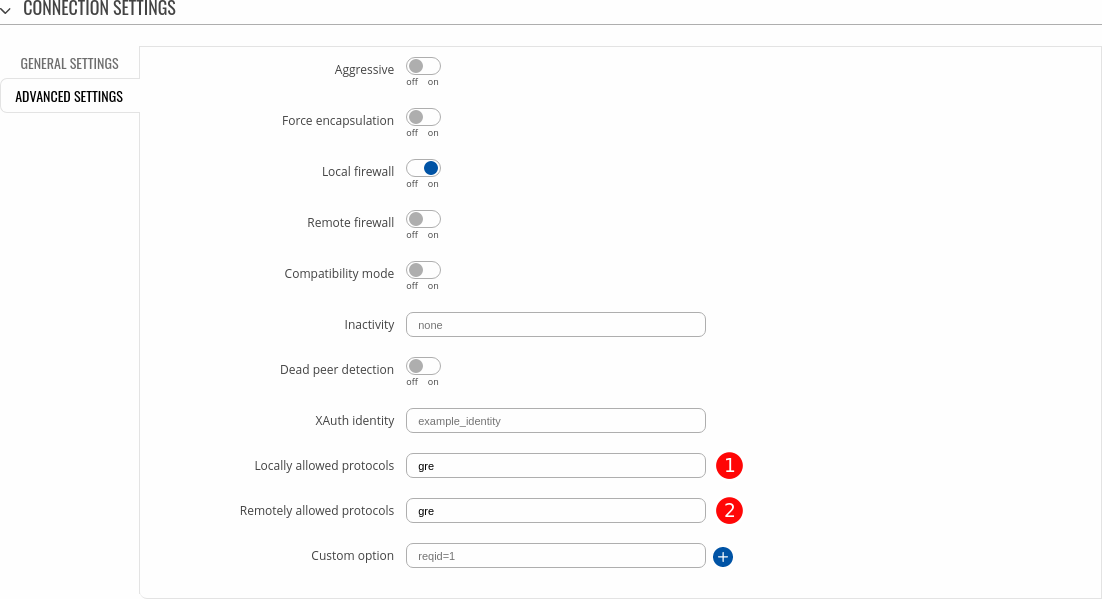
- In the same configuration window, navigate to Connection Settings → Advanced Settings:
- Locally allowed protocol - gre
- Remotely allowed protocol - gre
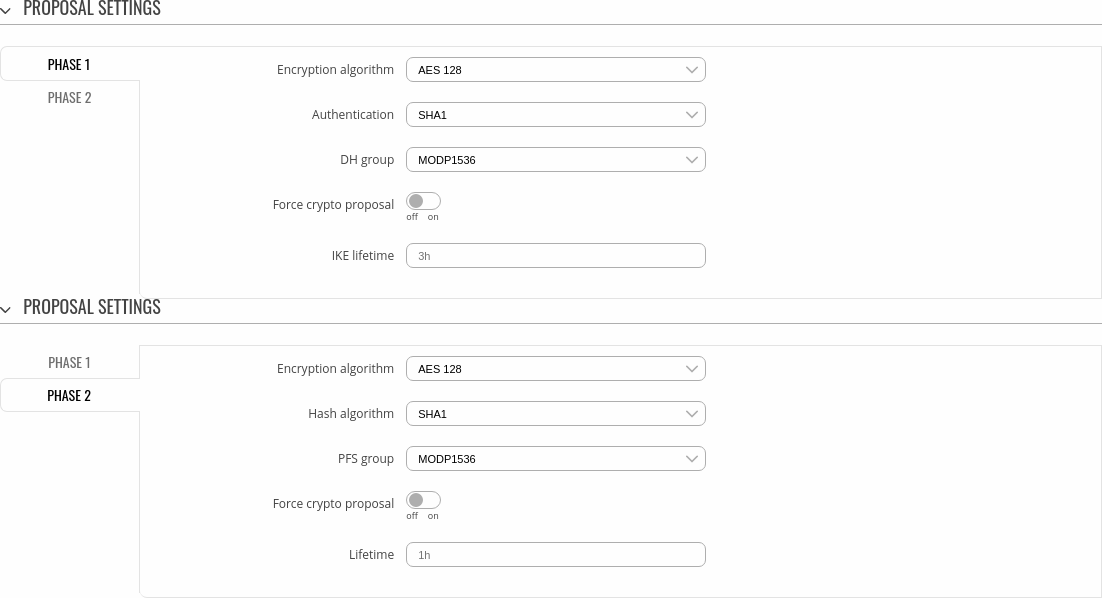
- Proposal Settings must match values configured on MikroTik device.
MikroTik configuration
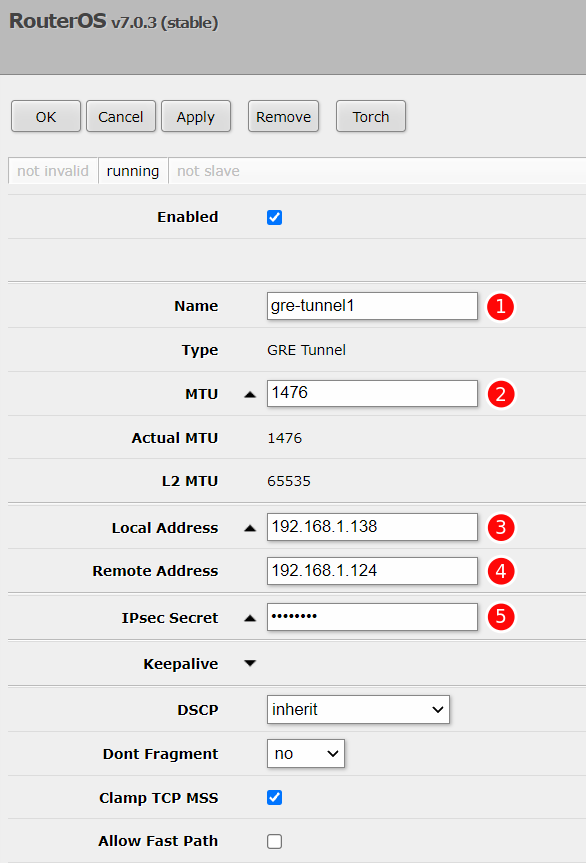
- First we'll create GRE tunnel with PSK which will automatically generate IPsec instance as well. To create GRE interface access WebFig of your MikroTik device and navigate to Interfaces → GRE Tunnel and click on Add New button.
- Configure the instance accordingly:
- Name - gre-tunnel1
- MTU - 1476
- Local Address - Public IP of MikroTik device
- Remote address - Public IP of RUTOS device
- IPsec secret - ipsec123
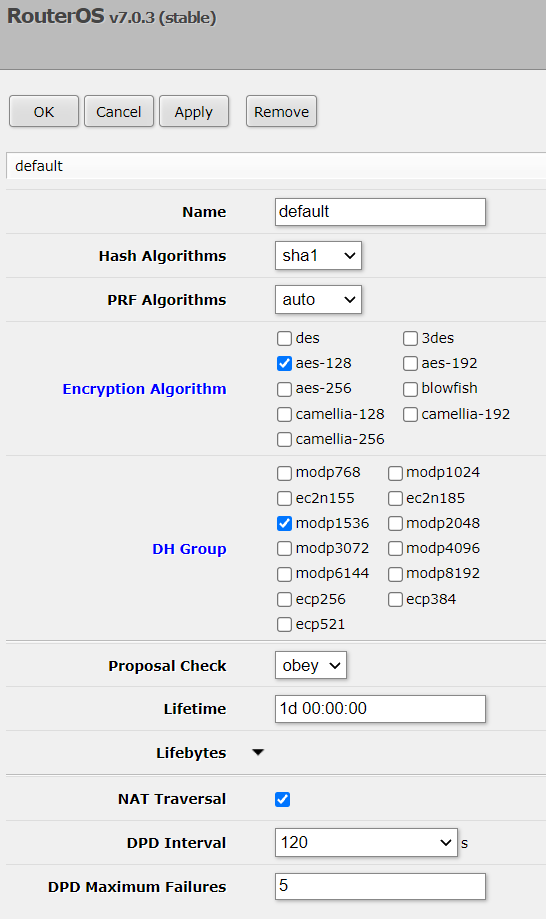
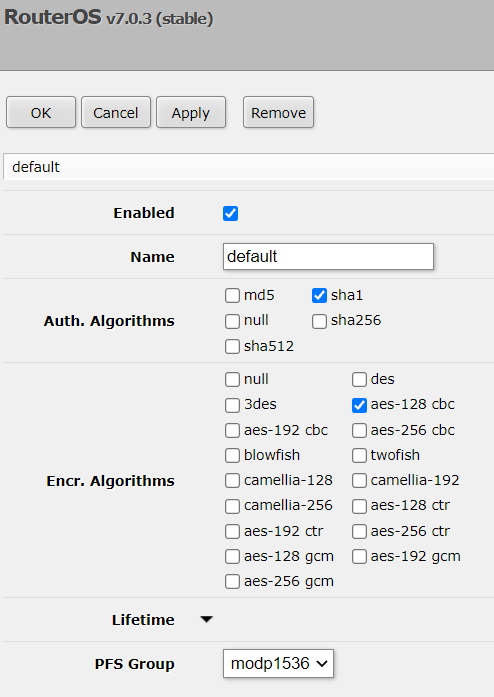
- Navigate to WebFig → IP → IPsec and configure Proposals and Profiles to match proposal settings configured on RUTOS device.
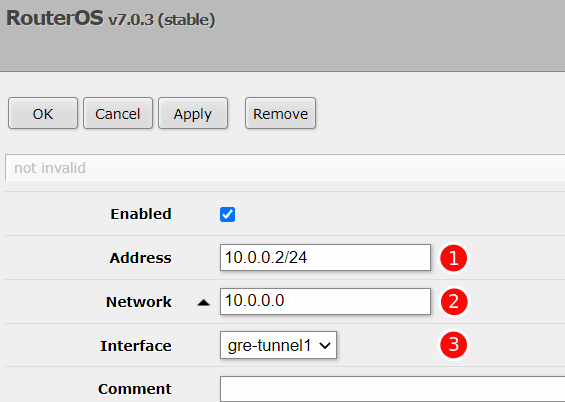
- Navigate to WebFig → IP → Addresses and add an IP address to GRE interface by clicking Add New:
- Address - 10.0.0.2/24
- Network - 10.0.0.0
- Interface - gre-tunnel1
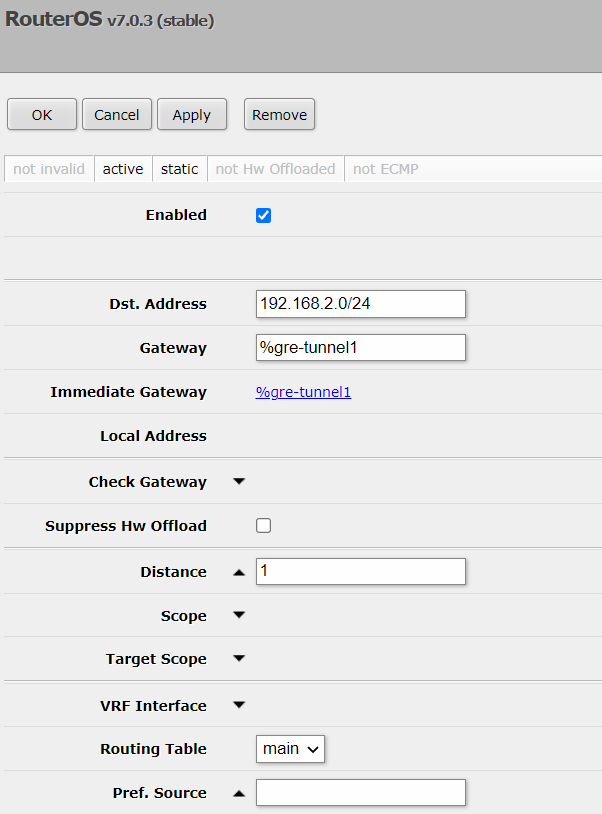
- Finally, navigate to WebFig → IP → Routes and add a static route via GRE interface by clicking Add New:
Testing configuration
Connect to RUTOS CLI and use command ipsec status, you should see IPsec tunnel via GRE interface being established.
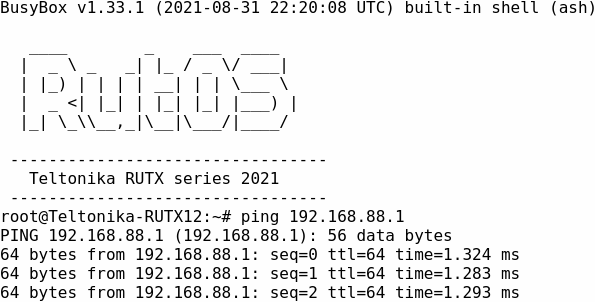
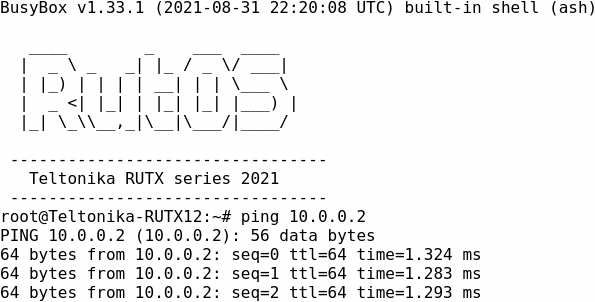
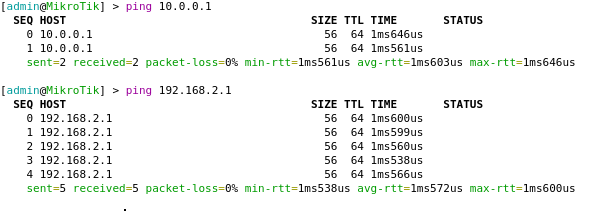
You should be able to reach the remote device's GRE tunnel IP and LAN IP and vice-versa. RUTOS CLI:
MikroTik terminal:
